Installing MassOS
This page will guide you through the installation process of MassOS using the Live CD ISO file.
Before installing, you may wish to read About MassOS to find out more about the operating system, what its goals are, and its differences compared to other distributions of GNU/Linux.
NOTE: This guide is dedicated to installing MassOS using the Live CD ISO file. To upgrade a MassOS installation, see Upgrading MassOS. To repair a MassOS installation, see Repairing MassOS. To install MassOS manually, see Manual Installation. To build MassOS from source, see Building MassOS.
- A 64-bit Intel/AMD CPU (most computers from the last ~15 years have a 64-bit CPU).
- At least 8GB of free disk space (16GB+ recommended).
- At least 1GB of RAM (2GB+ recommended).
- An empty flash drive of at least 4GB for the live environment and installer.
- Minimum 1024x768 screen resolution (some programs won't display properly below this and the UI will generally be hard to use and navigate). If you are using VirtualBox or VMware, we strongly recommend enabling EFI from the VM settings, to ensure the default resolution will be large enough (and generally improve compatibility).
Note that this guide is dedicated to installing newer builds which use the osinstallgui graphical installer, as opposed to the older TUI-based installer. These builds are considered "experimental" and are not yet published as stable releases. However, a link to a server containing them can be found in the changelog.md file in the MassOS repository. In any case, you want to download the file ending with the name .iso, which is the Live ISO image. Do not download the .tar.xz file, as that is the raw rootfs tarball designed for manually installing. The files ending in .b2 are Blake-2 checksum files which can be used to verify your download.
Note that, currently, we only provide experimental builds with the Xfce desktop environment. GNOME is no longer supported, and no further development on it is planned for the forseeable future. This article will no longer contain information about the differences between the two desktop environments unless development for GNOME on MassOS is resumed at any point in the future.
Note also that we now include device firmware by default in MassOS ISO images, and no longer support ISO images without firmware. For more information on the rationale behind this decision, see MassOS and Free Software.
This tutorial will show you how to use the Etcher utility to create a bootable USB flash drive using the ISO you have just downloaded. This is free software and cross-platform, so the process is very similar on Windows, macOS, and GNU/Linux.
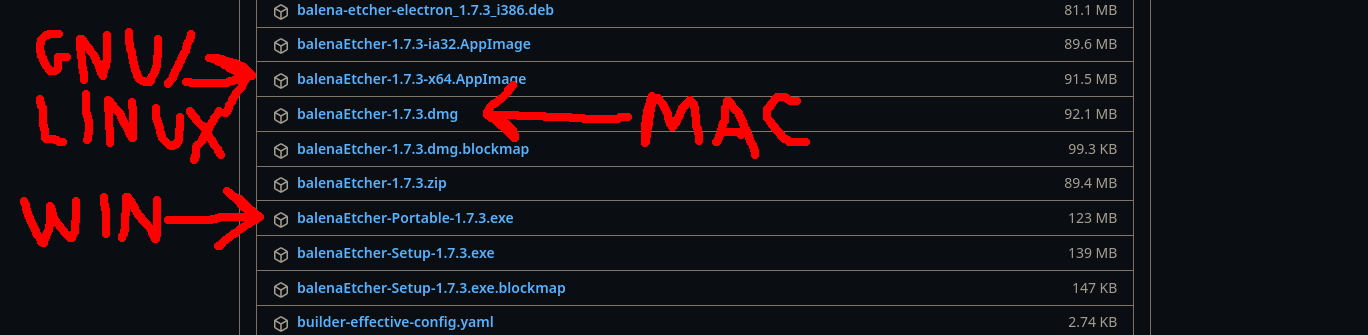
- Visit the Etcher Releases Page, and download the appropriate version for your operating system.
- Run the downloaded executable. On GNU/Linux, you will first need right click the file in the file manager, go to properties, and select "Allow this file to run as a program". Note that, some distros may not support running AppImages out of the box. If you encouter issues, ensure your system includes FUSE2. Ask the developers/maintainers of your distro for help if you are unsure on this.

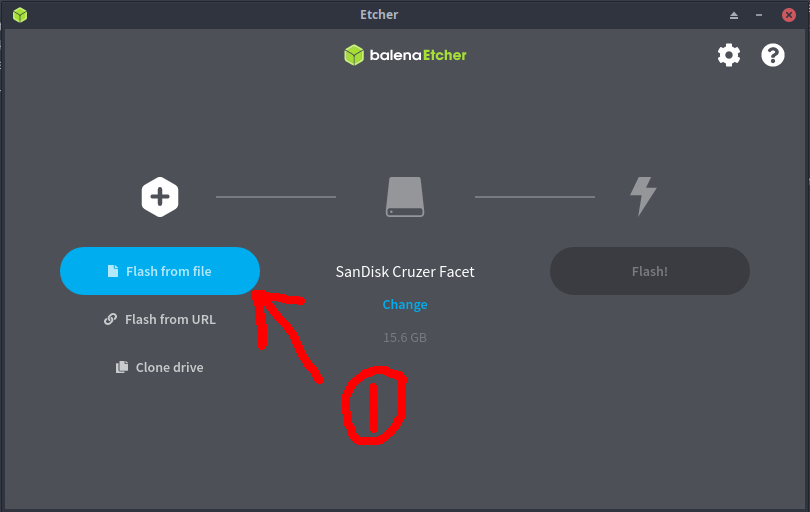
- Choose "Flash from file" and browse to your downloaded ISO file.
- Ensure your USB flash drive is selected, then click "Flash!" to begin the write process.

- Wait patiently for the write to finish. Once it has finished, close Etcher. Your USB flash drive will then be bootable, and you can proceed to "Booting the live environment".
You'll need to restart your computer to be able to boot from your USB flash drive. To boot from the flash drive, you normally have to press a special key during startup (when you see the BIOS logo). This could be any of the following: Escape, F1, F2, F9, F10, F11, F12. If you are unsure, consult the manual for your system. If done successfully, MassOS will start up from your USB flash drive.
NOTE: If you are using UEFI and the boot fails, you may need to disable secure boot in your system's firmware settings. Secure boot is a mechanism which is supposedly designed to "ensure security" by allowing only Microsoft-authorised operating systems to boot, namely Windows, as well as a few commerically-supported GNU/Linux distros such as Ubuntu and Fedora, whose bootloaders/kernels have been signed by Microsoft.
After the live system has booted, you'll be shown a welcome screen like this:
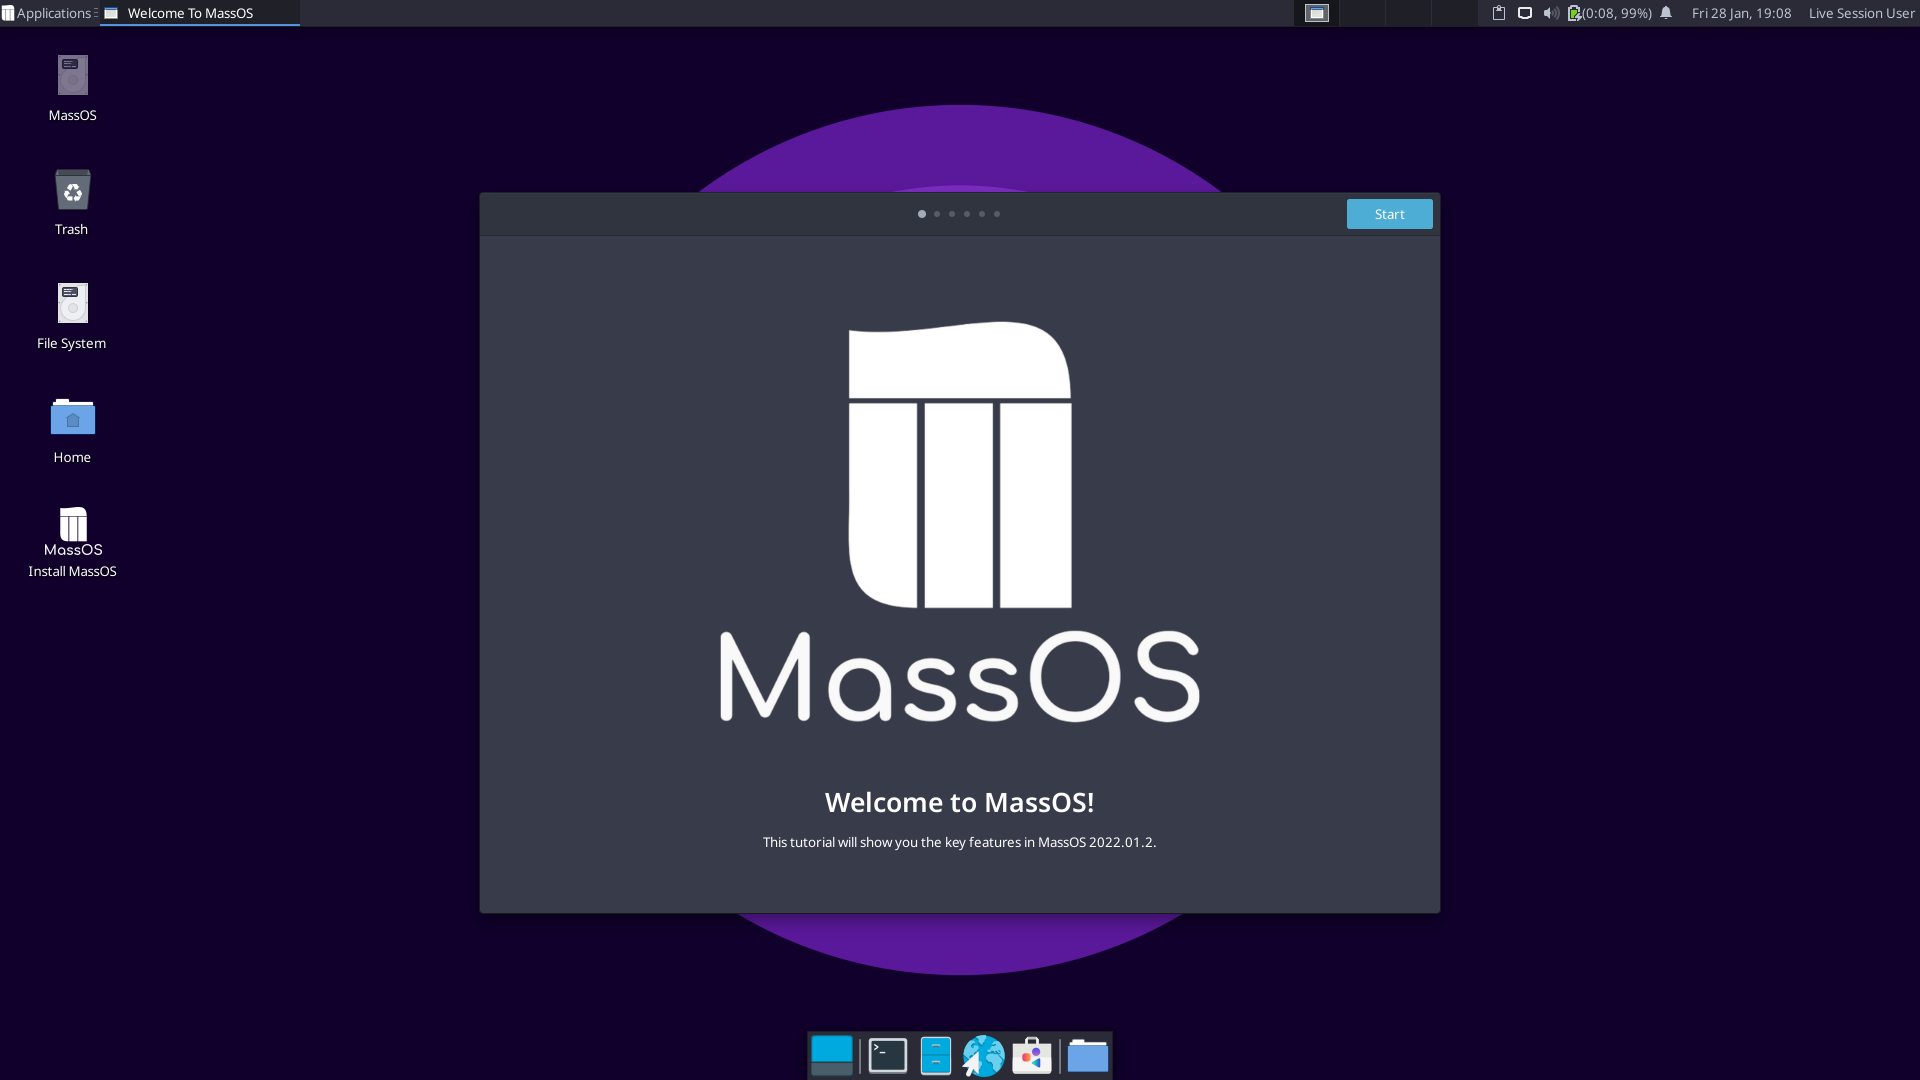
This shows some of the key features in MassOS and how to navigate the OS.
You may freely use the live system to try out MassOS and see if it is right for you before you decide to install it. You do not need to proceed with the installation, as described below, until you are ready and willing to.
- Launch the installation program found on the desktop to begin the installation of MassOS. If you get any sort of "Untrusted Executable" warning, simply select "Mark Executable" or "Launch Anyway" and continue.
![]()

- Choose "Install" to start the installation.

- Proceed through the setup pages, where you will be prompted to select your desired locale, keymap, timezone, username, password and system hostname. You can use this as an opportunity to customise the system to your needs.


- Choose which disk you want to use for the installation. It must differ from the USB flash drive you used to create the bootable live environment.

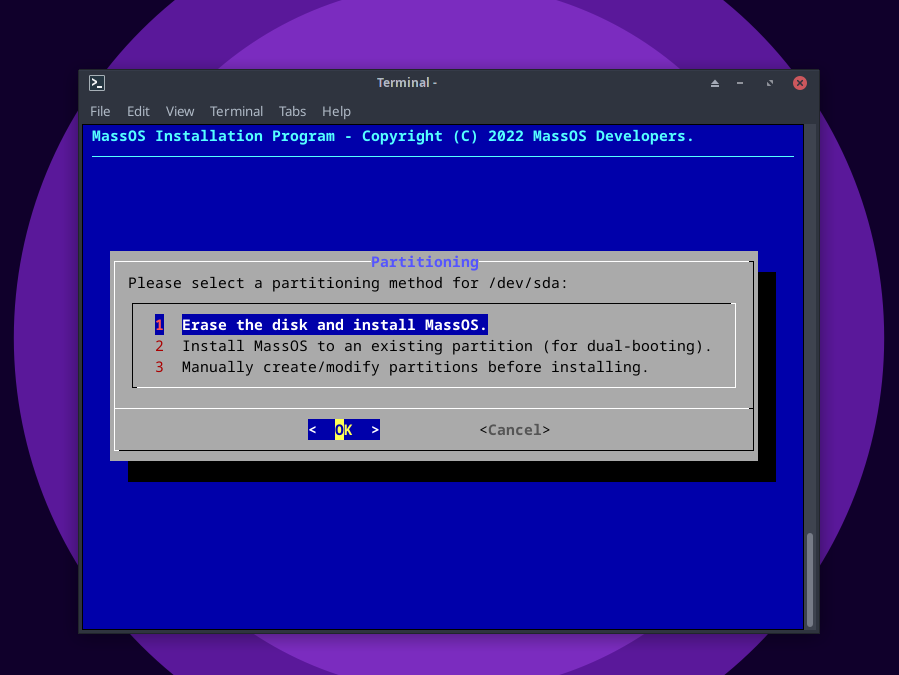
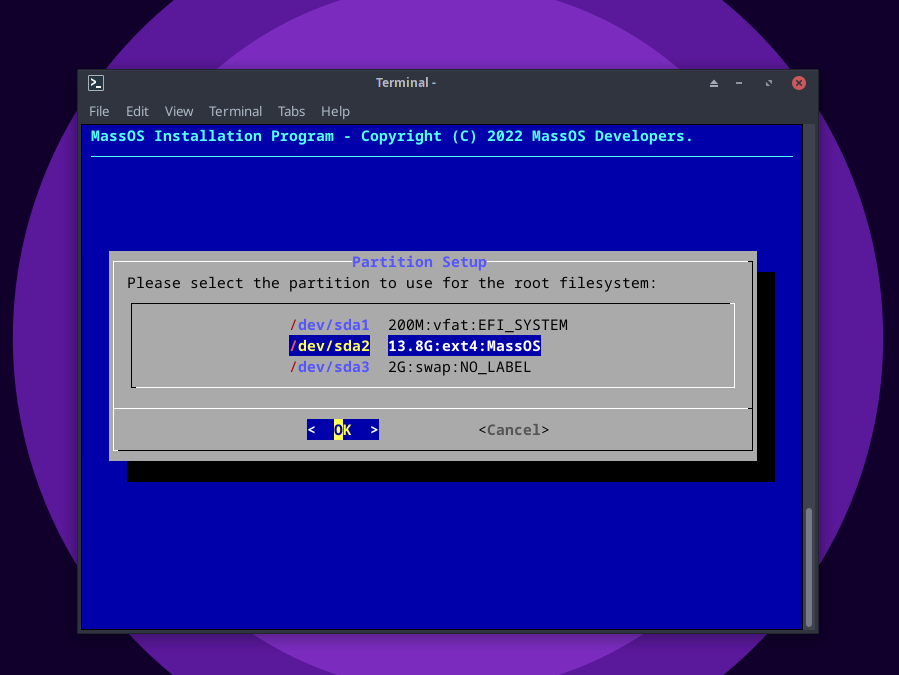
- Choose how you want to set up the disk. Option 1 will erase the whole disk and install MassOS. Option 2 will let you choose a partition to install MassOS on (for dual-booting). Option 3 will let you manually create and modify partitions. If you choose option 2, you will be shown a list of the partitions already on the disk, and prompted to select the one you wish to use for the installation of MassOS.
- You may be asked whether or not you wish to use the btrfs filesystem instead of ext4. Unless you know of a reason why you don't want that, you should answer "Yes" here.
- You will be asked whether or not you want a swap space to be added. Swap functions as an emergency RAM backup on the disk in case the system runs out of memory. It is NOT a RAM substitute. If you have 8GB or less system RAM, or you intend to run memory-heavy applications, then swap is likely advisable. Otherwise, you may not need it.

- You will be given a final confirmation warning before the installation starts. Answer "Yes" to continue.

- The installation process should only take a few minutes to complete. Be patient and do NOT close the dialog box during this process!

- After the installation completes, the system will be automatically configured as necessary. This may take a while. An initramfs also has to be generated during this stage, which is required to boot the system. So be patient while this takes place, and again, do NOT close the dialog box! Also be aware that it is normal for the progress bar to remain at 0% and not make any visual progress. This is normal behaviour, due to the fact that it is not possible to capture a progress report of this stage. So again, just be patient.

- If your system is booted in UEFI mode, you will be asked whether you are installing MassOS to an internal or a removable disk. Unless you are making a portable installation on a removable drive, you should select the "Internal" option, which is the default. For more information about this, as well as the rationale behind why this option is included in the installer, please read this section in the osinstallgui FAQ.

- After completing the installation, this message will be shown, and you will be given the option to either shut down the system now, to allow you to boot into your new installation immediately, or continue testing the live environment before rebooting into your new installation.
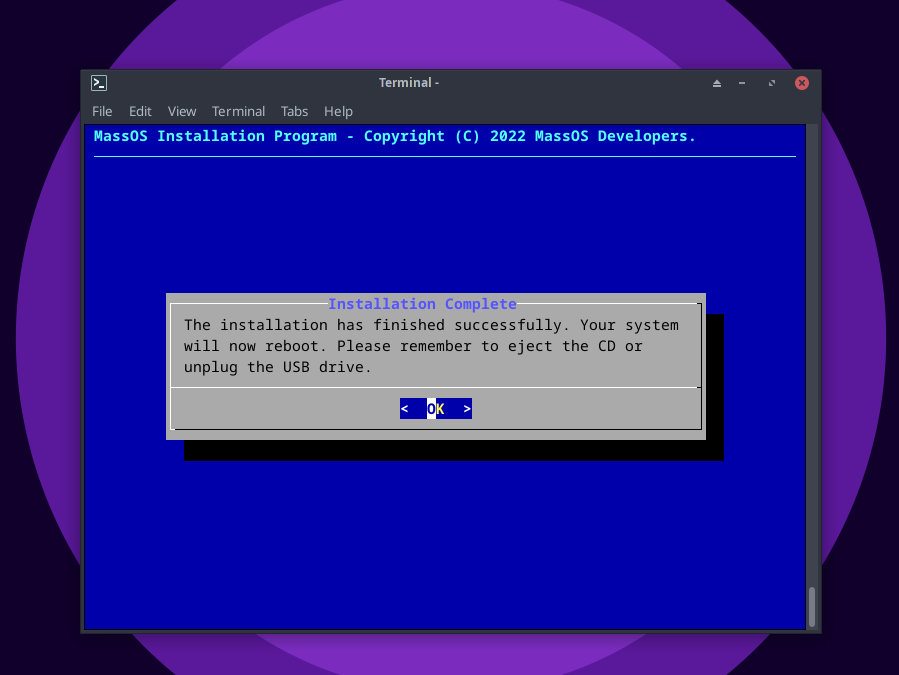
Remember that you must unplug the USB flash drive before attempting to boot the system again, so as to ensure you boot into your new installation, instead of accidentally restarting the live environment.
For general information on how to make the most out of your new installation, have a look at Post Installation. It contains information on how to do things like install software, customise your desktop, amongst other useful tips.