Microcontroller Workshop
#Intro# These notes are intended to be used by an instructor of a short Arduino-based introductory microcontroller course. Topics presented here support the goal of explaining what a microcontroller is, basic C/C++ programming in the Arduino development environment, basic electronic components and how they may interact with a microcontroller.
#Overview# In this two-hour workshop you will learn all you need to know to begin working with microcontrollers. We will begin by introducing simple circuits, and the the Arduino microcontroller itself and its programming language. We will compare and contrast the Arduino UNO to the Sparkfun Redboard. We will point you towards the Arduino website where you will find official Arduino documentation and example code. We will finish by blinking lights and taking readings from basic sensors.
Talk about DC circuit +/-, breadboards. Quick overview of circuit diagrams. Maybe copper tape?
Charge: An object is said to be negatively charged if it has an excess of electrons, and is otherwise positively charged or uncharged. -measured in units of Coulombs. 1 coulomb = 6.241×10^18 electrons.
Voltage: Electric potential difference, electric pressure, can be thought to be the desire of charge to move from an area of relative high potential (positive) to an area of low potential (negative). -measured in units of volts.
Current: When charges move, as they are compelled to do where a voltage exists. -measured in units of amperes or amps. 1 amp = 1 coulomb flowing past a given point in 1 second.
Resistance: The ability of a material to resist the flow of current. -measured in units of ohms.
Ohm's Law: voltage = current × resistance

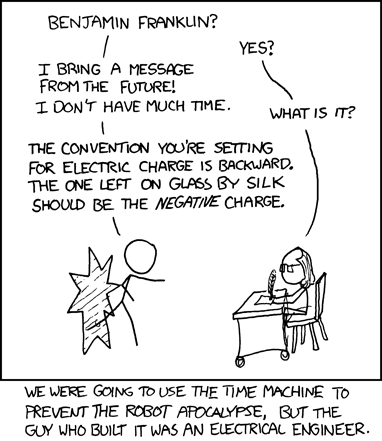
Images: left, http://www.johns-jokes.com/Ohms-Law-Explained; right, XKCD https://xkcd.com/567/ CC BY-NC
For our purposes, it does not matter, but if you read the previous definitions of charge and voltage closely, you might notice that they don't quite jive. See this article on conventional current flow for an explanation.
For current to flow in an electric circuit, the circuit itself must be made up of a continuous loop of a conductive material. If ever there is a discontinuity in a circuit, current will no longer flow. To make assembling electric circuits easy, we'll be using solderless breadboards. These allow us to connect components without having to solder or otherwise permanently connect them. A breadboard, is made up of a series of holes where all holes in a given row are electrically connected such that a wire in the first hole of a row is electrically connected to the second hole and likewise all other holes in a row. Similarly, each row of holes is also electrically insulated from all other rows. See the image below of the exposed clips on the back side of a breadboard.
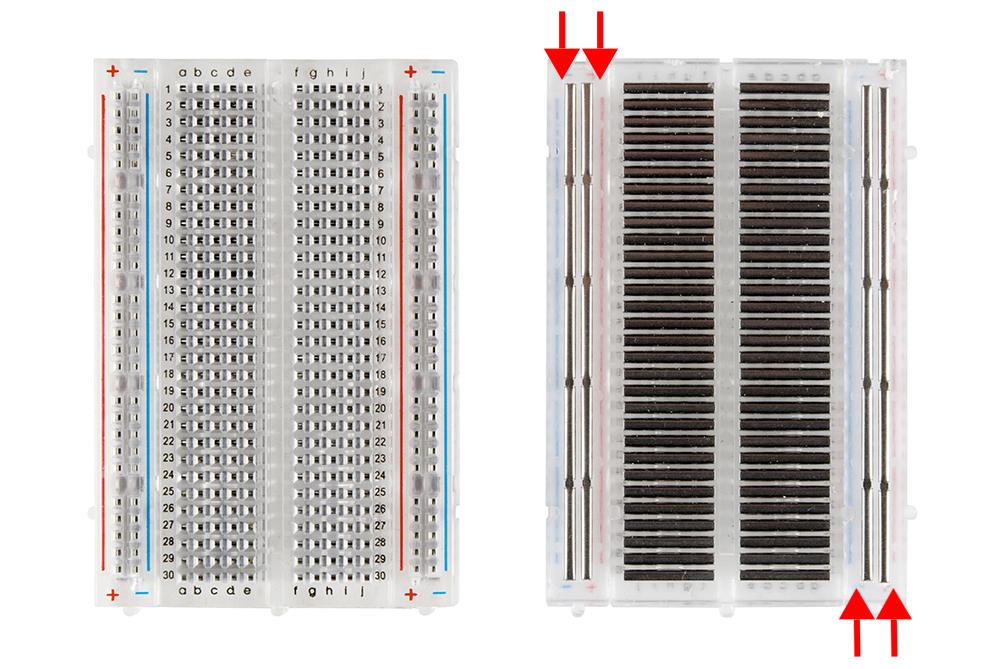
Image: Sparkfun CC BY-NC-SA
An electronic switch. Show demo board with and & or gates?
An Arduino (and your cell phone, calculator, computer) is just thousands of transistors wired up to give us various capabilities to turn gates on and off. By turning these thousands of gates on and off in know ways we are able to control input/output pins based on programming logic we define.
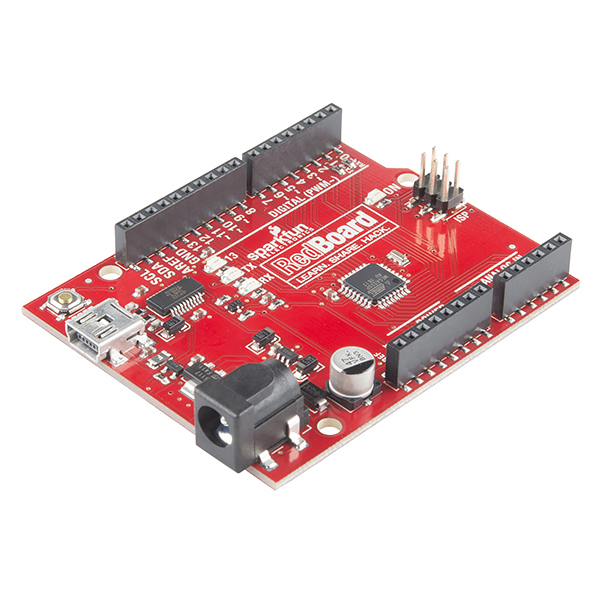
#What is a microcontroller# A microcontroller is a bare-bones, computer. Its processor, RAM, and non-volatile memory are all contained on a single chip. Microcontrollers are typically used for controlling and/or sensing things in the physical world. They can be found in many common devices. Microwave ovens, calculators, printers, digital watches, etc. The actual microcontroller in Arduino UNO (blue) and the Sparkfun Digital Sandbox (red), pictured below, is the Atmel ATmega328. We often (and will in this course) refer to the Arduino itself as a microcontroller. However, know that the "Arduino" is made up of the ATmega328 microcontroller, an FTDI USB chip, the printed circuit board (PCB), female pin headers, and software called a "bootloader". Everything on the blue circuit board pictured below except the long rectangular chip aims to make working with that chip, the ATmega328 microcontroller, easy. The whole package, the ATmega328 microcontroller and its support features are what we call an Arduino. With that distinction made we will begin to use the terms "microcontroller" and "Arduino" interchangeably.


Images: left, Wikipedia-oomlout CC BY-SA; right, Sparkfun CC BY-NC-SA;
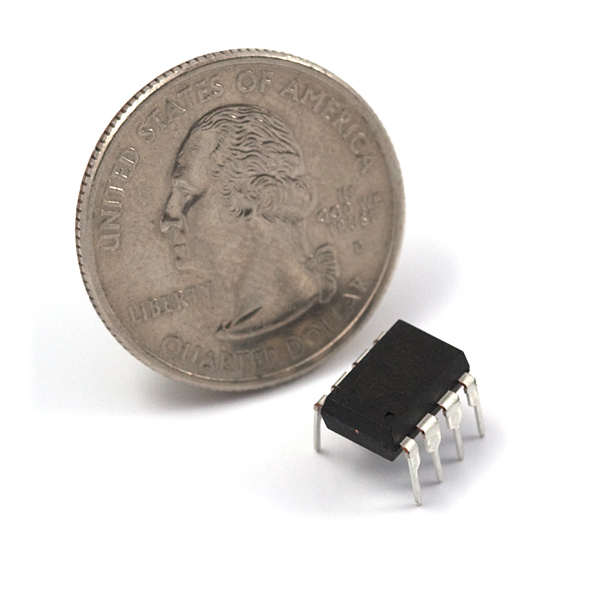
Atmel ATmega328 in two form factors. Left, dual inline package (DIP) -larger, easily replaced. Right, surface mount device (SMD) -smaller, difficult to replace.

Images: Sparkfun CC BY-NC-SA
#Programming Language# Microcontrollers, in general, can be programmed in a variety of languages. Arduinos are programmed in C/C++. One of the nice things about Arduino is how easy its library makes writing code. No, not that kind of library! In this context, a library contains nitty-gritty code that makes implementing common functionality simple. For example, displaying text on your computer screen is not a trivial task, without a library to help you do so. Verbiage on the Arduino.cc website varies regarding what programming language is used to program Arduinos. Sometimes, they call the language "Arduino" and other times they call it "C/C++" Let us clear this up. Arduinos are programmed in C/C++. They do; however, by default use the Arduino library. -nevertheless you are most definitely writing C/C++ code when you program an Arduino. A detailed write-up on this confusion can be found on the Hackaday blog.
#Interactive Development Environment (IDE)# The Arduino IDE is software that makes programming the Arduino easy. It features syntax highlighting, a serial monitor, and a window where compile errors are displayed. It is pretty basic as far as IDEs go, but is appropriate for most programming done with Arduino. It also makes importing example programs, commonly referred to as sketches, easy. The list of example programs is extensive. When beginning your own program it is often useful to start by browsing the example sketches to see if an appropriate example exists to use as a starting place.
#Other Microcontrollers# Don't be led to believe that Arduinos are the be-all and end-all of microcontrollers. There are countless others each better suited for a specific purpose than others. Some are faster, have more pins for receiving input and delivering outputs, support various features such a pulse width modulation, analog-to-digital conversion, are suited for low power consumption, among numerous other things. This is evident even within the family of microcontrollers that the Atmel328 belongs.
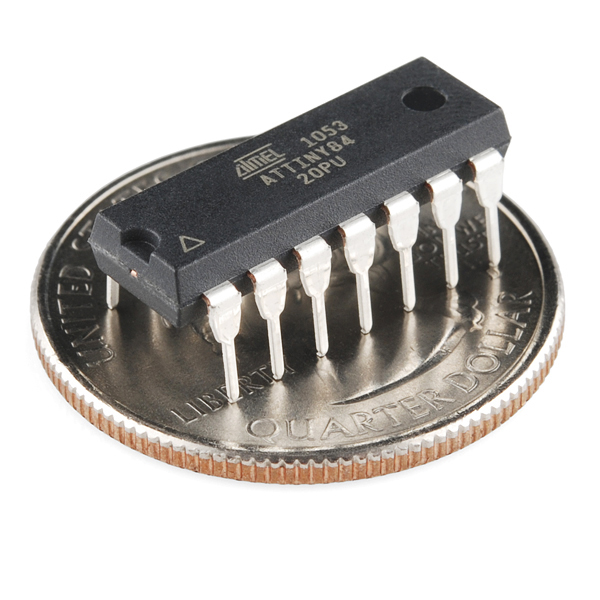
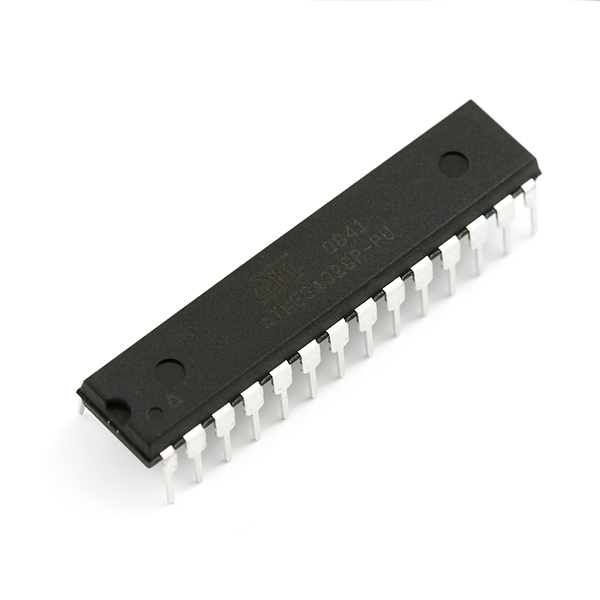

Images: Sparkfun CC BY-NC-SA
The Arduino platform supports all four of the chips above. A primary consideration when choosing a microcontroller to use is the cost of each chip compared to how it will be used. From left to right, the ATtiny85 costs on the order of $3 and can be dropped into a breadboard for easy prototyping. Likewise, ATtiny84 also costs on the order of $3 and has a few more pins. The Atmel328 has more pins still and costs on the order of $5. The most powerful of the group, the ATMega2561 only comes in a surface mount package and costs on the order of $11. On their own, each of these chips would need to be programmed using a chip programmer, something that is handled for you by an Arduino UNO or the Sparkfun RedBoard. Comparing price to the device's intended use is important if you are considering mass producing your widget, but of little concern for one-off projects. Therein lies another facet of Arduino's beauty. It is a very cheap, extremely easy-to-use, powerful-enough microcontroller for many hobbyist purposes. So cheap and versatile, in fact, that sacrificing an Arduino UNO board ($25) to embed in a project is commonplace among hobbyist and artists, even though it is not the most cost-effective means of implementation. In cases like these the difference in price between an UNO ($25) and an Atmel328 (~$5) is what we are most often willing to pay for the convenience of the Arduino platform.
#I/O#
- digitalRead() - is a button pressed or not?
- Serial.println()
- digitalWrite() - turn LED on, off with some perceptible delay
- analogWrite() - PWM to dim/brighten LED
- Analog input - Show photoresistor's voltage on Serial Console
#Potential Uses#
- examples of microcontrollers in use
- 3D printers in The EDGE are driven by Arduinos
- UAV/Drones
- Clocks
- Smart toasters
- Anything!!! List project ideas here: Make Hackaday Adafruit Sparkfun Twitter search: Arduino