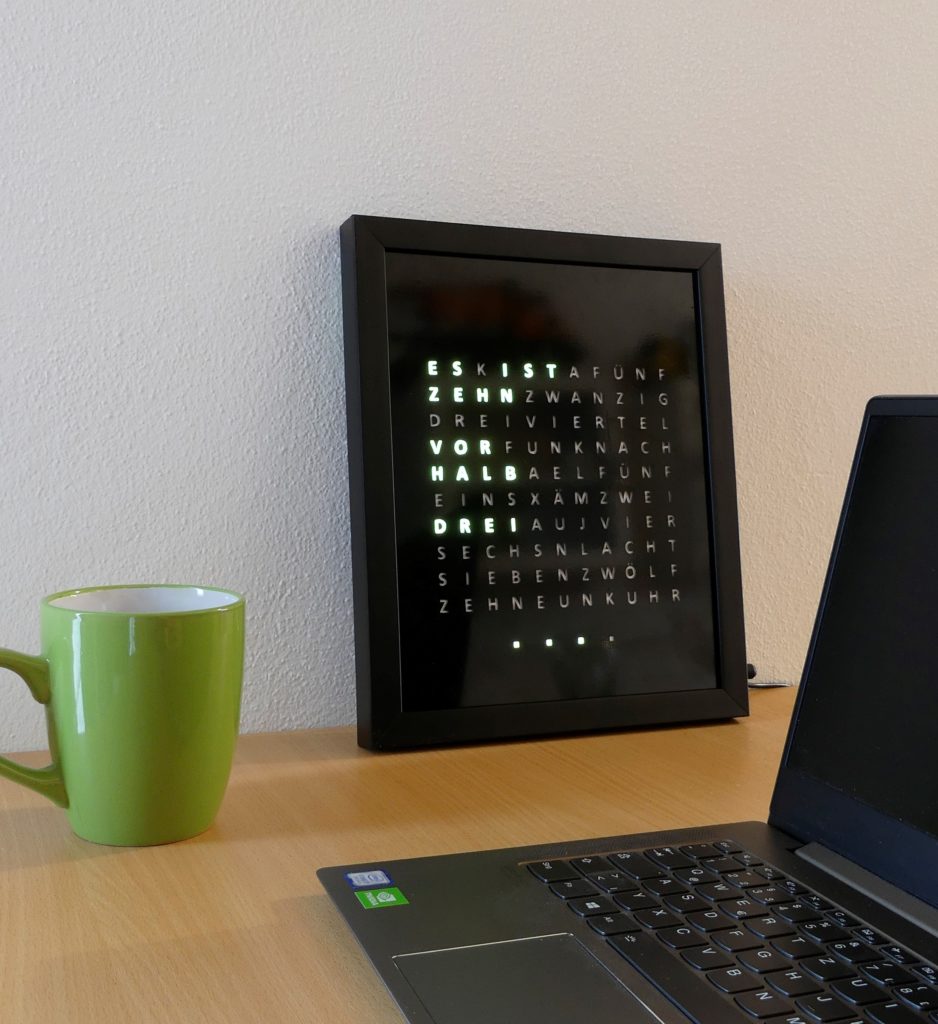
Arduino source code for my DIY Wordclock.
This project includes the following features:
- Arduino Nano as a microcontroller
- 114 NeoPixel LEDs WS2812b as Zic-Zac matrix starting from top left
- RTC module DS3231
- DCF77 receiver for German clock signal
- 7 different color modes (switched when turned off/on within 10 seconds after startup)
- light sensor to adjust the brightness of LEDs to the environment
- DCF77 signal quality measurement on every startup and display on LED matrix (see description below)
The full tutorial on how to build this Wordclock is published on
https://techniccontroller.com/word-clock-with-arduino-and-neopixel/
-
Download the code (ZIP) and unzip it, copy the complete unzipped folder into your sketchbock path (found in ArduinoIDE under File->Settings).
-
Start Arduino IDE and open the file
wordclock_german.inovia File -> Open .... -
Now the libraries must be installed. To avoid complications, I recommend simply copying all folders from the
librariesproject folder into thelibrariesfolder of the sketchbook path. You can also install the libraries manually via the library manager of the IDE, but the time library of PaulStoffregen is missing, you still have to copy it yourself.Your folder structure should look like this:
./MySketchbookLocation │ └───libraries │ └───Adafruit_BusIO │ └───Adafruit_GFX_Library │ └───Adafruit_NeoMatrix │ └───Adafruit_NeoPixel │ └───DCF77 | └───RTClib | └───Time │ └───think_wordclock └───libraries │ └───Adafruit_BusIO │ └───Adafruit_GFX_Library │ └───Adafruit_NeoMatrix │ └───Adafruit_NeoPixel │ └───DCF77 | └───RTClib | └───Time │ └───wordclock_german │ └───wordclock_german.ino │ └───pictures | └───(...) └───README.md -
Connect your Arduino Nano to your computer.
-
In Arduino IDE select the correct board (Arduino Nano) and serial port.
-
Compile and upload code via Sketch -> Upload.
To use this source code, you need to install the following libraries in Arduino IDE. I have also included the versions of the libraries I use in this repository. In case of any problems, please use the versions I've provided.
- https://github.com/adafruit/RTClib
- https://github.com/PaulStoffregen/Time
https://github.com/thijse/Arduino-DCF77-> please use the library in the folder libraries- https://github.com/adafruit/Adafruit-GFX-Library
- https://github.com/adafruit/Adafruit_NeoPixel
- https://github.com/adafruit/Adafruit_NeoMatrix
- https://github.com/adafruit/Adafruit_BusIO
I added a signal measurement feature for the DCF77 receiver. The signal quality is now also displayed at each startup with the LEDs:
- (during measurement) top left LED flashes blue,
- (after measurement) red/green the signal quality is shown as a bar for 2 seconds (10 leds = good, 1 led = bad)
