This is a sample application demonstration redis caching capabilities in Spring Boot. This app is also deployable to AWS ElasticBeanstalk and integrates with AWS ElastiCache.
- LinkedIn - Manthan Patidar
- Slack - Manthan Patidar
- Reachable only by Scaler students
- A simple post management system allowing Read operations on and
Postsusing SQLite DB as persistence store. - During the startup sequence, the project seeds dummy data into the SQLite database to have something to play with. This is done via the
SeedDataclass withinstartuppackage.
Note: All data is wiped (from both SQLite DB as well as ES) on every reboot of the app.
- The app has 3 endpoints
GET /-> Hello world endpoint which redirects to/actuator/infoGET /posts/-> Get all postsGET /post/{postId}-> retrieve post by id- The initial call will take
4 secondsto respond - but subsequent calls will be much faster thanks to reading from redis cache. The TTL for entries in cache is set to30 seconds.
- The initial call will take
Note: As we are using SQLite database, the code intentionally includes a
4 seconddelay to simulate a proper (over network) DB call.
- Refer postman folder for collection & environment (you can import in postman)
The Spring Boot project contain multiple application.yaml files accounting for multiple environments/profiles
- application-local.yaml
- is used when running the project locally via IntelliJ and uses the dependencies running in docker containers (or you can also setup other locally running dependencies)
- application-aws.yaml
- is used when the app is deployed on AWS Elasticbeanstalk and uses AWS Elasticache
The above profiles can be switched at runtime by setting the environment variable,
SPRING_PROFILES_ACTIVE=aws
- Open the project in IntelliJ
- Make sure the redis server is running before you run the project
- redis server can be setup via docker or by any other means (docker setup can be achieved by running the provided
docker-compose.ymlfile in the docker folder)
- redis server can be setup via docker or by any other means (docker setup can be achieved by running the provided
- Setup AWS ElastiCache (steps mentioned below)
- Copy the AWS ElastiCache endpoint & port in
application-aws.yamlfile - Create a
.jarfile - Setup AWS ElasticBeanstalk and deploy the
.jarfile.
-
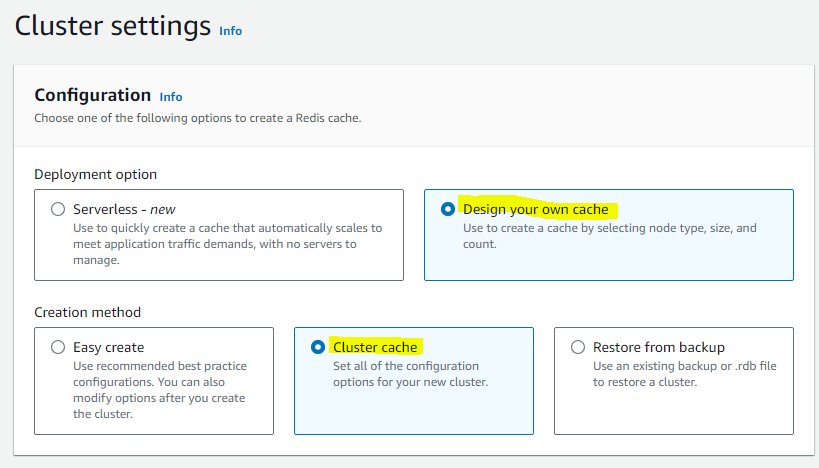
Go To AWS Elasticache > Redis OSS Cache > Create and then select the following configuration options

-
Disable
Cluster Mode- as this is just for demo we dont need multiple shards
-
Set cache name (and optional description)

-
Set Location and make sure to disable
MultiAZandAuto Failoverto save some bucks
-
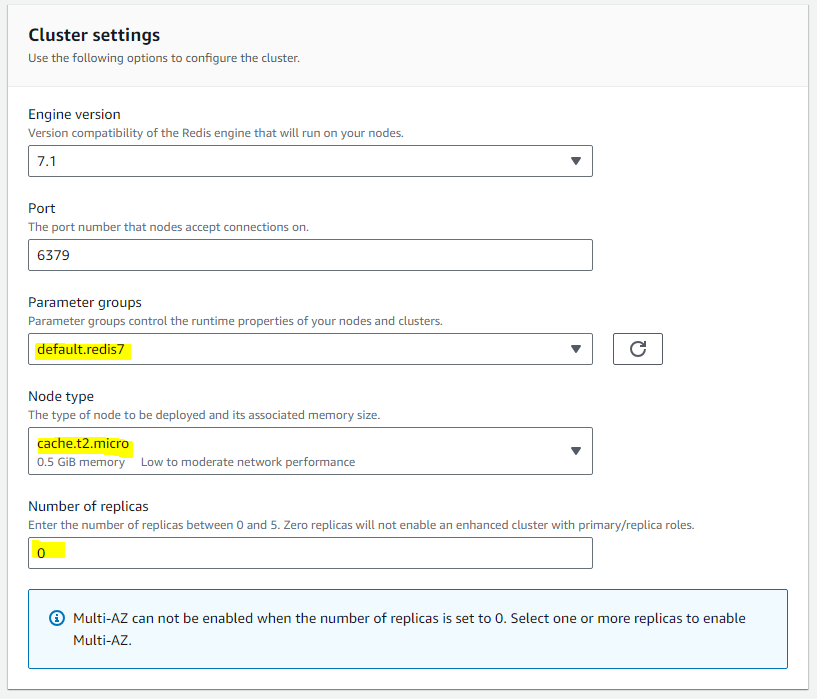
Cluster Settings
- Parameter groups ->
default.redis7 - Make sure to select smallest node type ->
cache.t2.micro - And set number of replicas to
0
- Parameter groups ->
-
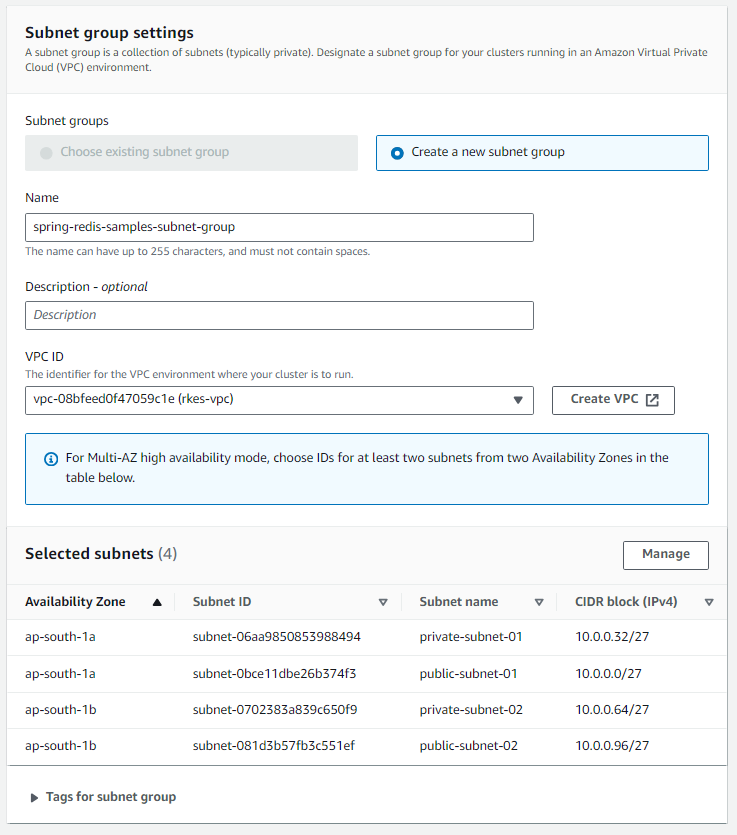
Subnet group settings
- Provide a name and select a VPC
- this will determine the placement of redis cache in the subnets and therefore its reachability from other subnets
- it is preferred to select only private subnets
- but as this is just for demo, I've selected all subnets available in the VPC

-
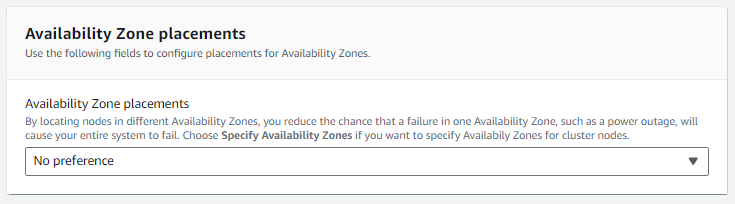
Availbility Zone Placements -- NO CHANGE

-
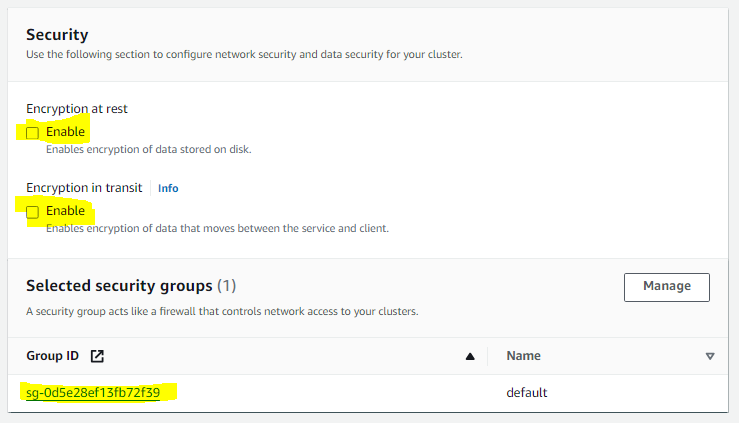
Security
- Disable
Encryption at rest - Disable
Encryption in transit - Select default security group of the VPC

- Disable
-
Backup
- Disable as this is just for demo/learning purposes

- Disable as this is just for demo/learning purposes
-
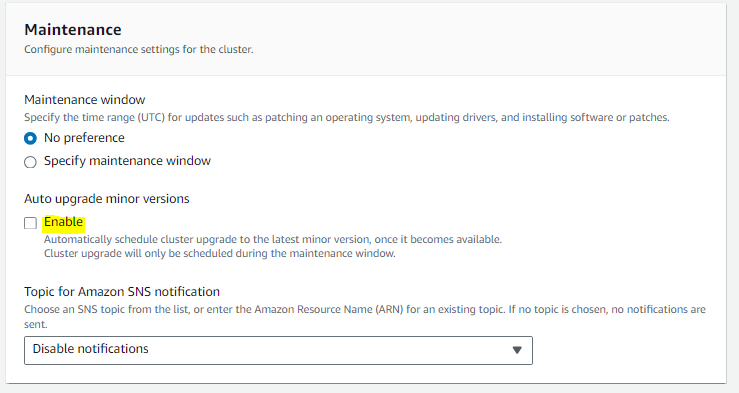
Maintenance
- Disable
Auto upgrade minor versions
- Disable
-
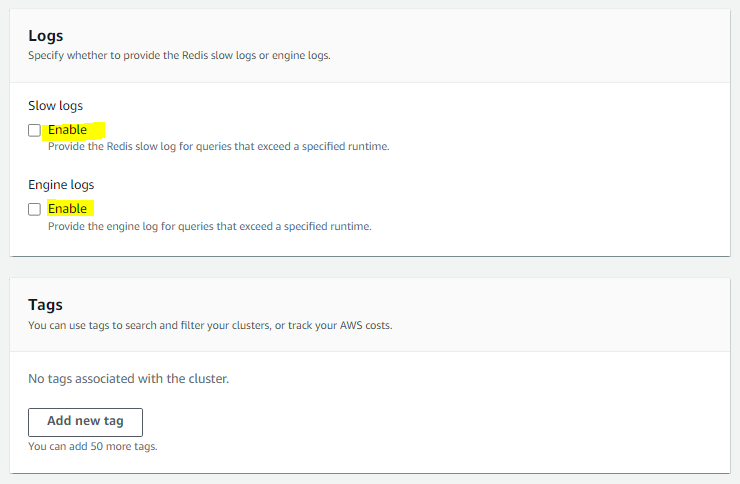
Logs
- Disable
Slow logs - Disable
Engine logs
- Disable
-
Hit
Create- it takes about
~10minutes to become available
- it takes about
-
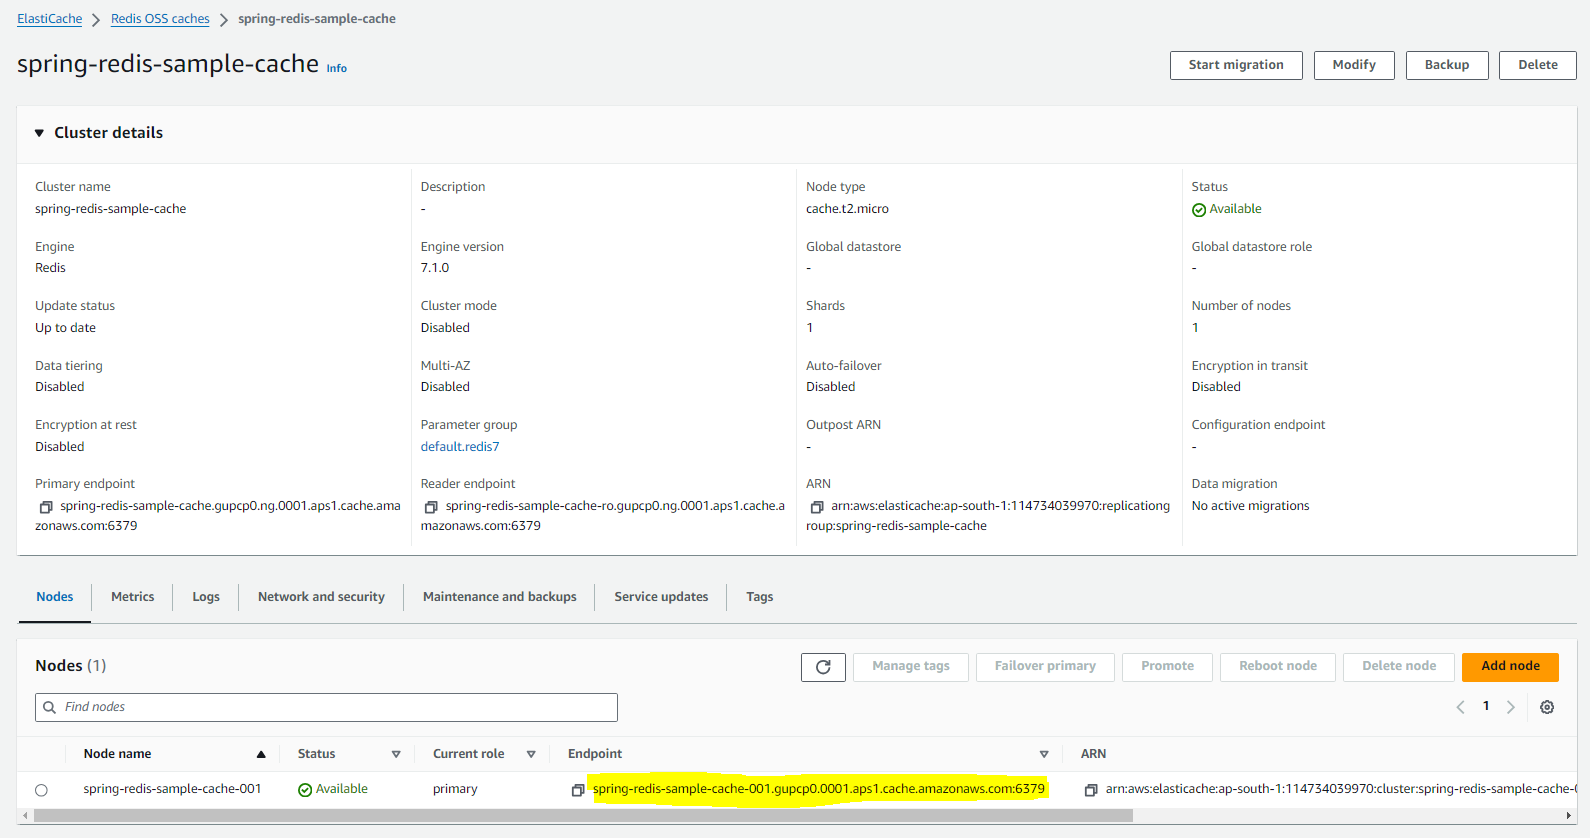
Once created the endpoint is available here