-
Notifications
You must be signed in to change notification settings - Fork 8
JShawn
As already described and used before, Shawn provides the use of
configuration files. Parsing such files follows very simple
rules. Either you can set a parameter with key=value, or you
can invoke a task by writing its name. When the former is used,
key is set to value, and can be looked up in the
simulation environment. But there is no possibility to use loops, if
clauses, or local variables within the configuration file. Therefore
JShawn has been developed. It requires at least Java 1.6, and allows
for writing simple scripts.
For introducing scripting functionality, JShawn uses the BeanShell (http://www.beanshell.org). It allows the execution of the full Java syntax, Java code fragments, as well as loosely typed Java and additional scripting conveniences. Also, it enables transparent access to all Java objects and APIs.
The most important issue is how to access Shawn from a JShawn configuration file. There are two commands available:
  shawn.setGlobalVariable( "variable", "value" );
  shawn.runCommand( "task-name", "settings of required"
                                 "and optional parameters"
                                 "of the named task" );
The former is used to set global variables, such as key=value
in the well-known configuration files. The latter invokes the given
task, and adds the possibility for setting local variables that can
only be seen by the task (and thus are not globally available).
Next, printing debug messages is done the same way as in Java with System.out.println:
  System.out.println( "my debug message" );
  System.out.println( "i = " + i );
Local (script-wide) variable declaration works as follows.
  double my_double = 0.123;
  int my_int = 123;
Finally, also loops and if-clauses can be used easily:
  for ( int i = 0; i < 10; i++ ) ...

  if ( foo )
    // do something

  else
    // do something else
In Section XXX, we used the following configuration file as a first simulation:
  prepare_world edge_model=simple comm_model=disk_graph range=1
  rect_world width=25 height=25 count=800 processors=helloworld
  simulation max_iterations=10
To convert the file into a JShawn configuration file, create a file
named simple-jshawn.bsh, and add the following lines:
shawn.runCommand( "prepare_world", "edge_model=simple " +
                                   "comm_model=disk_graph " +
                                   "range=1" );
shawn.runCommand( "rect_world", "width=25 height=25 " +
                                "count=800 " +
                                "processors=helloworld" );
shawn.runCommand( "simulation", "max_iterations=10" );
Then, the simulation can be started via the commandline when running from the main Shawn directory:
  java -jar utils/jshawn-allinone.jar
    -s buildfiles/shawn
    -b simple-jshawn.bsh
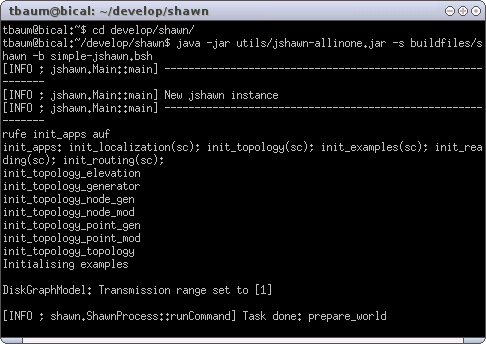
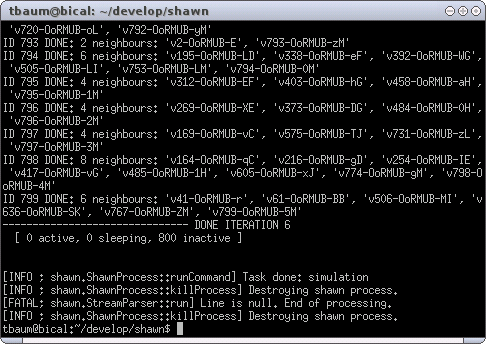
The result can be seen here.
{| align="center"
|  |
|  |}
'Running JShawn with the HelloWorld example.'
When starting JShawn as shown in the figure, a new instance is created that processes the given script. JShawn executes Shawn, reads the output, and passes input lines to the executable. At first, it begins with own debug output describing that a new instance is created. Then, it redirects output from Shawn. For example, the line beginning with init_apps is read from Shawn, and directly printed to standard out. The line beginning with [ NOW READING... on the other hand is completely suppressed. Much the same happens with the output printed when tasks start and finish. Output for starting tasks is suppressed, whereas a finished task is shown by an own debug message. However, after the simulation finished, there follows concluding debugging output.
Since JShawn is basically another frontend for Shawn instead of plain .conf files, it is sometimes helpful to convert JShawn scripts to .conf files. For instance, to keep a history of your simulations in order to reproduce results or to debug your program.
To actually convert your .jshawn script to a .conf file, put
shawn.traceHistory("file.conf");
at the beginning of your jshawn file and then invoke jshawn with the command line option "--dryrun", e.g.:
java -jar jshawn-allinone.jar --dryrun -b yourscript.jshawn
This will create "file.conf" with the sequence of commands that would have been issued to Shawn.
To keep a history of your simulations, don't use --dryrun but use a file name for your .conf file containing the current date.
  shawn.traceHistory("simulation-" +
     new java.text.SimpleDateFormat("yyyy-MM-dd--hh-mm--ss")
     .format(new java.util.Date())+".conf");
The previous example was very simple, and was a direct conversion from a Shawn configuration file. It used only the possibility of starting tasks in Shawn. Next, we will use a more complex configuration file that also uses variables, loops, if clauses, and debug output.
	shawn.setGlobalVariable( "name", "xml_top" );
	shawn.runCommand( "xml_polygon_topology", "file=smiley.xml" );

	boolean lattice = false;

	for ( int i = 1; i <= 10; i++ ) {

	   System.out.println( "i = " + i );

	   shawn.setGlobalVariable( "processors", "helloworld" );
	   shawn.runCommand( "prepare_world", "edge_model=simple " +
	                        "comm_model=disk_graph range=10");

	   if ( lattice ) {

	      shawn.runCommand( "populate", "topology=xml_top " +
	                           "point_gen=lattice " +
	                           "spacing=" + i + " count=200" );
	   }

	   else {

	      shawn.runCommand( "populate", "topology=xml_top " +
	                            "point_gen=uniform_2d count=200");
	   }

	   shawn.runCommand( "simulation", "max_iterations=50" );
	   shawn.runCommand( "polygon_topology_postscript",
	                         "file=topo" + i + ".ps topology=xml_top" );
	   shawn.runCommand( "save_world", "file=world.xml" );

}
The example uses the already previously described XML
topologies. Again, it uses the smiley.xml that produces a
topology like the one shown in Figure
XXX. It is also possible to place the
nodes on a lattice, but this is done later on. For now, we set the
internal script-wide variable to false. Then, a for loop
iterates ten times through separate simulation processes. At first,
the current simulation number is printed. Then, the type of used
processors is set to HelloWorld, and the world is prepared by
using a simple edge model, and a unit disk graph communication model
with a transmission range of 10. If the variable lattice is
set to true, 200 nodes are placed on a lattice. Otherwise,
200 nodes are randomly populated in the world. At last, the simulation
is started with a maximal iteration count of 50, the actual topology
is printed as postscript output, and the world is saved to a XML file.
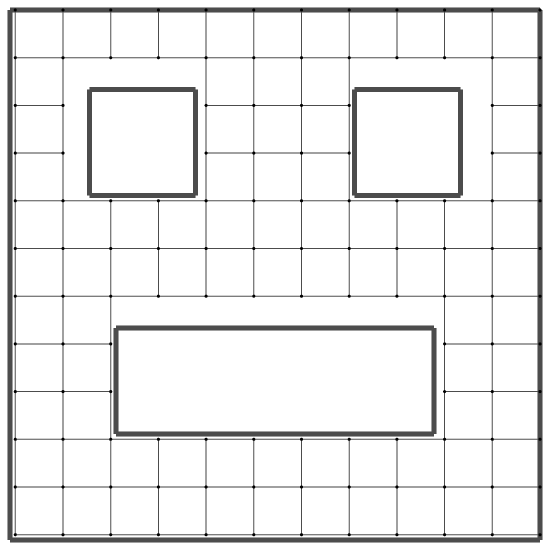
So far, the task polygon_topology_postscript has not been presented. It visualizes three parts of the topology. First, the topology borders from both inner and outer polygons are printed. Second, connections between nodes that are in communication range are represented by lines. Third, nodes are printed as circles.
The for loop runs 10 times, and thus there are 10 postscript files
named topo*X*.ps after running the script. The nodes
were populated randomly, so that there are 10 files with arbirtraily
topologies, named topo1.ps to topo10.ps. Two
examples are shown in Figure XXX.
{| align="center"
|  |
|  |}
|}
Next, we will change the script to populate the nodes on a lattice. Therefore we write
boolean lattice = true;
in line 4 of the script. The for loop runs from 1 to 10, and sets the spacing of the lattice dynamically to the current iteration. Figure XXX shows two examples, one with a spacing of 5, the other one with a spacing of 9.
{| align="center"
|  |
|  |}
|}