A simple camera app that allows you to take multiple pictures and save each picture in dateTimeStamp format to external SD Card (if available)
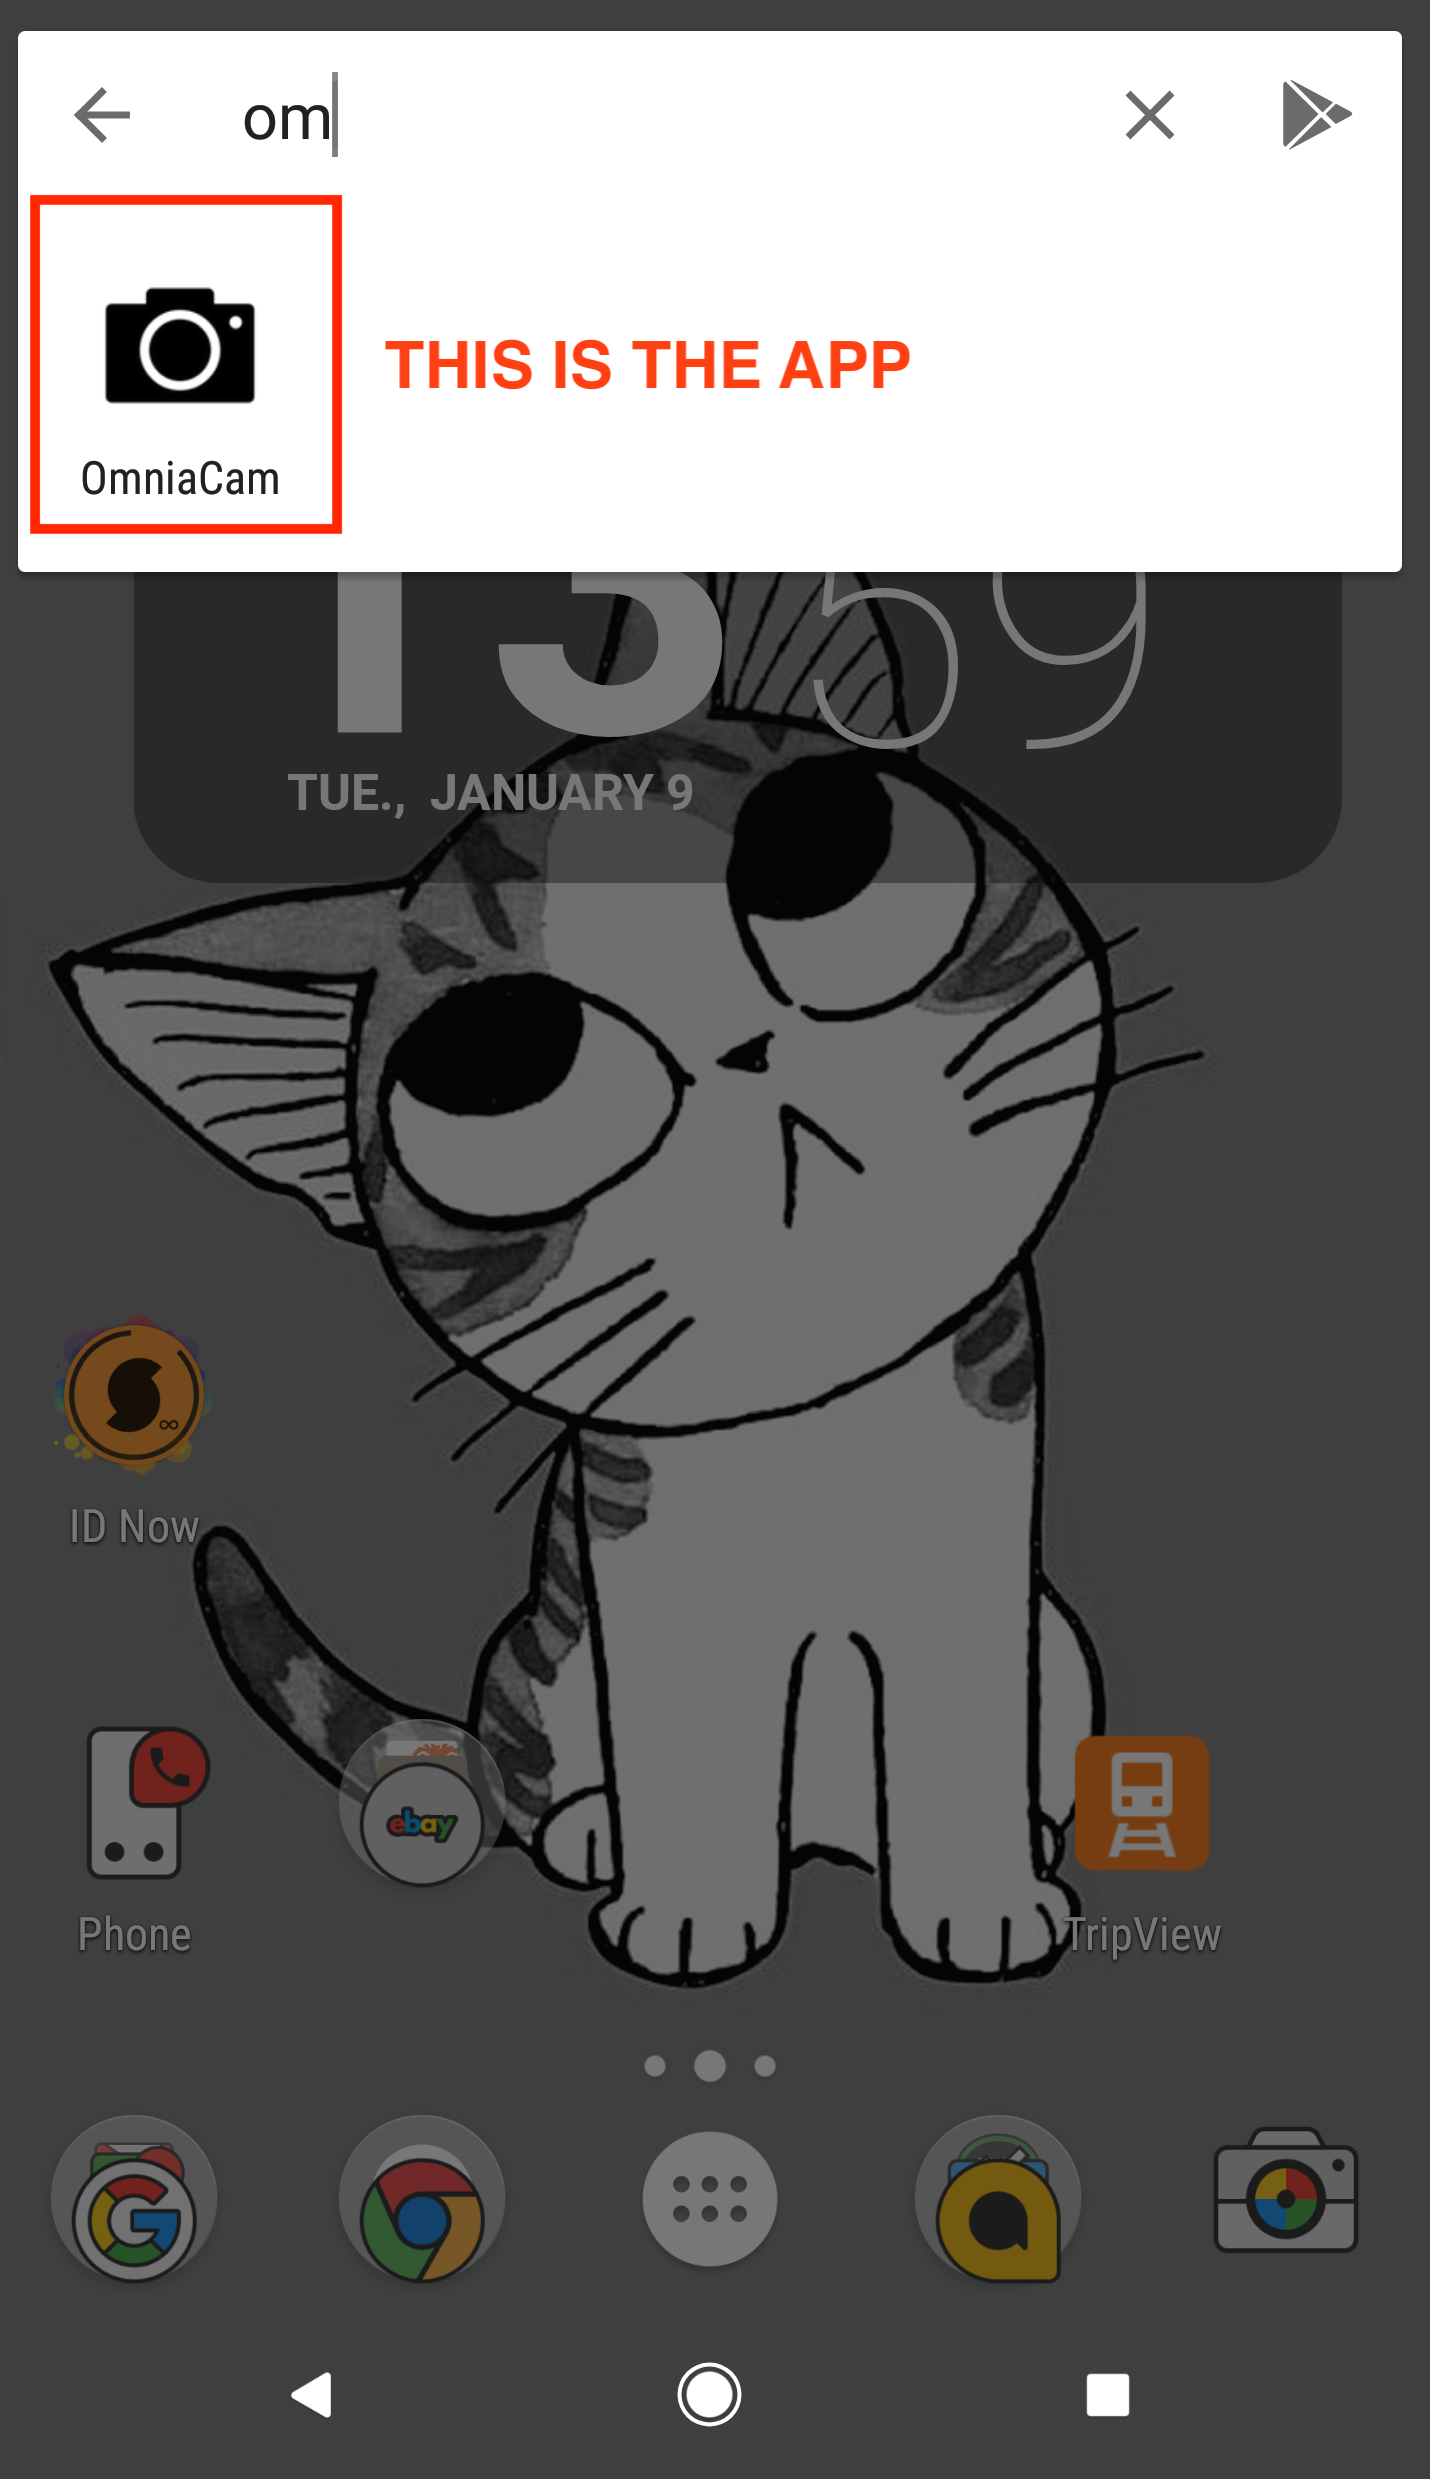
The camera app only works when a patient record is passed from www.omniacorp.com.au//cosme/site/inc/omniacam.php?[patient information]
For instance, below is a list of 4 patients:
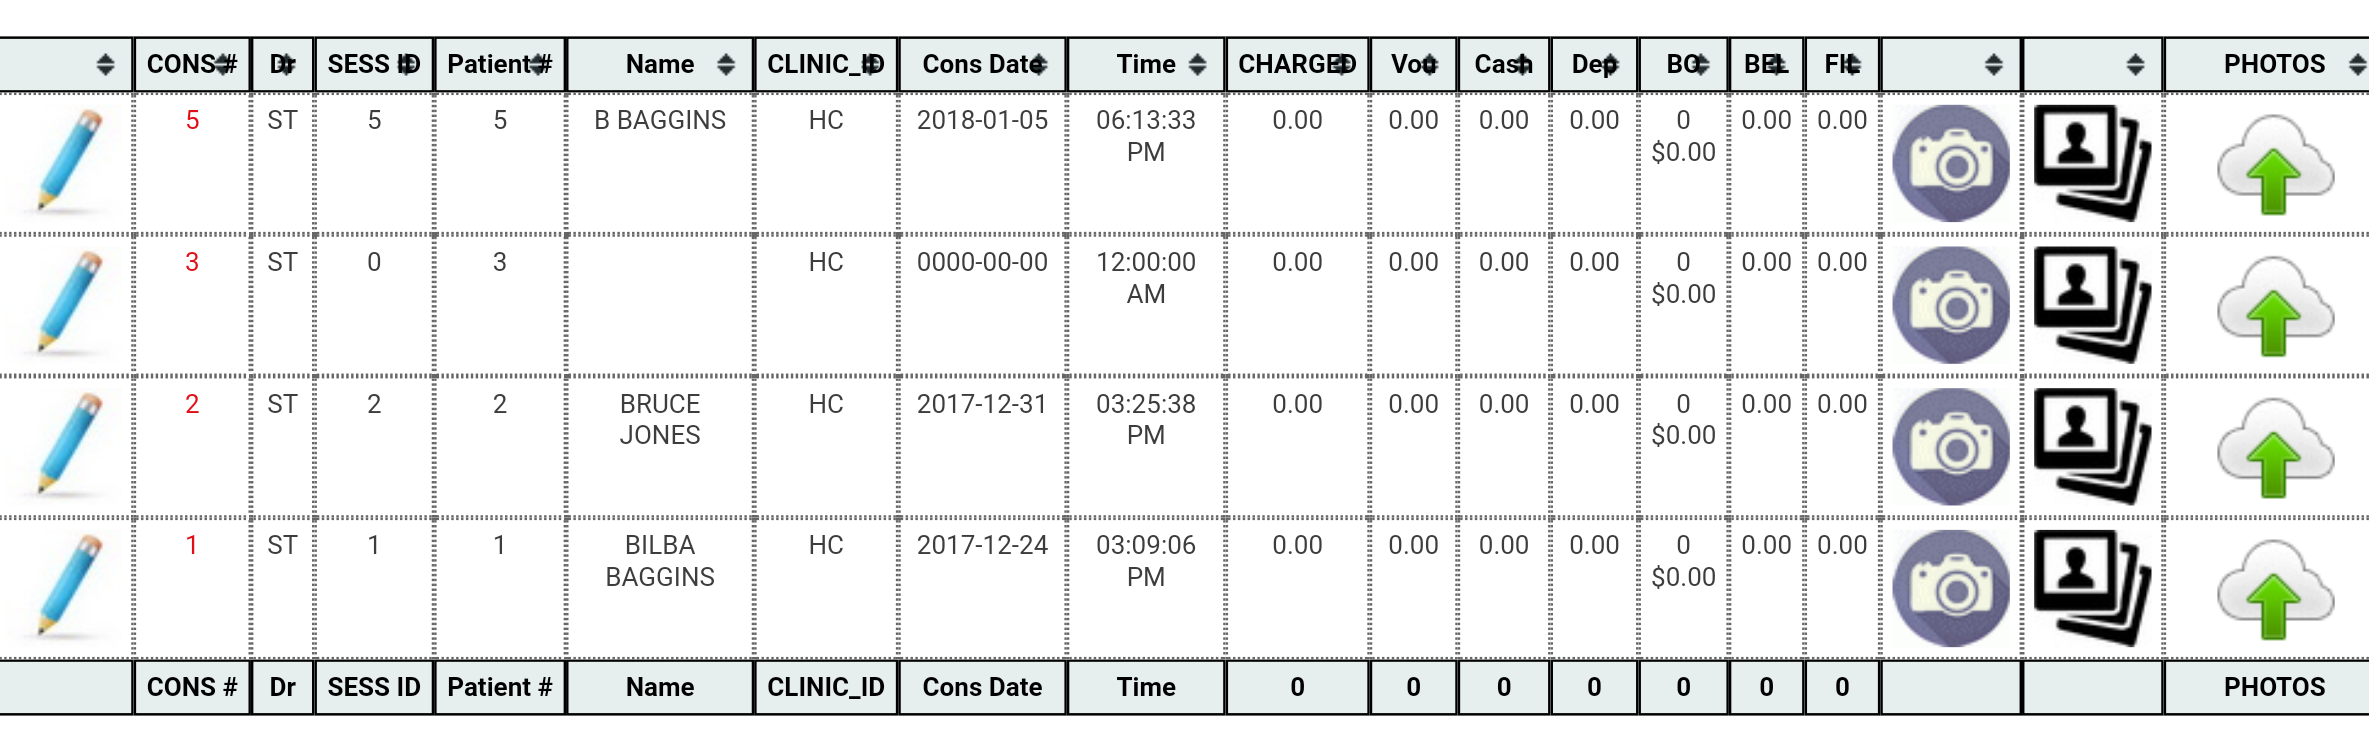
In order for the app to capture a corresponding patient information, it needs to capture the patient information after omniacam.php?. In order to do that, the user needs to tap on the corresponding patient's camera icon:
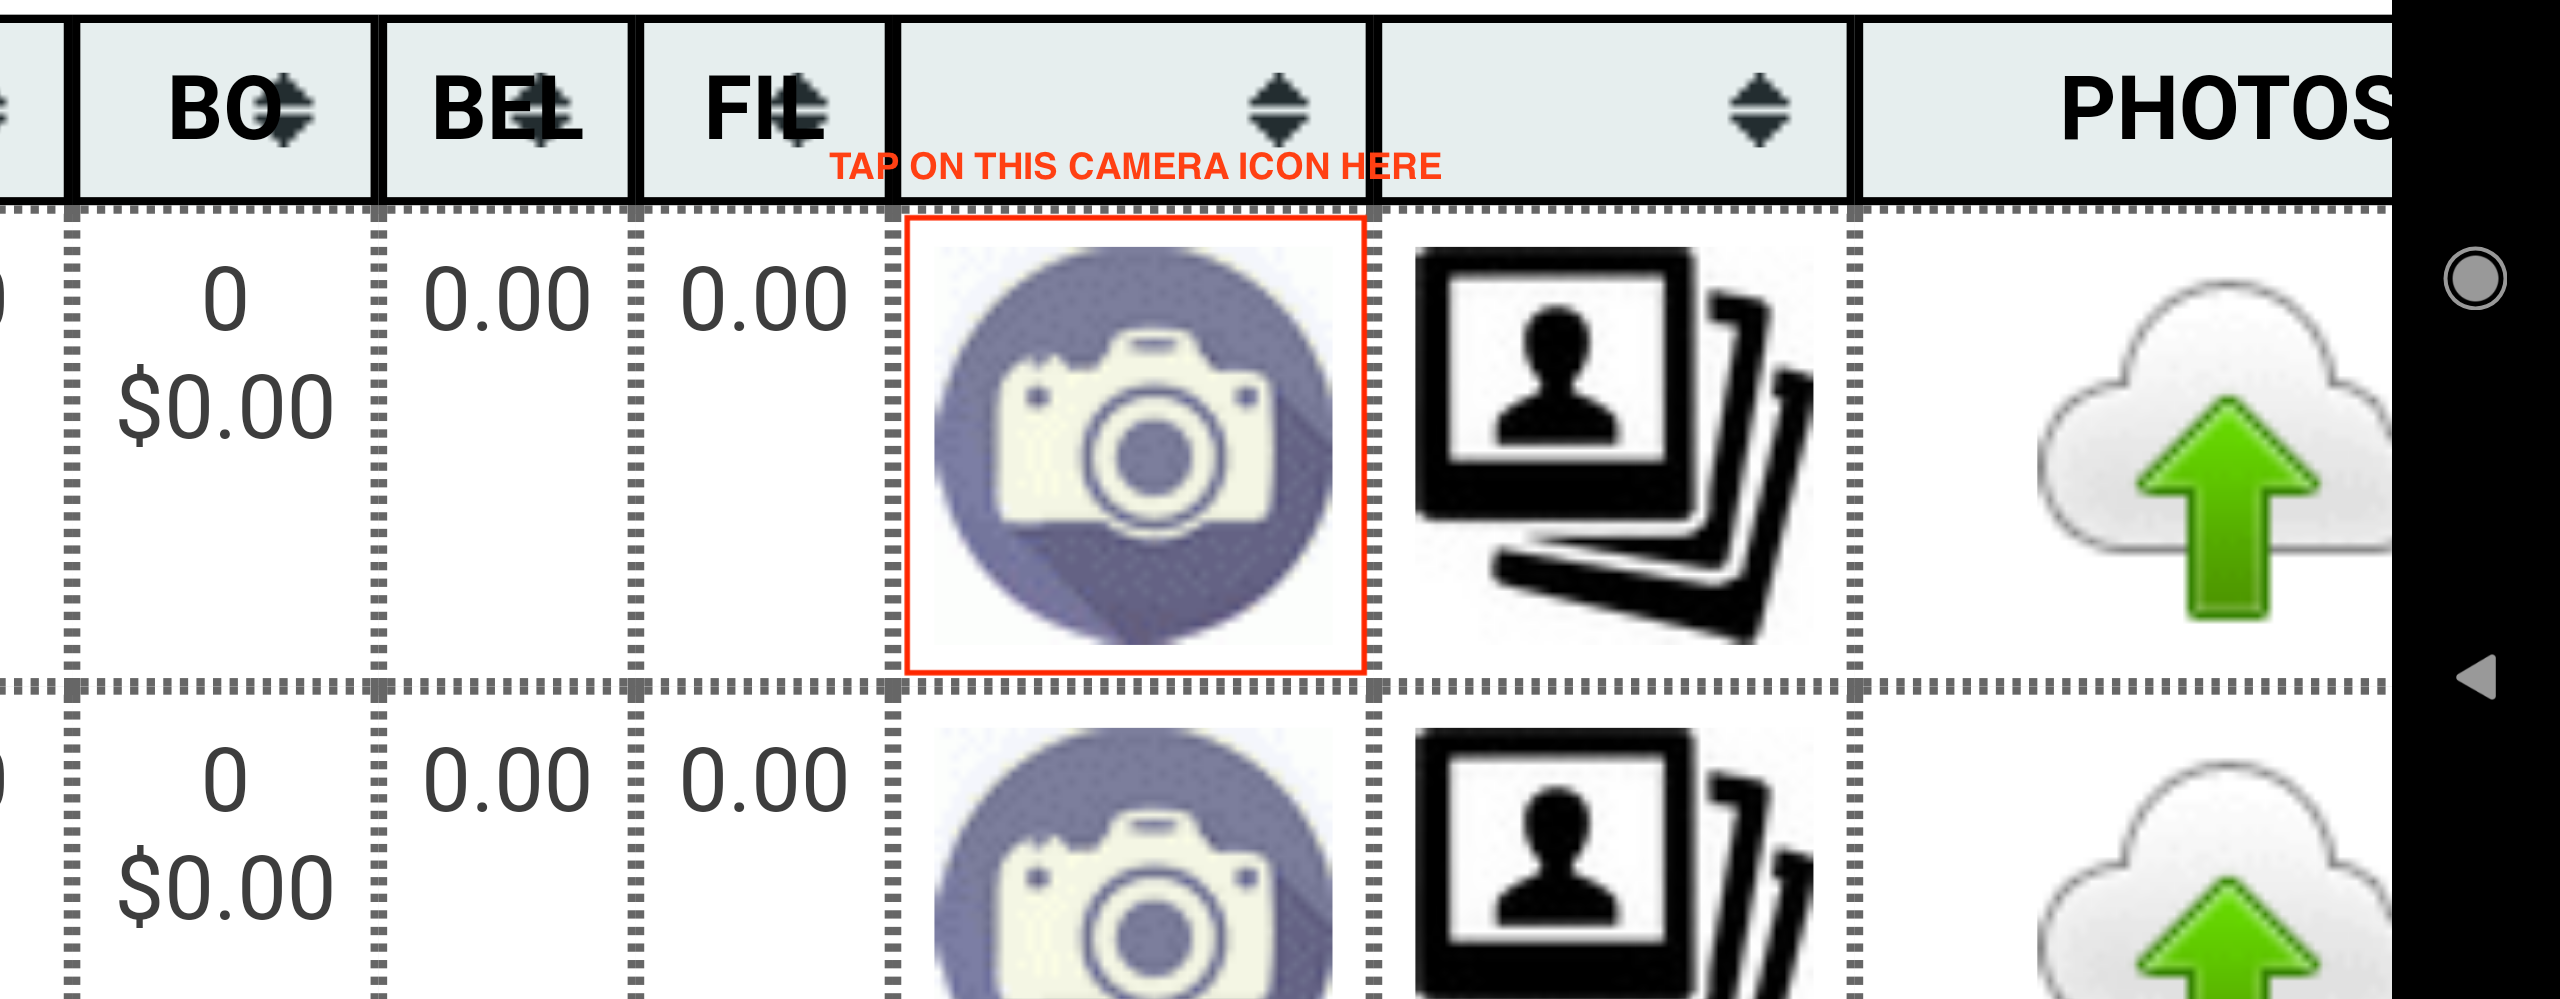
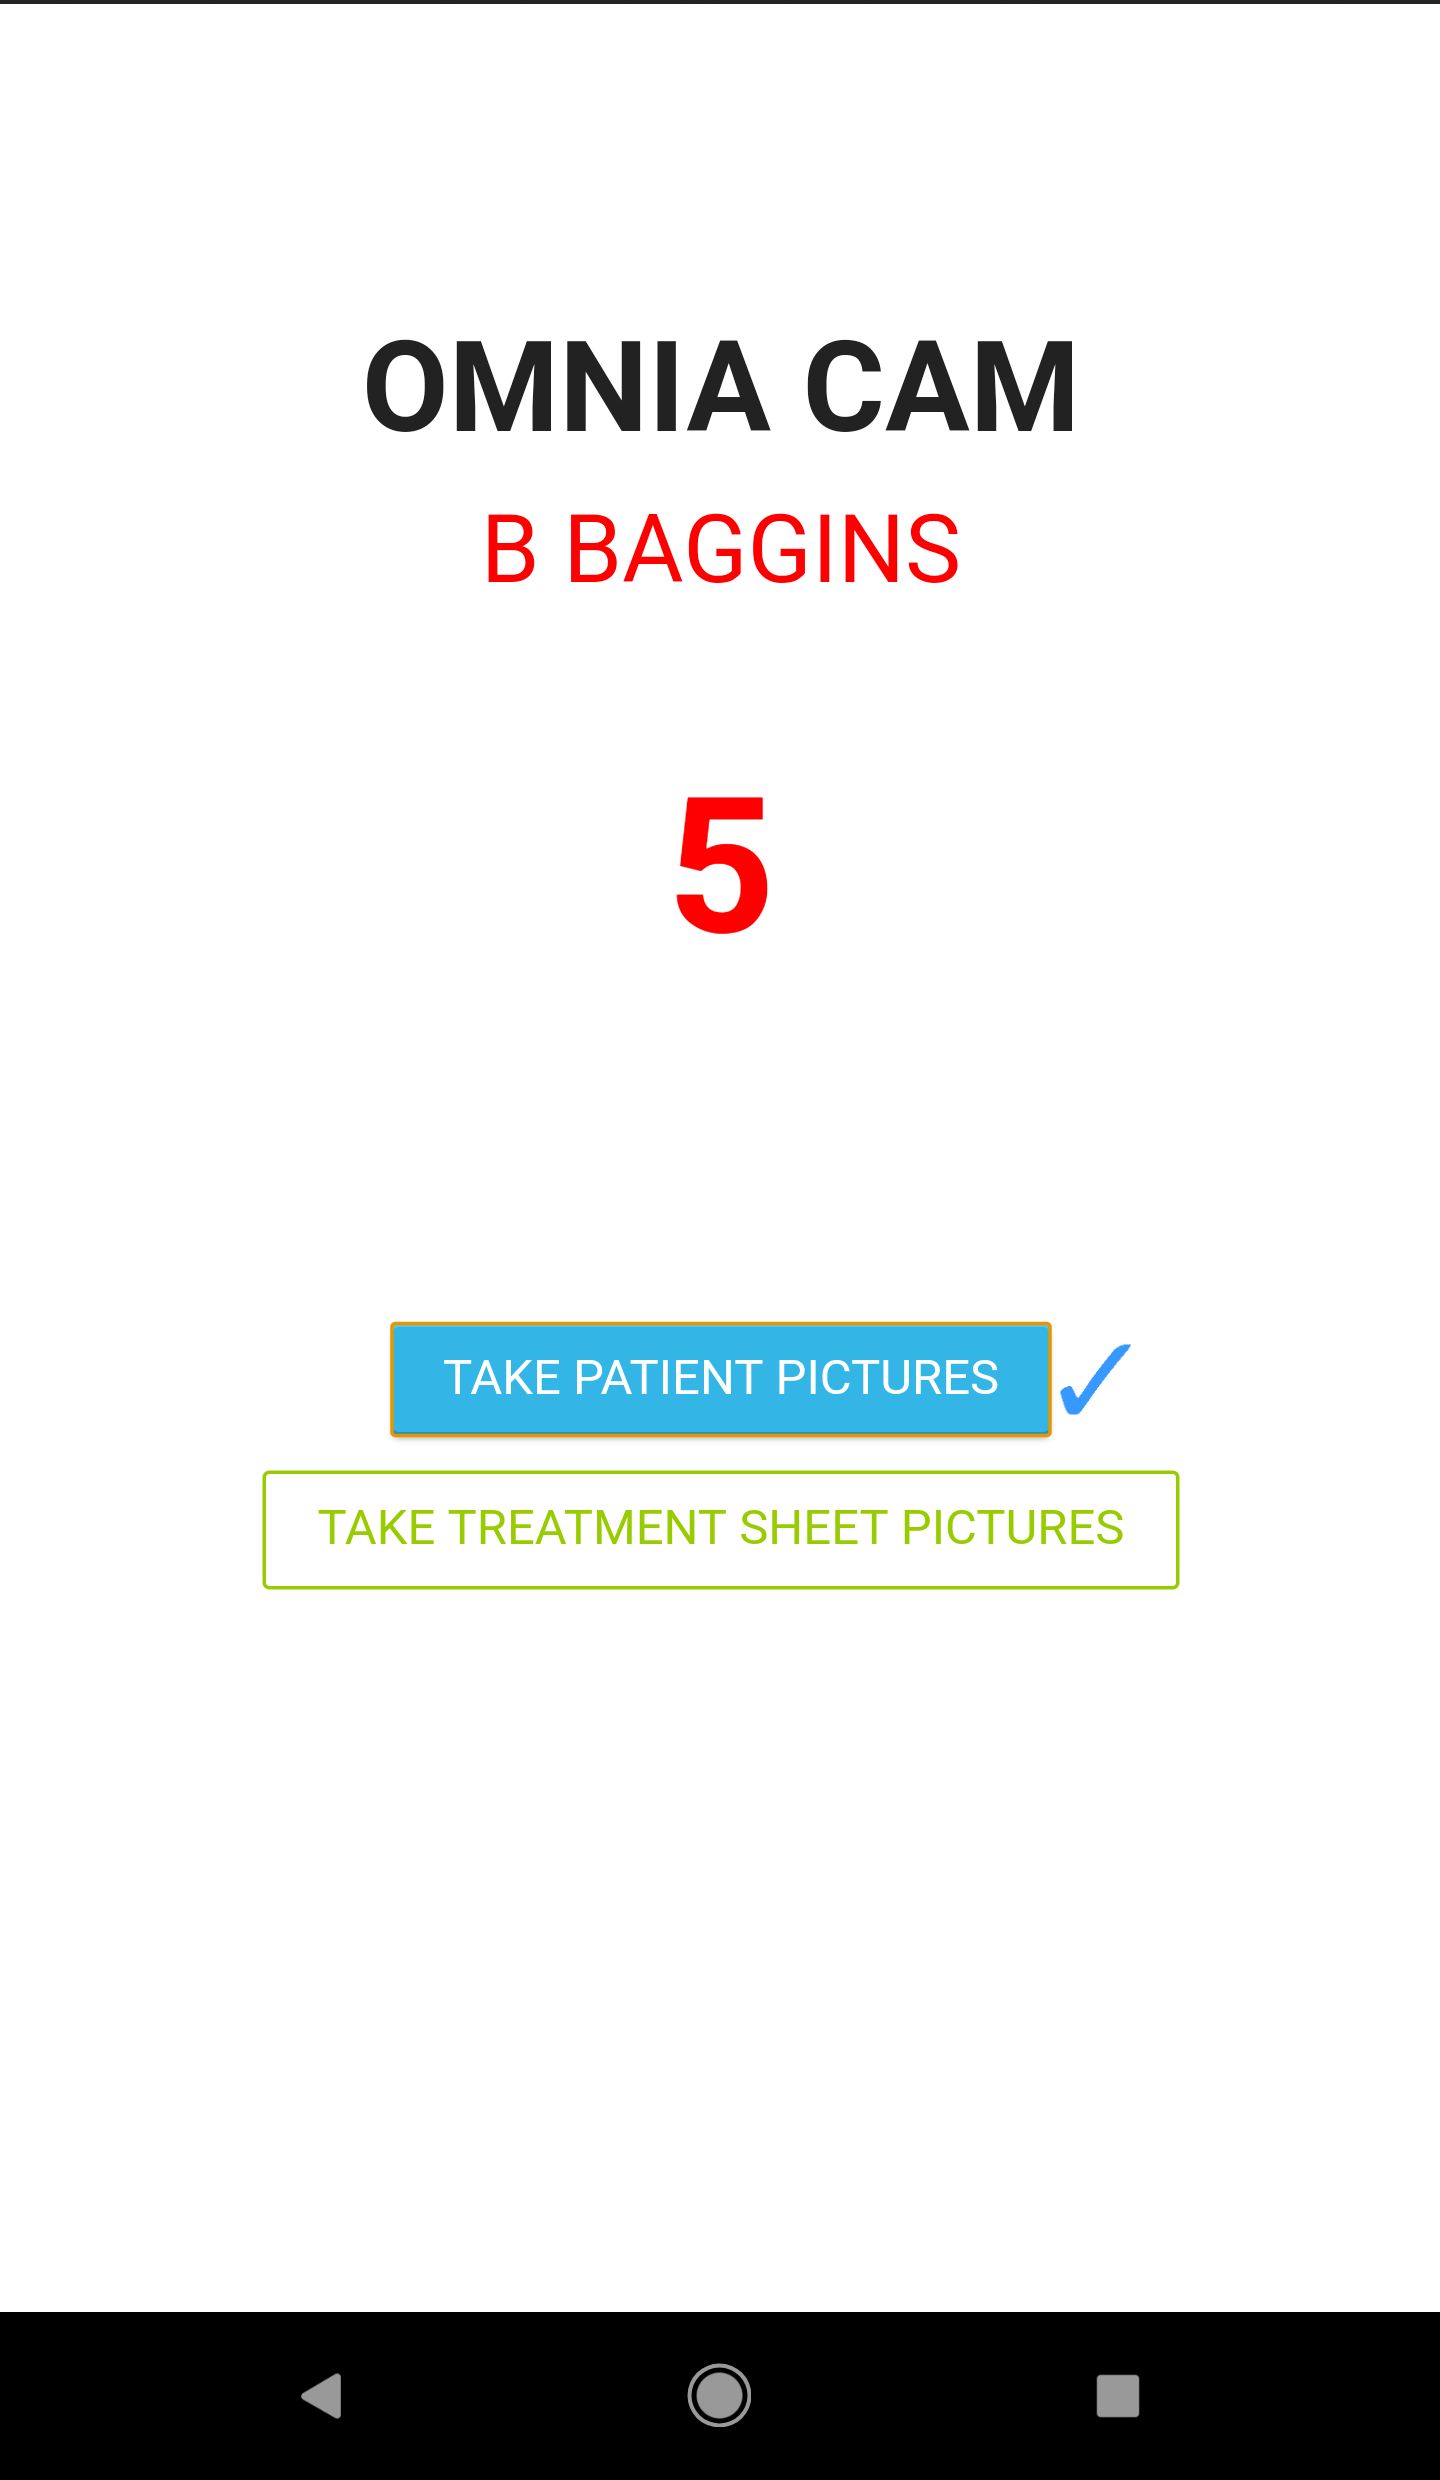
Once the corresponding camera icon is pressed, the app will automatically fire up and displays 4 things:
- the patient name [in red]
- the patient consultation ID [in bolded red]
- a blue button used to take patient pictures
- a green button used to take patient treatment sheet pictures

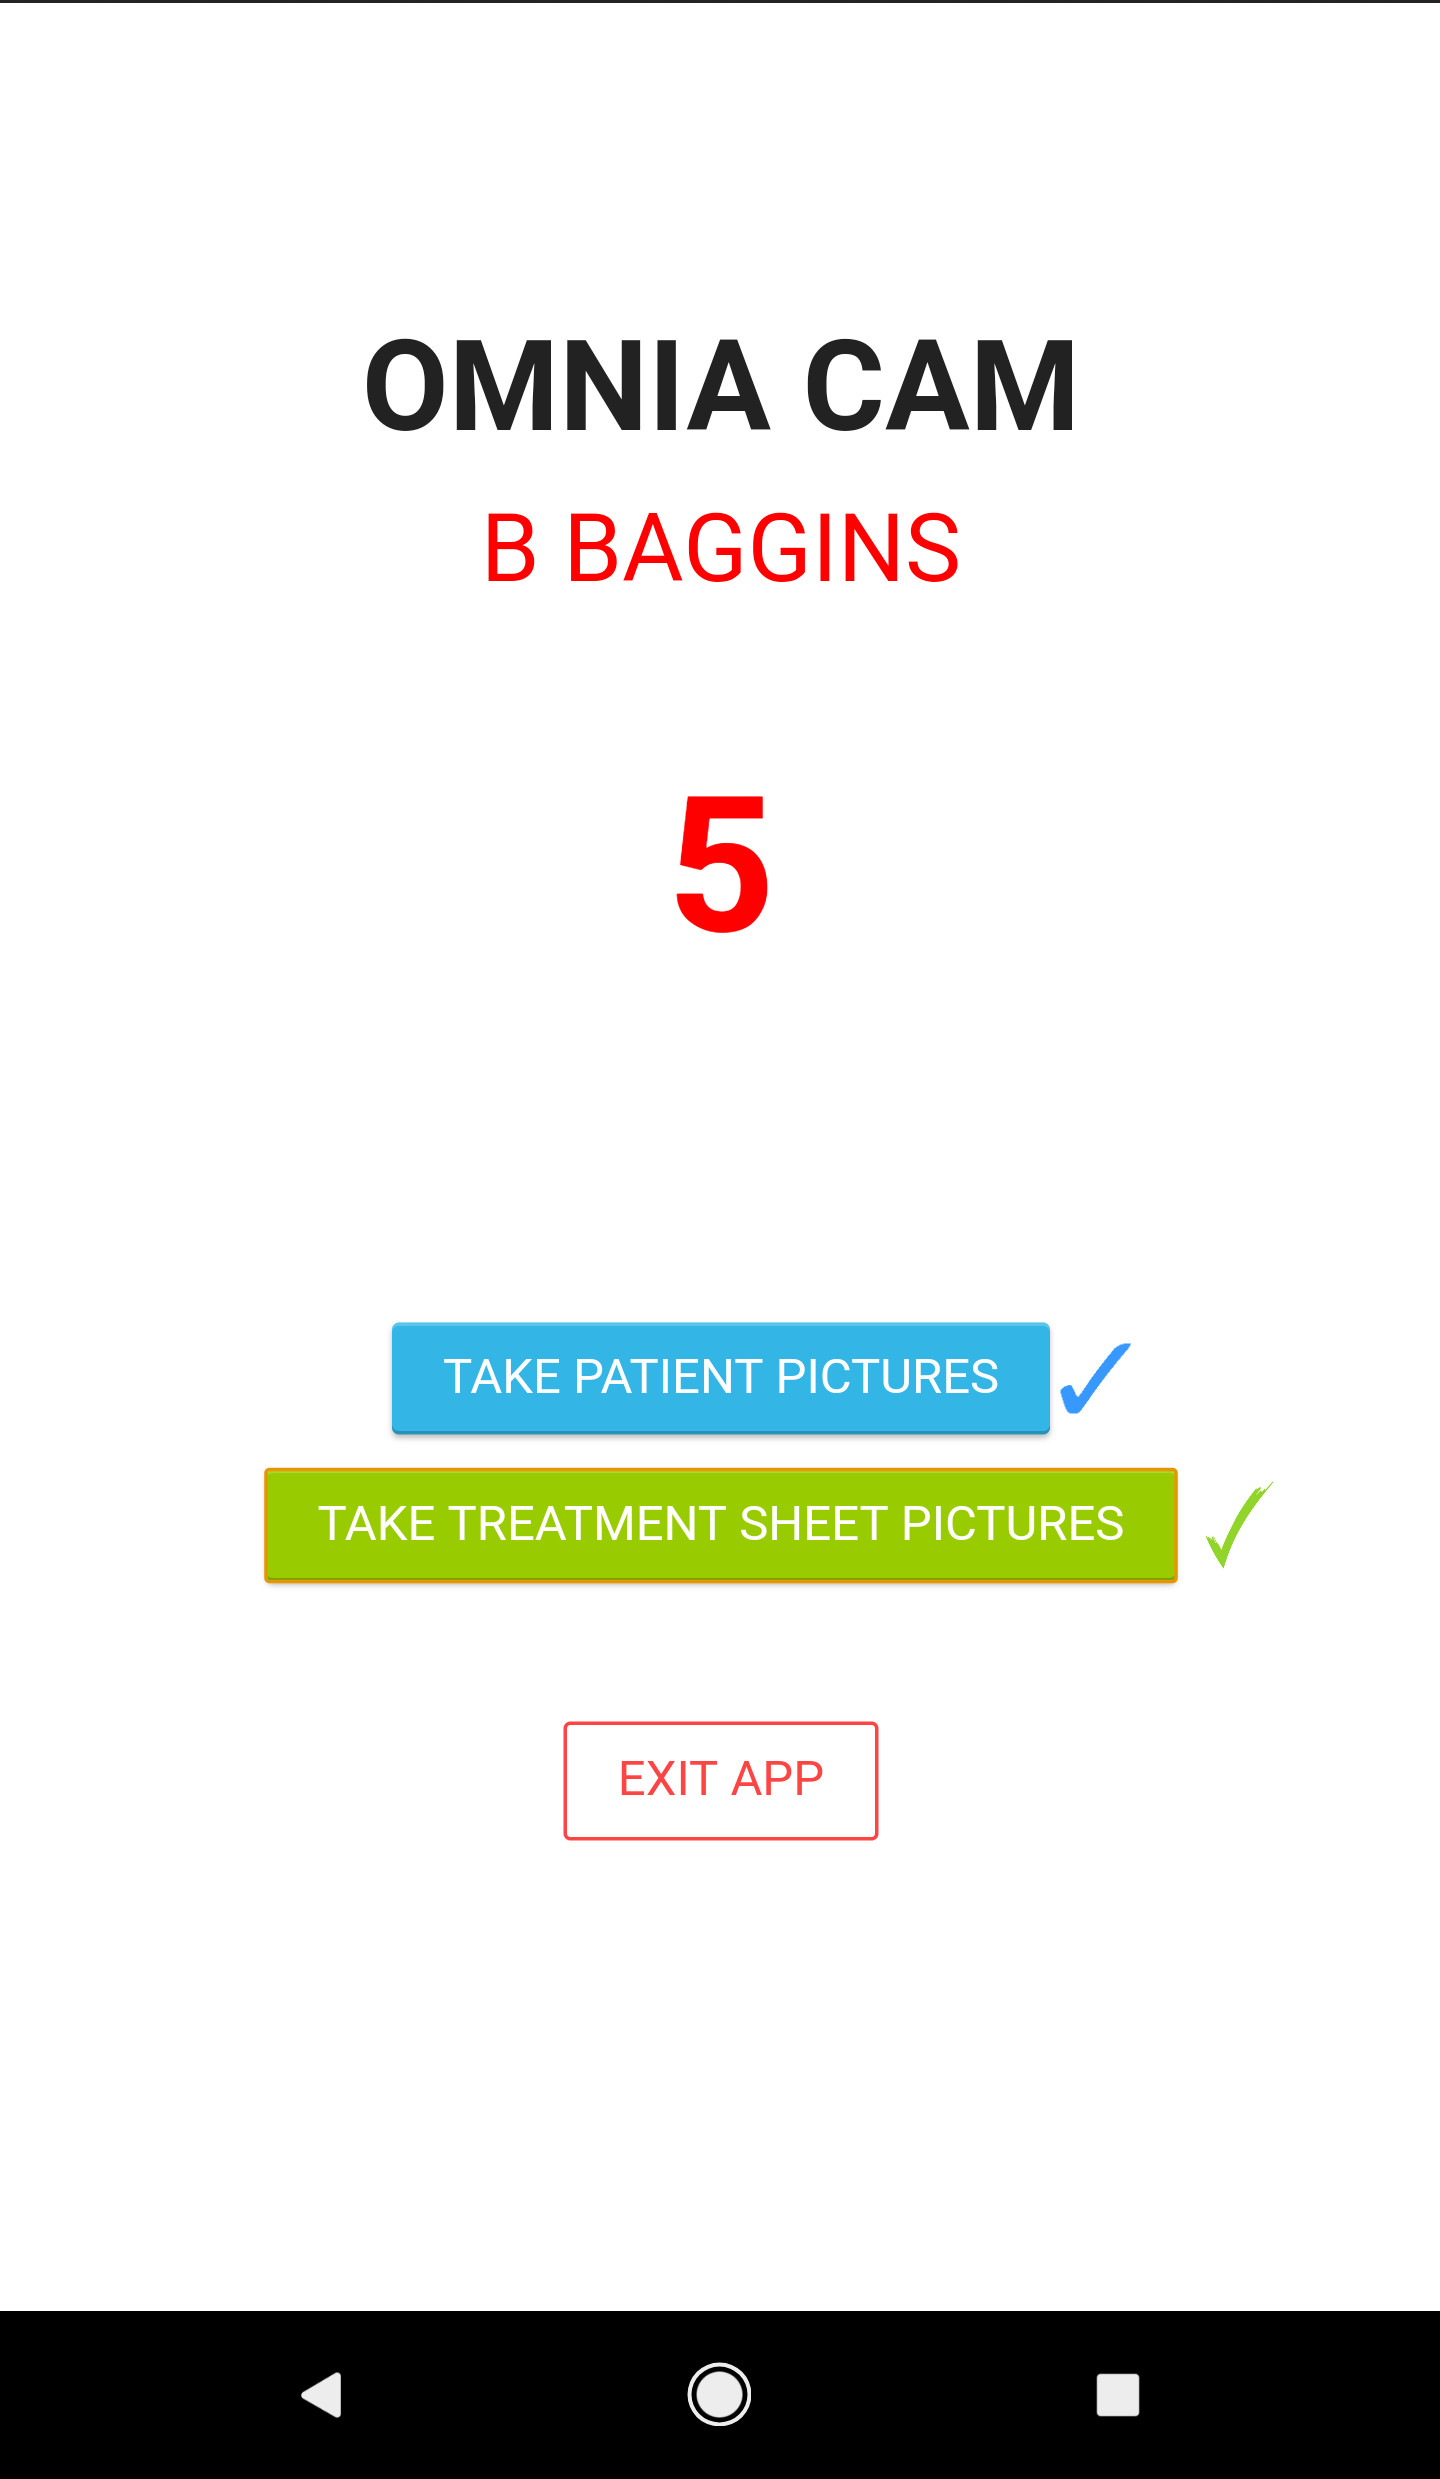
When the user presses either TAKE PATIENT PICTURES or TAKE TREATMENT SHEET PICTURES, a blue check or a red check will appear next to the corresponding button pressed and the camera interface will open up.
Taking Patient Pictures Demonstration
Taking Treatment Sheet Pictures Demonstration
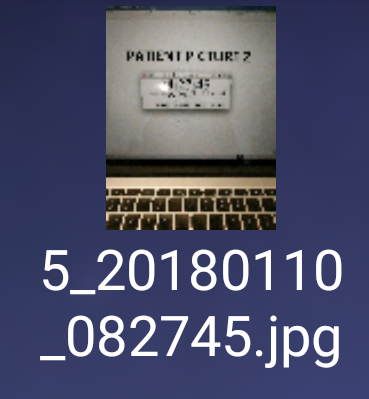
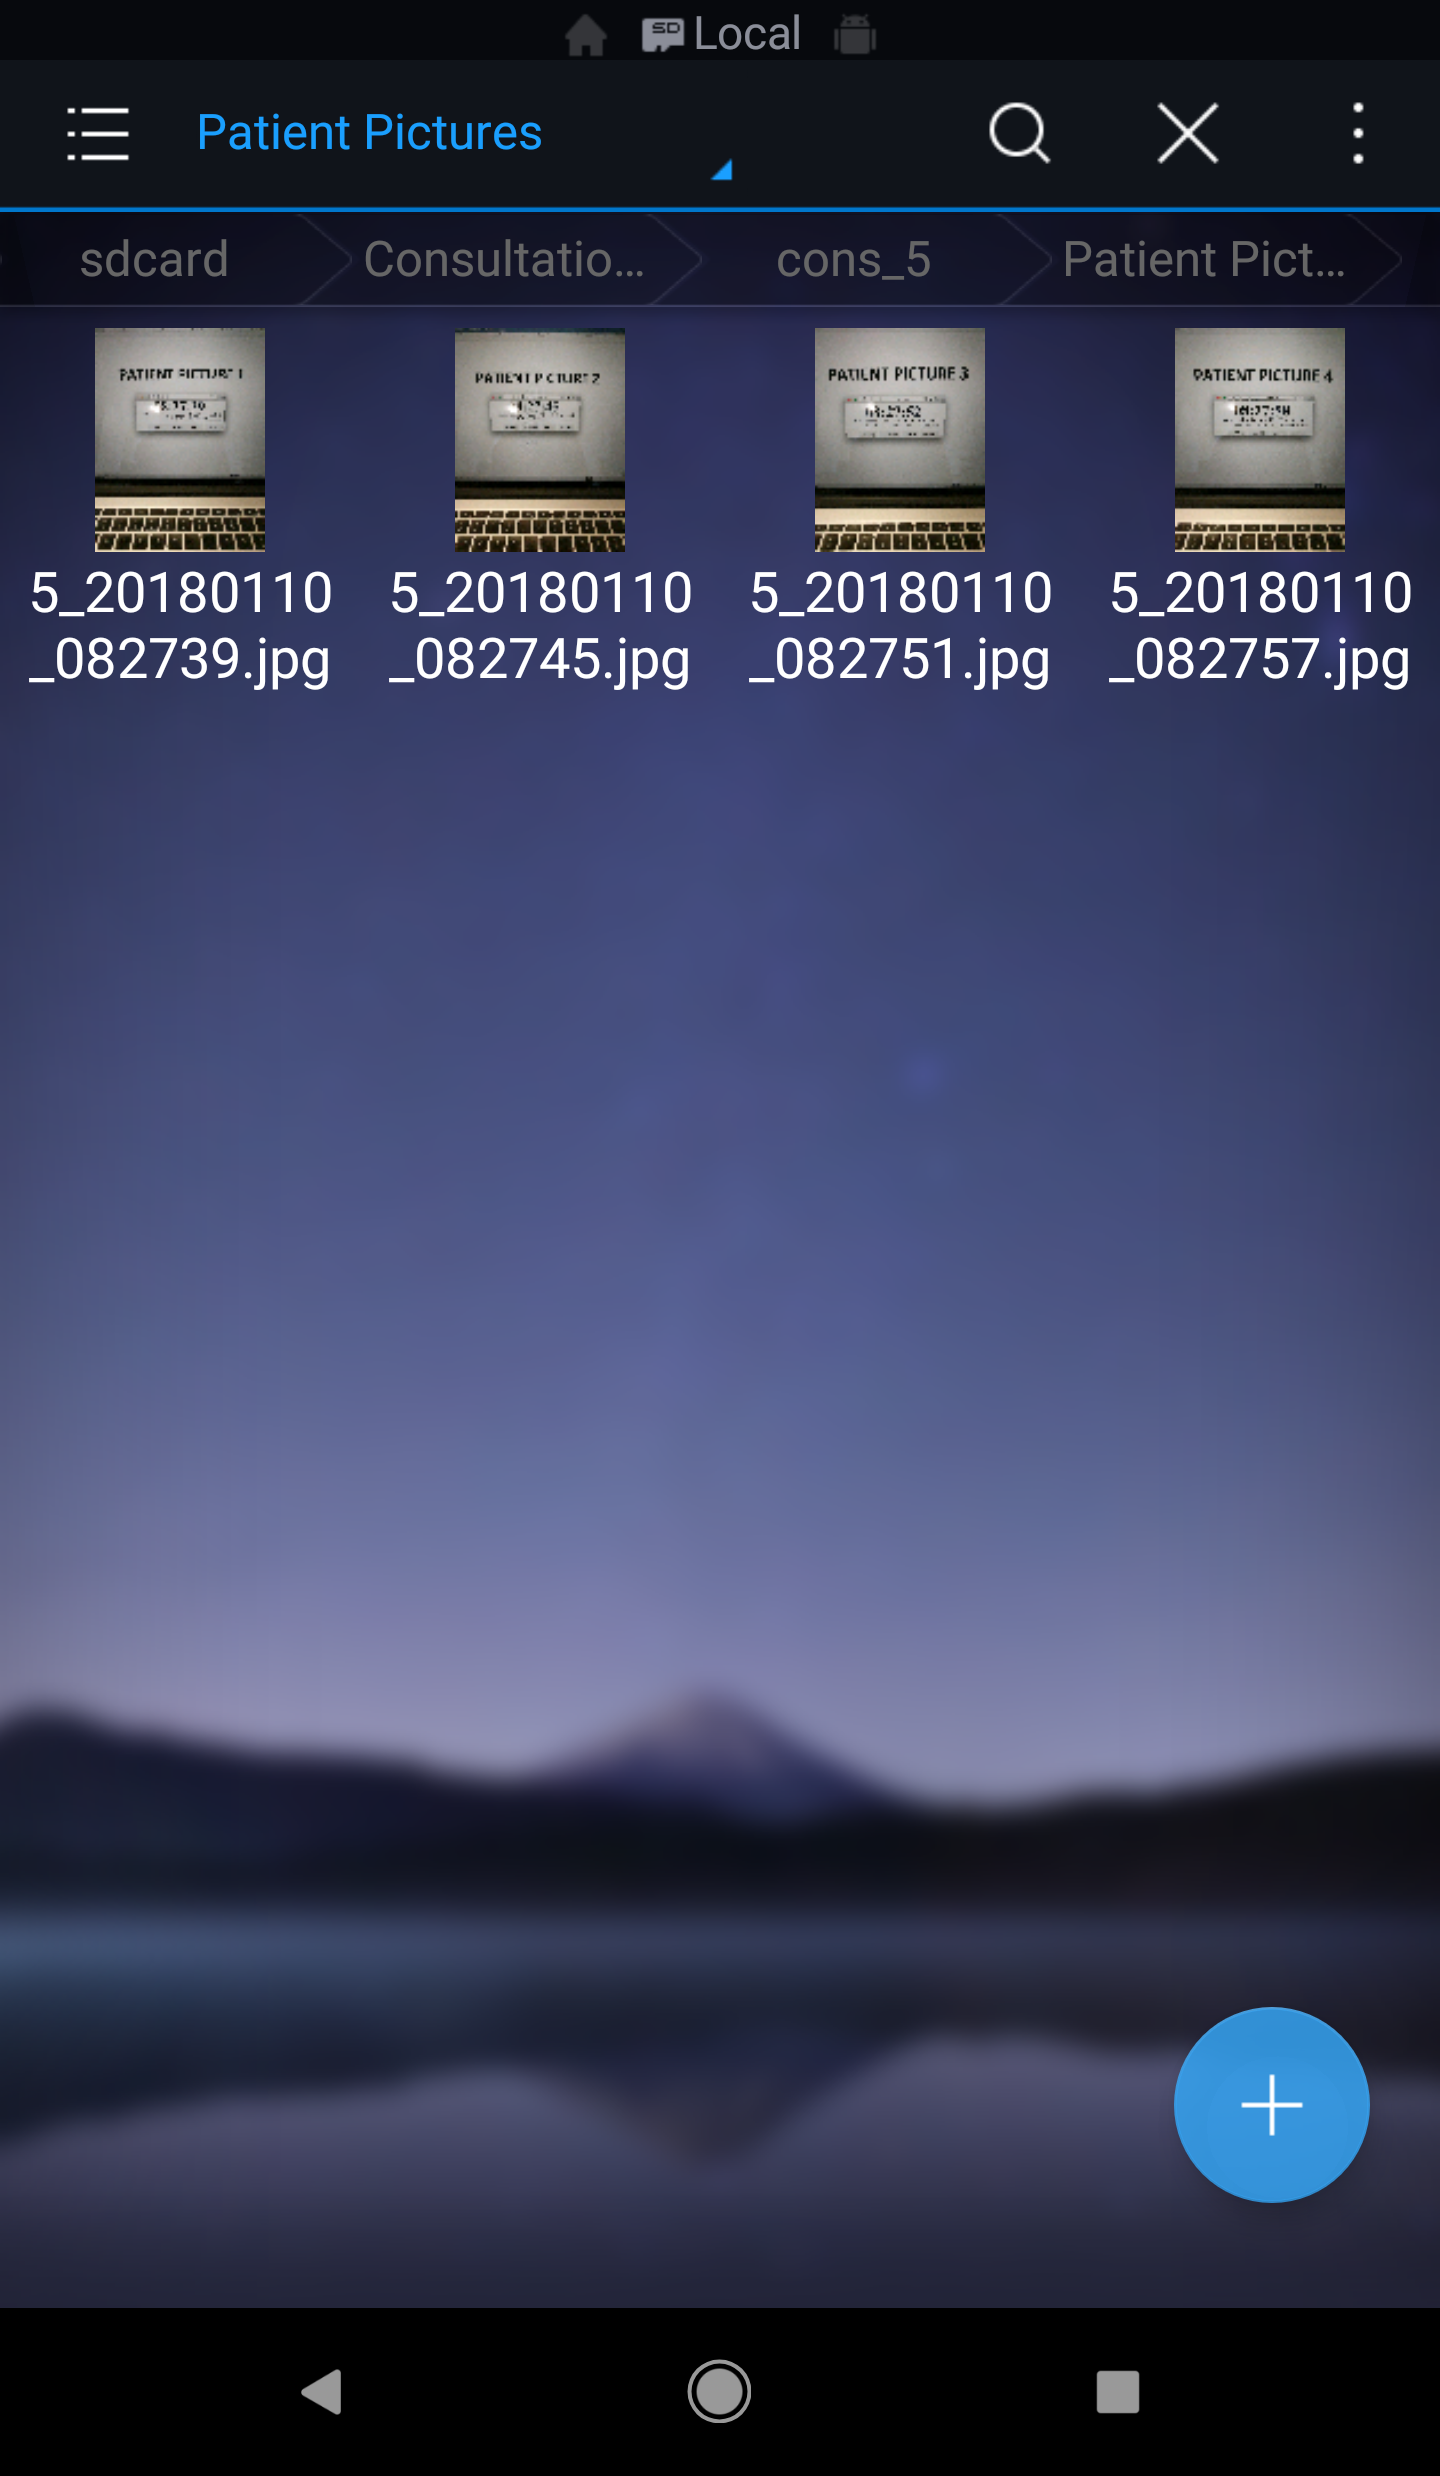
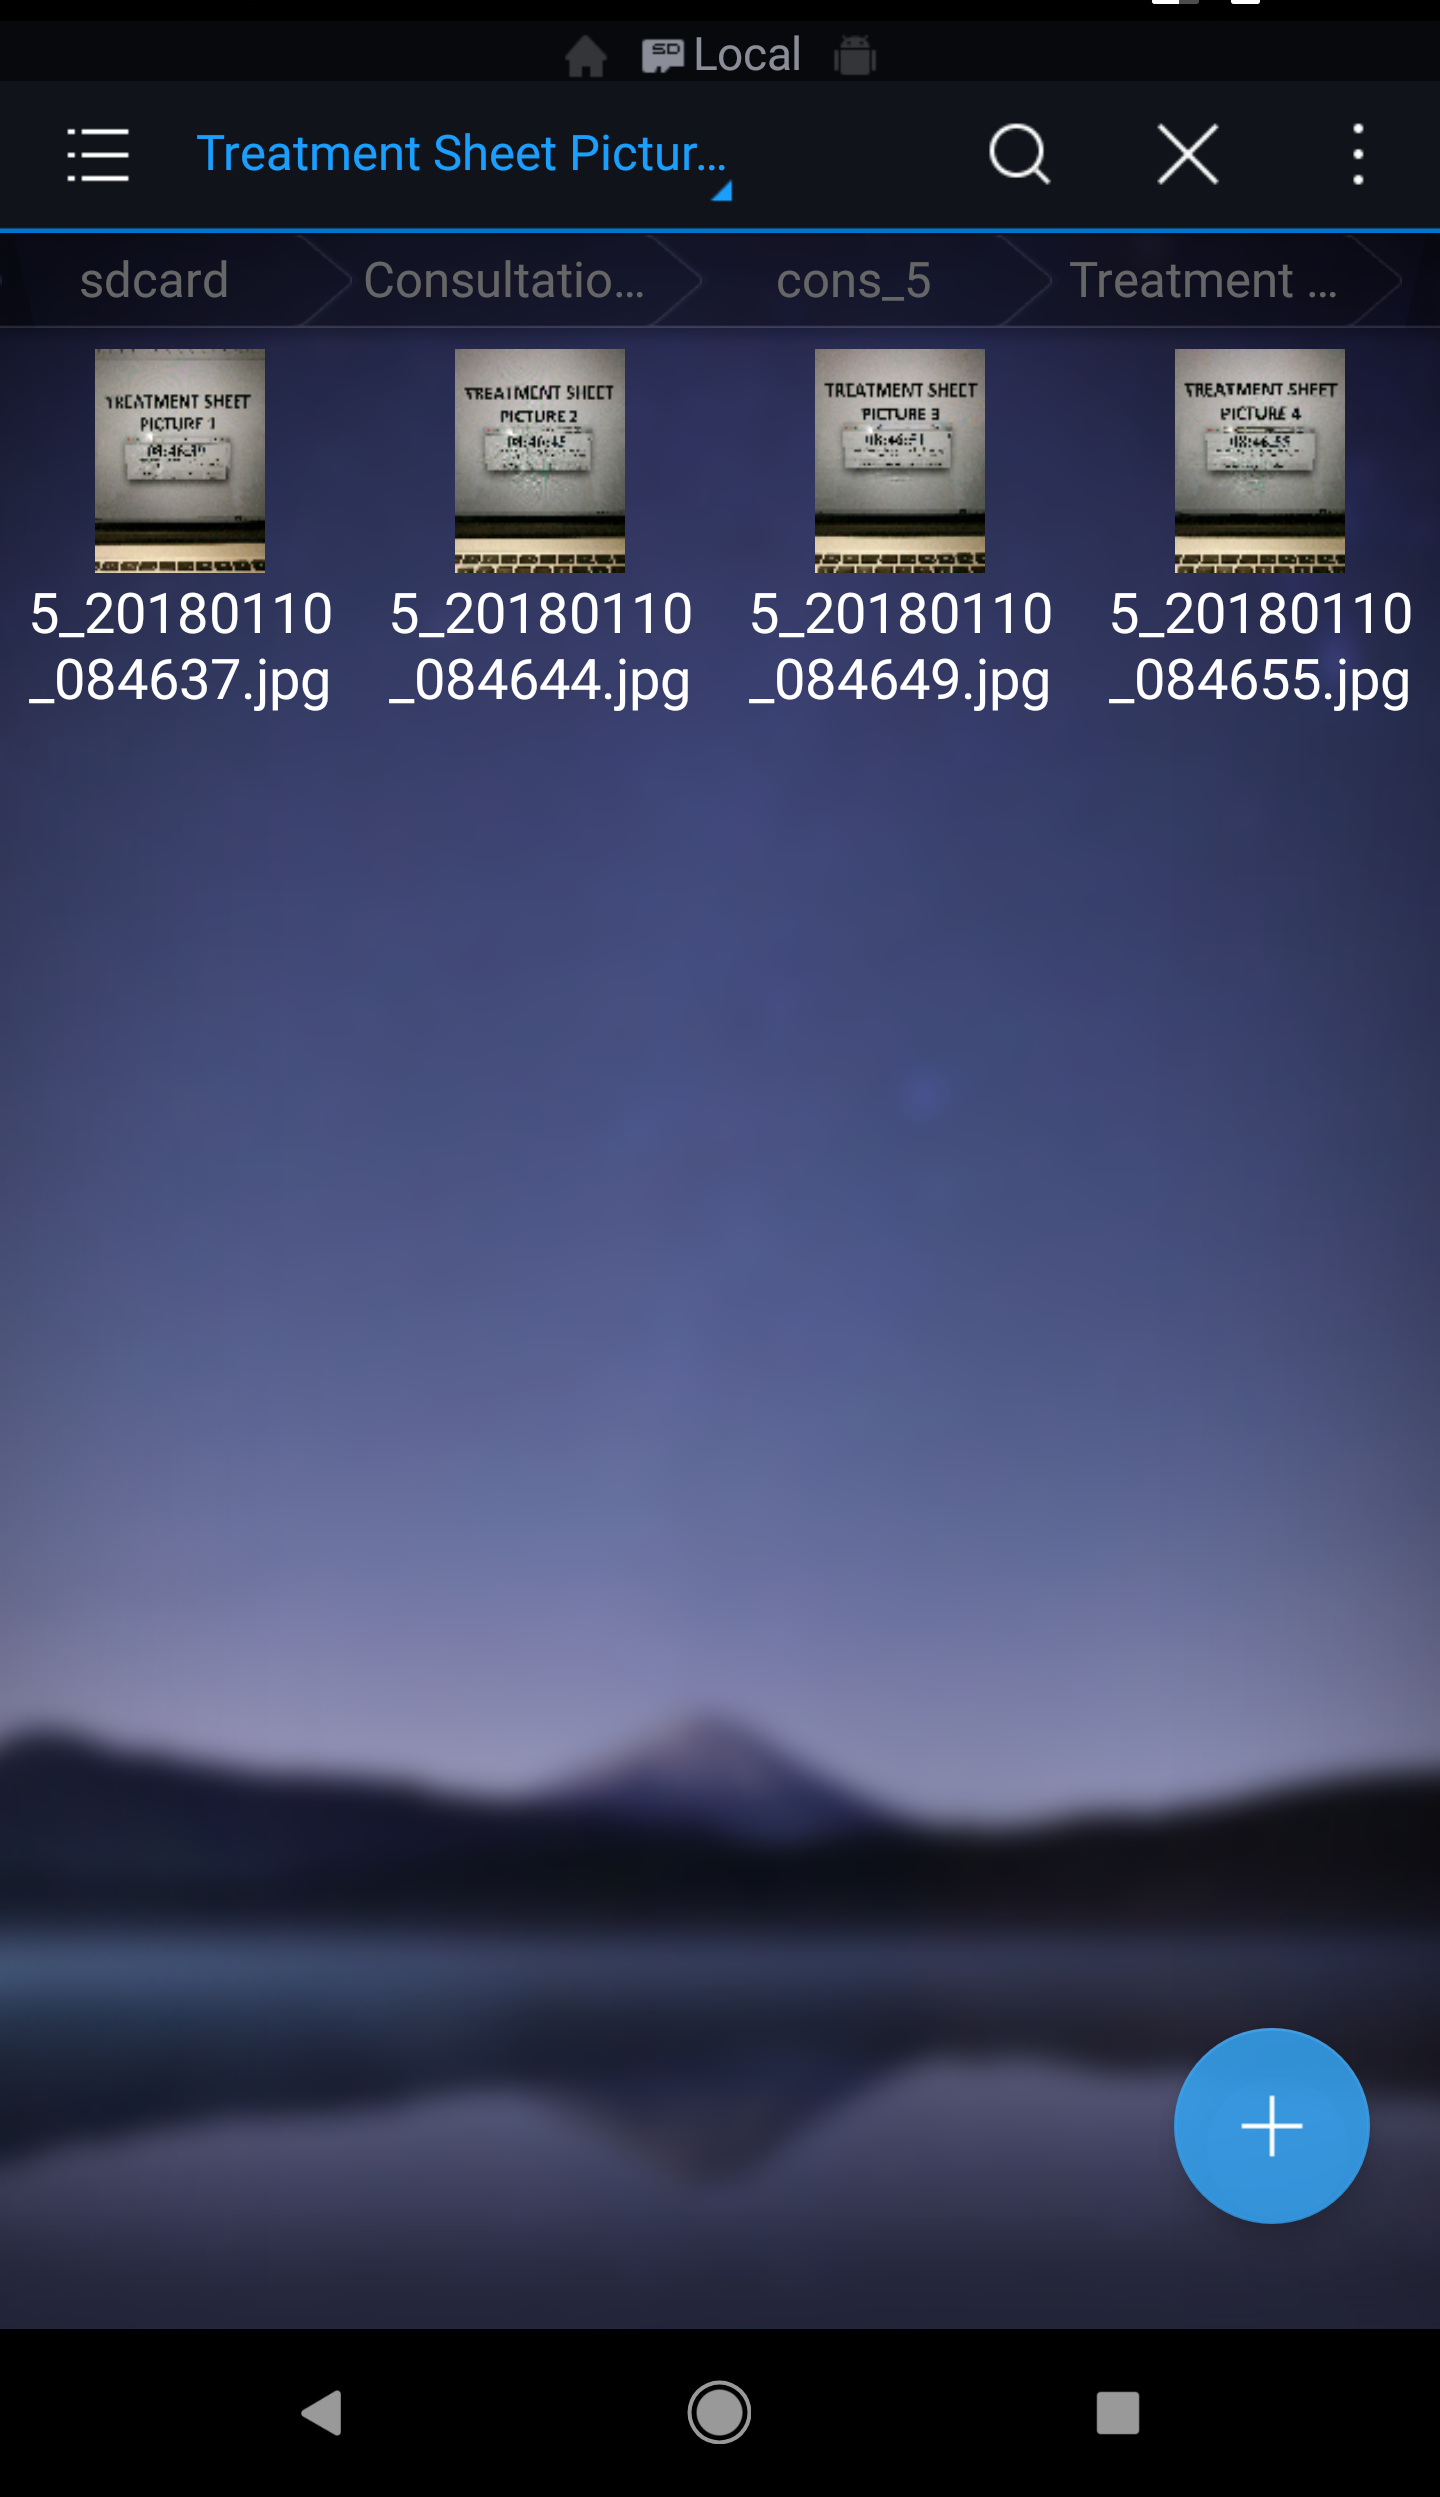
Each image taken will be named [patient_consultationID][yyyymmdd][hhmmss], where:
- patient_consultationID is the consultation ID of the corresponding patient given by the website that opens the app
- yyyymmdd is the year, month and date when the image is taken.
- hhmmss is the hour, minute and second when the image is taken.
For instance, in the demonstration above, one of the images was taken such that:
- patient_consultationID passed by the website was 5
- the image was taken on 10th January 2018
- the image was taken at 8:27:45 am in the morning
As such, this particular image was named 5_20180110_082745.jpg
The subdirectory created by the app to save images is rooted at Consultation Images
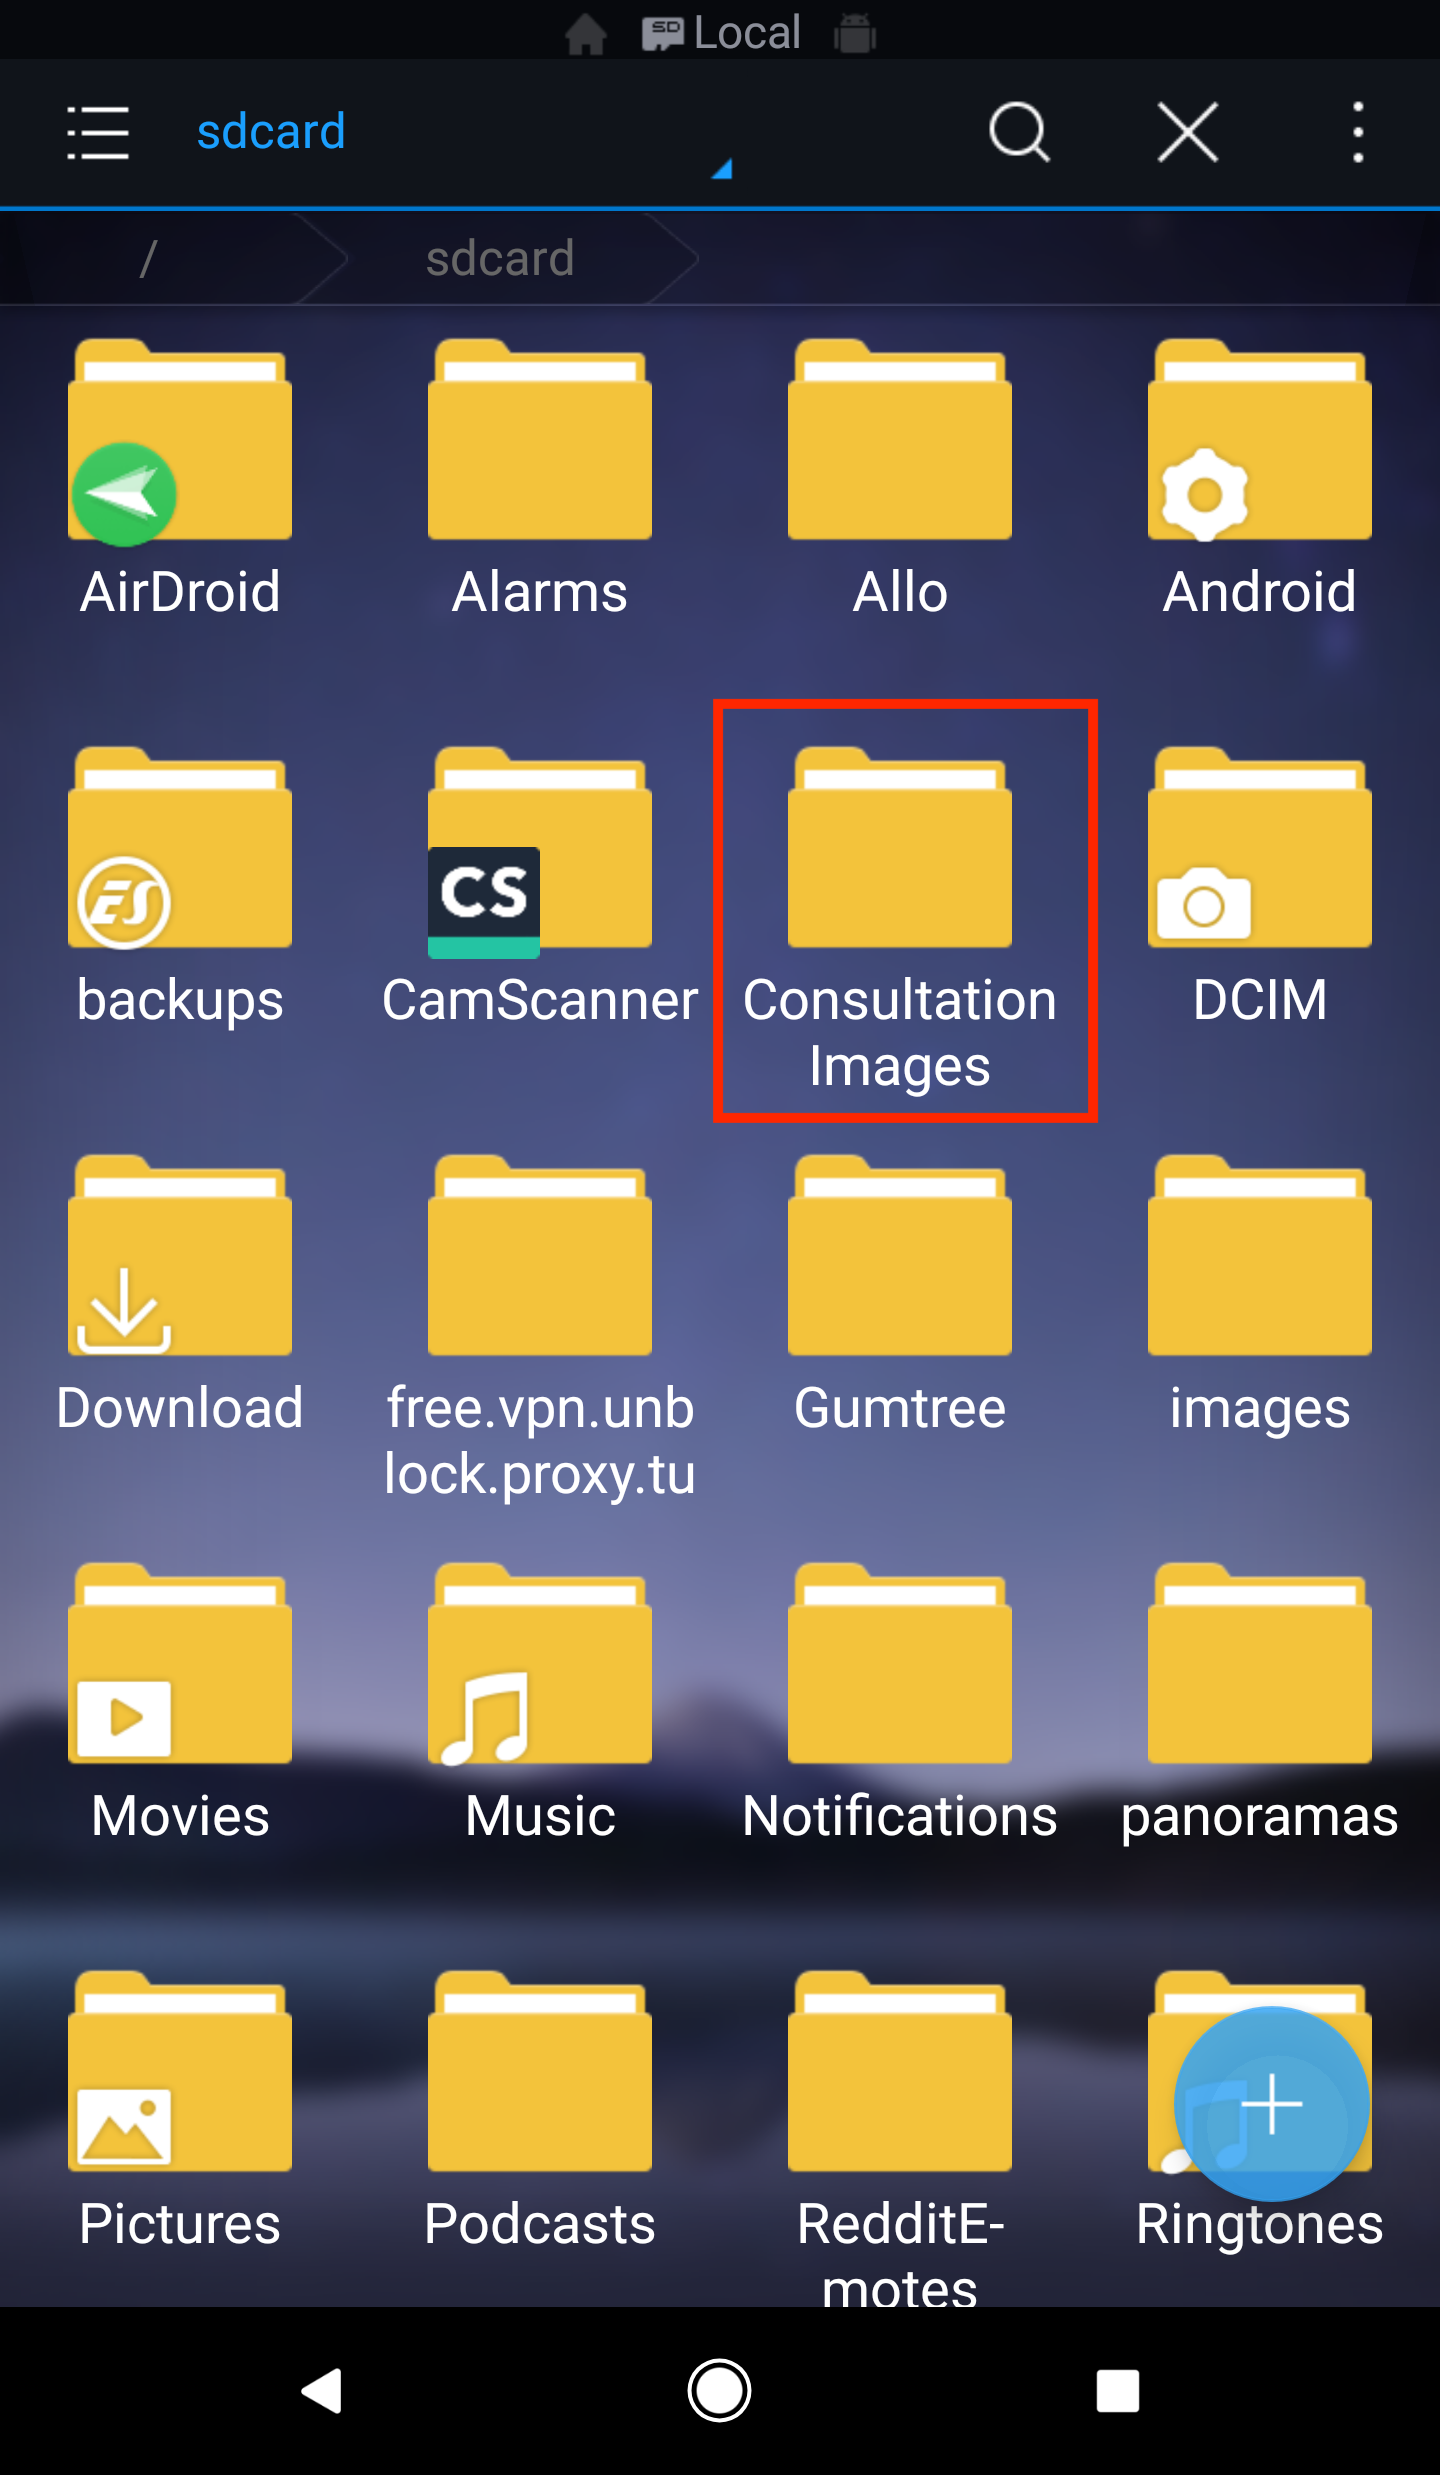
Inside this folder will be a list of folders, each one of them is aptly named cons_[patient_consultationID] and corresponds to the consultation ID for each patient whose pictures were taken by the app.

Inside each cons_[patient_consultationID] folder, 2 folders will be created. One of them will be called Patient Pictures and the other one will be named Treatment Sheet Pictures.
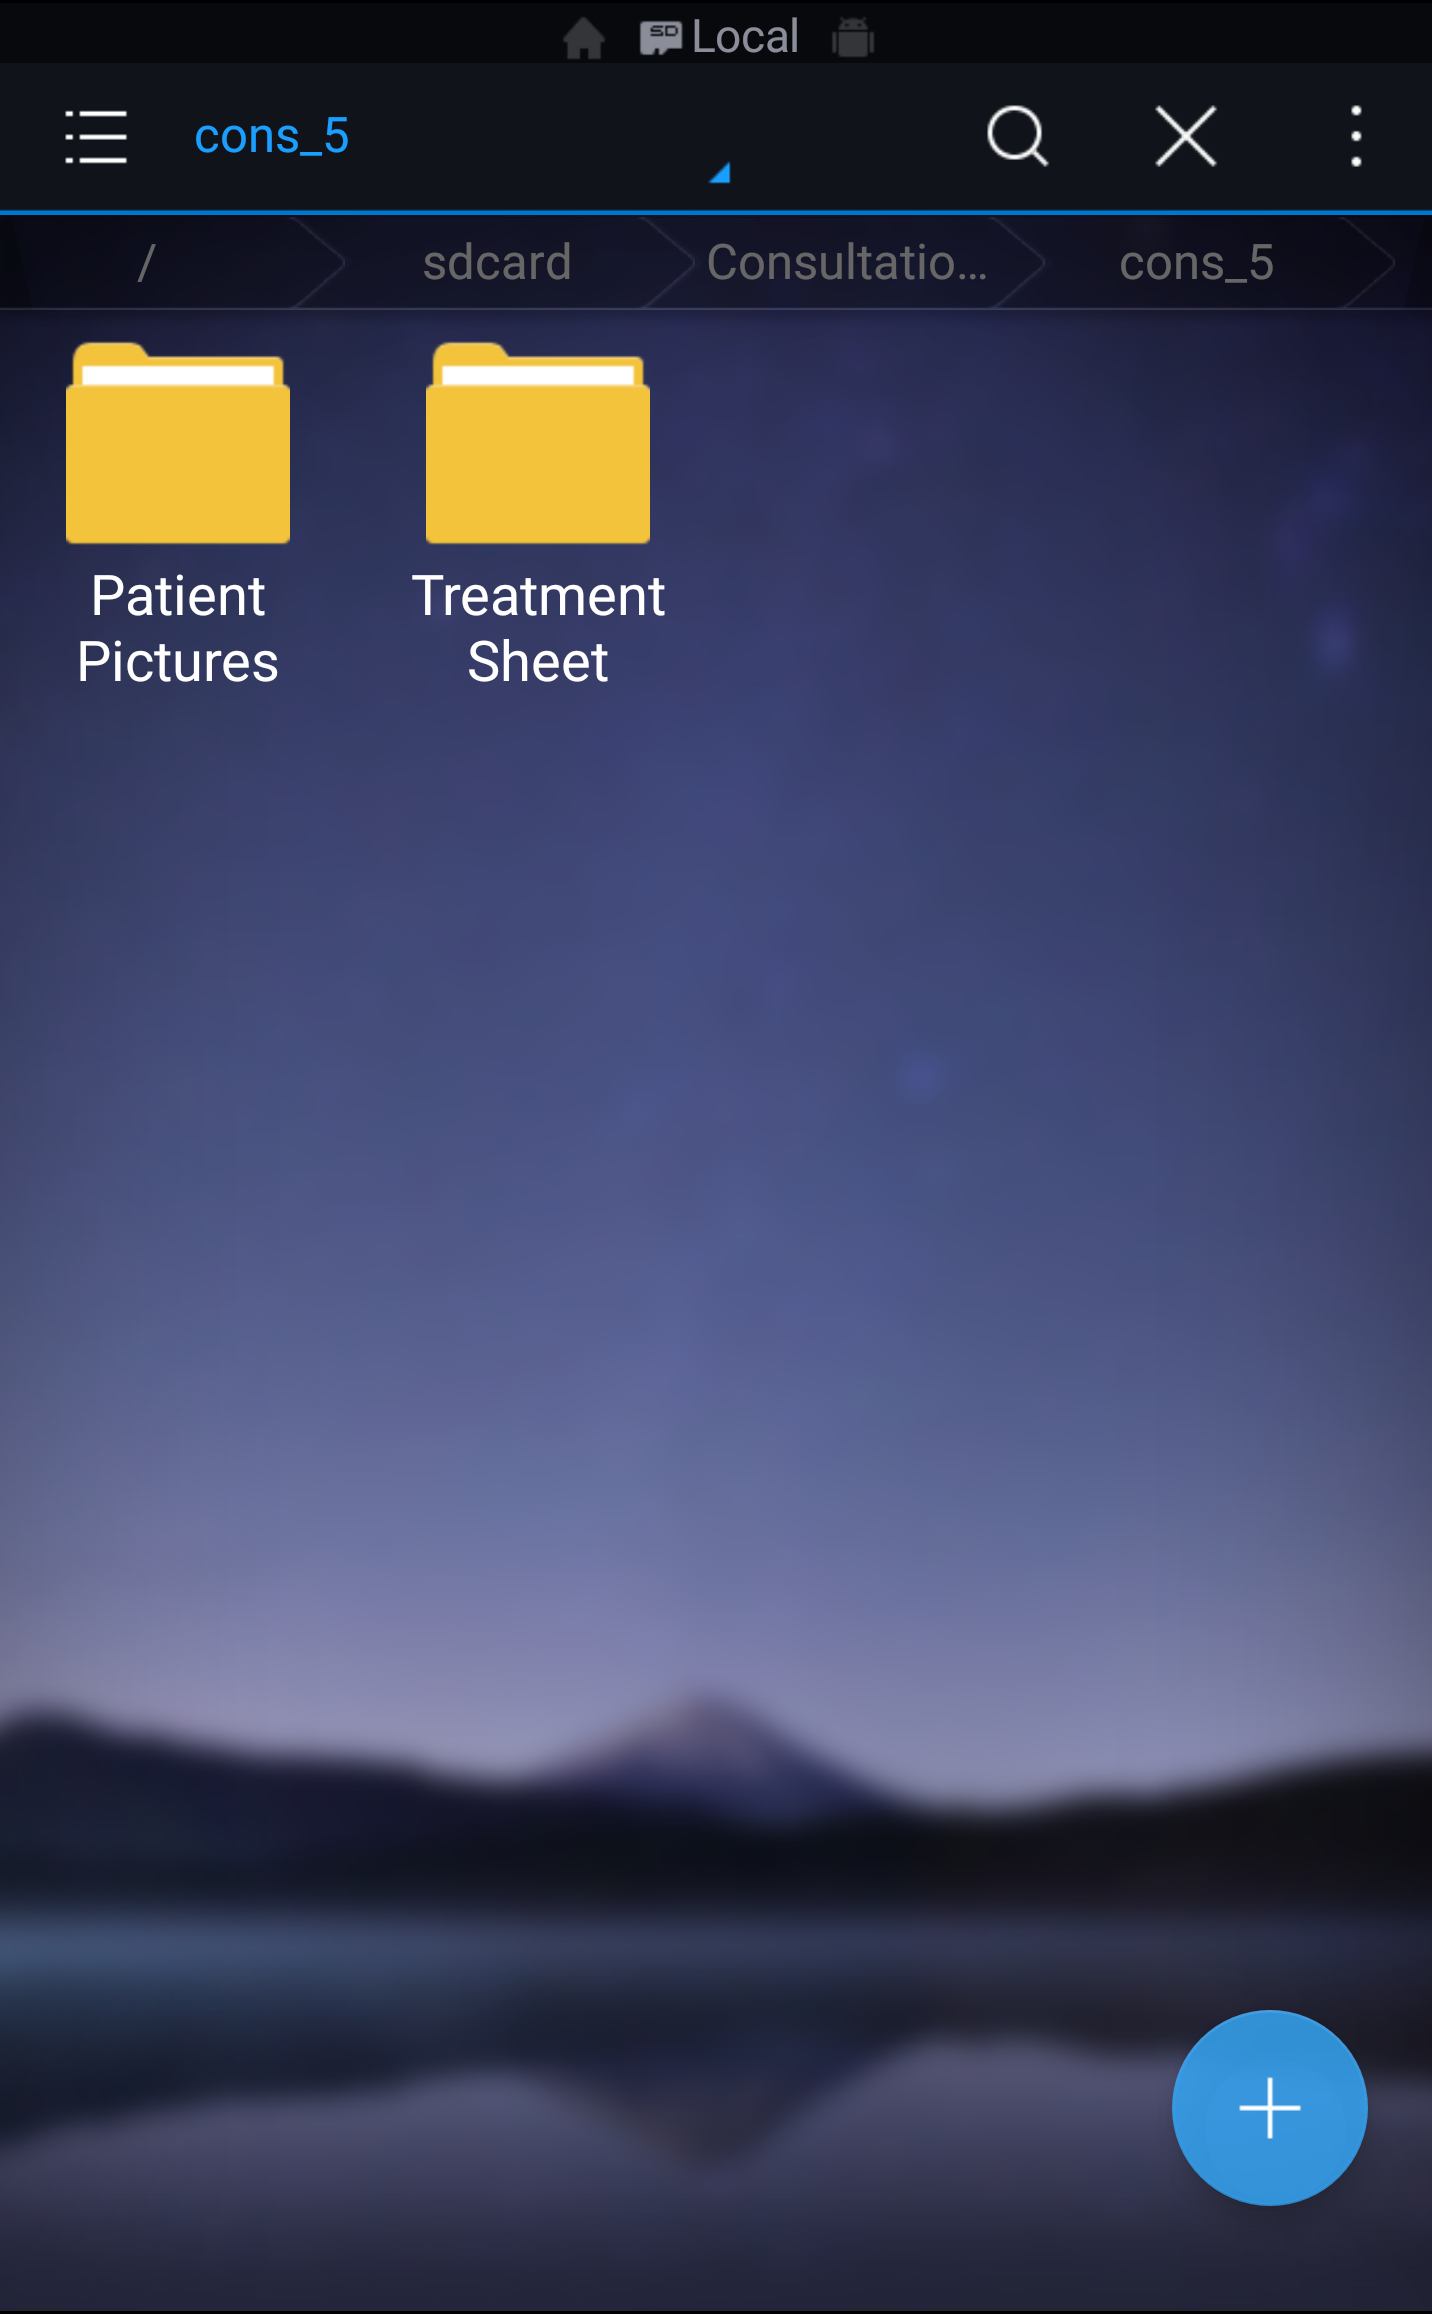
When user chooses TAKE PATIENT PICTURES button, each corresponding image taken afterwards will be saved inside the Patient Pictures folder. On the other hand, when the TAKE TREATMENT SHEET PICTURES button is pressed, each corresponding image taken afterwards wil be saved inside the Treatment Sheet Pictures folder.
Patient Pictures
Treatment Sheet Pictures
When the app is installed to devices with no external SD Card, just like the Google Pixel XL (1st gen) that I used to test the app on in this case, a subdirectory structure with a root folder named Consultation Images will be created in the root path of the device internal storage, usually at /storage/emulated/0.
For devices with external SD card, the app will automatically detect the external storage and the subdirectory structure rooted with Consulatation Images folder will be created in the app sandboxed storage folder, which is /storage/emulated/externalSdCard/Android/data/com.OmniaCam.app.