This is a Flask-based chat application that provides functionalities such as managing chat sessions, handling PDF uploads, processing documents, selecting models for generating responses, and retrieving chat history.
- Create and manage chat sessions
- Handle PDF uploads and process them
- Manage model selection and response generation
- Retrieve chat history
- Debugging endpoints for system state and document information
- Python 3.8 or higher
- Conda (Anaconda or Miniconda)
-
Create a Conda environment:
conda create -n flask_env python=3.8
-
Activate the environment:
conda activate flask_env
-
Navigate to the project directory and install dependencies:
pip install -r requirements.txt
-
Navigate to the project directory:
cd /path/to/project -
Run the Flask application:
python app.py
-
Open your web browser and go to:
http://127.0.0.1:5000/
To use the RAG-Chatbot application, please follow these steps:
-
Download the Model: Download the required model from the provided Google Drive link. Make sure to save the downloaded model file in the
modelsfolder of the project. -
Rename and Set Up the Model: After downloading the GGUF model, rename it to match one of the default names from the following list to ensure compatibility with the application:
mistral-7bllama-2neural-chatmistral-nemo-instruct-2407-ggufmodel
For example, if you download a model named
my-gguf-model, rename it tomistral-7b(or another model name from the list). Save it in themodels/directory. -
(OR Alternatively)Update the DEFAULT_CONFIG (if needed): The
DEFAULT_CONFIGdictionary in the project has predefined model names, such asmistral-7b,llama-2, and others. When you rename the model to one of these default names, it will automatically match the configuration settings for that model.You can also update the configuration settings directly in the
model_config.pyfile to suit your specific model.Here's an example of the
DEFAULT_CONFIGdictionary:DEFAULT_CONFIG = { 'mistral-7b': { 'n_ctx': 4096, 'n_threads': os.cpu_count(), 'n_gpu_layers': 0, 'template': "System: You are a helpful assistant.\n\nUser: {query}\n\nAssistant:" }, 'llama-2': { 'n_ctx': 4096, 'n_threads': os.cpu_count(), 'n_gpu_layers': 0, 'template': "<s>[INST] {query} [/INST]" }, 'neural-chat': { 'n_ctx': 4096, 'n_threads': os.cpu_count(), 'n_gpu_layers': 0, 'template': "### System: You are a helpful assistant.\n\n### User: {query}\n\n### Assistant:" }, 'mistral-nemo-instruct-2407-gguf': { 'n_ctx': 4096, 'n_threads': os.cpu_count(), 'n_gpu_layers': 0, 'template': "System: You are a helpful assistant.\n\nUser: {query}\n\nAssistant:" }, 'model': { 'n_ctx': 4096, 'n_threads': os.cpu_count(), 'n_gpu_layers': 0, 'template': "System: You are a helpful assistant.\n\nUser: {query}\n\nAssistant:" } }
Alternatively, you can update the configurations directly in the
model_config.pyfile. -
Set Up the Environment: Follow the steps in the "Setting Up the Environment" section of this README file to create and activate a Conda environment, and install the necessary dependencies.
-
Run the Application: Once the environment is set up, run the
app.pyfile to start the Flask application:python app.py
-
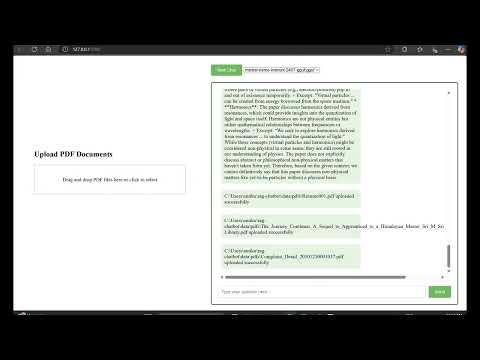
Chat with Your Documents: Open your web browser and go to
http://127.0.0.1:5000/. You can upload your documents via the GUI and start chatting with the chatbot.
-
GET /
Renders the home page and creates a new chat session if none exists.
-
POST /new-chat
Starts a new chat session and returns the chat ID.
-
POST /chat
Processes a chat request, generates a response, updates the chat history, and returns the response, chat ID, and generation time.
-
POST /select-model
Selects a model for the current session.
-
GET /chat-history
Retrieves the chat history for the current session.
-
GET /debug/system-state
Retrieves the current system state for debugging purposes.
-
GET /debug/document-info
Retrieves detailed information about processed documents.
-
POST /debug/test-retrieval
Tests document retrieval based on a query.
-
POST /upload-pdf
Uploads a new PDF, processes it, and updates the vector store.
/path/to/project
│
├── src/
│   ├── __init__.py
│   ├── document_processor.py
│   ├── model_config.py
│   ├── model_handler.py
│
├── data/
│   ├── chat_history/
│   ├── pdfs/
│   └── vector_store/
│
├── models/
│
├── templates/
│   ├── index.html
│
├── app.py
├── requirements.txt
└── environment.yml
This project is licensed under the MIT License.