-
Notifications
You must be signed in to change notification settings - Fork 41
HowTo: Build HELIOS with Eclipse and Maven
In this this article, you will learn how to build HELIOS using Eclipse, Maven and the Eclipse Maven plugin m2e.
This article assumes that you already have the latest versions of the following software packages installed on your computer:
- Eclipse IDE for Java Developers (i.e. including the Java Development Tools)
- Java SE Development Kit 8 (alternatively: OpenJDK 8)
- Maven
- The m2e Maven plugin for Eclipse
The procedures described in this article were tested by the author running Kubuntu Linux 16.04. However, since all involved pieces of software are Java-based, they should work in the same way on other operating systems like different flavours of Linux or Windows, and probably also Mac OS X.
Instructions for installing Maven on Windows can be found here.
Maven is a so called "build tool" - a program that helps you to organize and automatize the build process of another program (generate a runnable binary from the source code). A great feature of Maven is that it can automatically download and include third-party libraries that your application depends on, eliminating the need to do this manually. This is currently the primary reason for why it is recommended to use Maven to build HELIOS.
Start by setting up a new Maven project in Eclipse. To do so, click "File" -> "New" -> "Other" and Select "Maven" -> "Maven Project" from the list that pops up. Click "Next" three times (keep the defaults) until you arrive at the dialog page shown in Figure 1. In this form, enter "de.uni-hd.giscience" into the text field labeled "Group Id" and "helios" into the field labeled "Artifact Id". Then, click "Finish". Eclipse will now create an empty Maven project. Navigate to the project directory (either directly in Eclipse or with your file manager) and delete the "src" folder. In the next step, we will replace it with the actual HELIOS source code from GitHub. Deleting the default "src" folder is required because it contains a template source code file that would otherwise conflict with the HELIOS source.
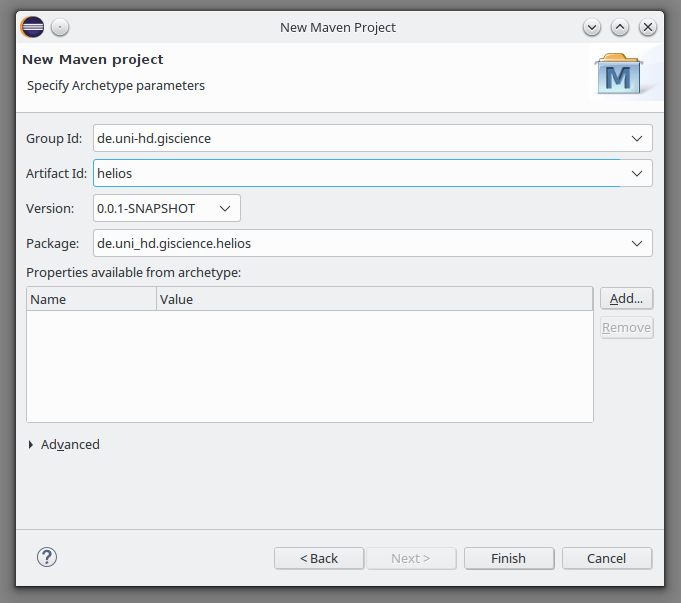
Figure 1: Maven project settings
Clone the HELIOS GitHub repository to a separate folder on your hard disk. After the clone is complete, you should find at least four folders ("assets", "data", "lib" and "src") and two files ("pom.xml" and "style.groovy") in the destination directory. The directory might contain additional files, but these are not required to set up the project (as of the time of this writing, 2016-10-16).
Select the "assets", "data", "lib" and "src" folders and the "pom.xml" and "style.goovy" files and copy them into the root directory of the Eclipse project you created before. If your file manager asks you whether you want to overwrite any existing files, say "yes".
Go back to Eclipse and right-click on the project root entry ("helios") in the "Package Explorer" view. Select "Properties" from the context menu (last entry). This will open the project's configuration dialog window.
Select "Java Build Path" from the left side bar and then click on the "Libraries" tab at the top of the main area. If the list in the center of the dialog already contains an entry labeled "JRE System Library [java-8-openjdk-amd64]" or something similar that indicates Java Version "8" or "1.8", you are fine ("Java 8" and "Java 1.8" are actually the same thing - confusing, but true).
If the list contains another (especially an older) JRE System library, select it and click the "Remove" button on the right side. Then, click "Add Library", select "JRE System Library" and click "Finish" (there is also a "Next" button, but you can skip the following page). Don't close the project properties dialog yet - in the next step, we will continue right where we are now.
Unfortunately, not all dependencies of HELIOS can currently be automatically added by Maven due to a problem that is not yet understood. The Lemur library, represented by the file "lemur-1.8.1.jar" that resides in the "lib" folder, must currently be added manually. Click the "Add JARs" button and navigate to the "lib" folder. Select "lemur-1.8.1.jar" and click "OK". Your dialog window should now look like Figure 2. Again, don't close the window yet ;).
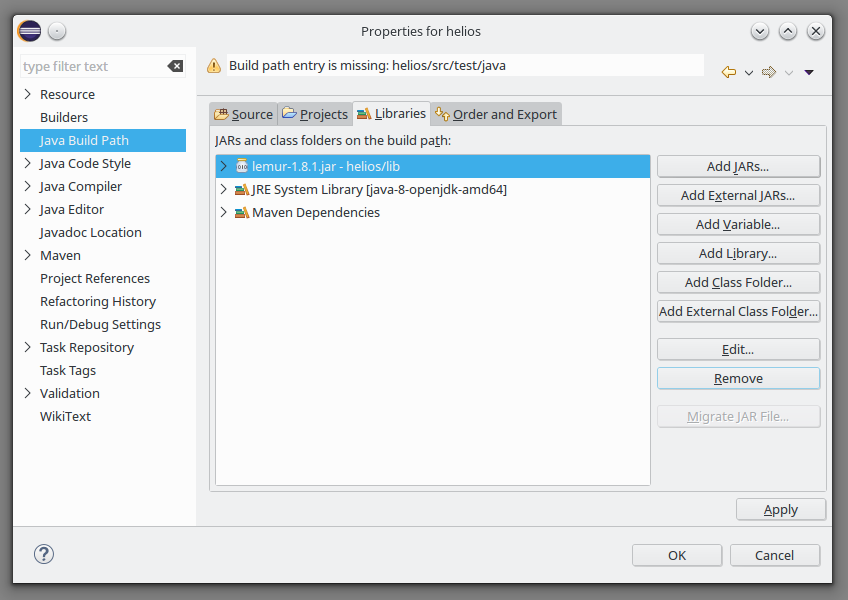
Figure 2: The Eclipse project settings dialog
Click on "Java Compiler" on the left side. On The right side, click the dropdown menu that is labeled with "Compiler compliance level" and select "1.8" (Figure 3). Finally, Click "OK" to apply your settings and close the dialog window.
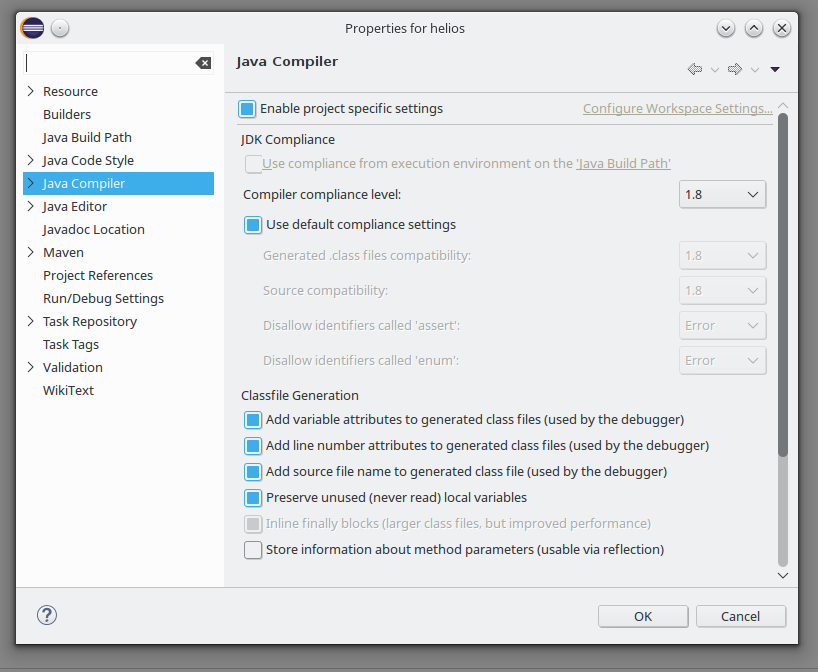
Figure 3: Set Java compiler compliance level
Your project is now ready to build and run. Right-click the project root element in the Package Explorer view again. This time, select "Run as" -> "Java Application". A popup window with a progress bar will appear for a couple of seconds. Wait until another popup window labeled "Select Java Application" shows up. Enter "lidar" into the text box at the top to filter the entries shown in the list below (Figure 4).
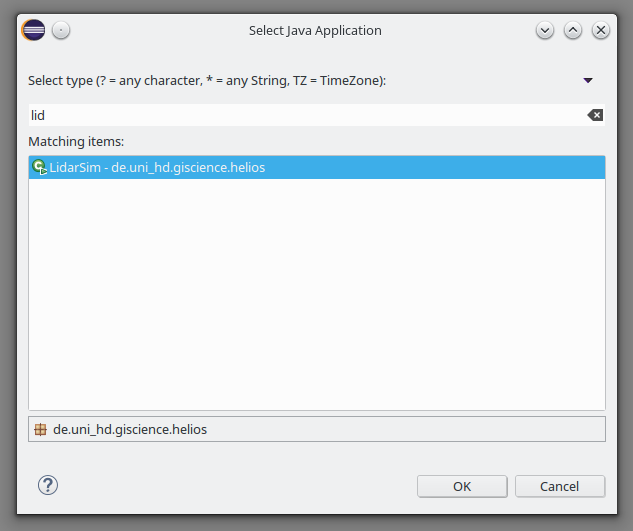
Select "LidarSim - de.uni_hd.giscience.helios" and click "OK". If everything went right, HELIOS should now be built and started, and you will see the JMonkey Engine Start-Up dialog after a few seconds (Figure 5).

Figure 5: The JMonkeyEngine startup dialog
Select your desired screen resolution and click "Continue" to start the interactive 3D interface of HELIOS.
Good luck!
Running HELIOS from inside Eclipse is very useful for development, but not so much for "normal" usage, especially by non-developers. In order to pack HELIOS into a runnable .jar file so that it can be used without Eclipse, follow these steps:
In Eclipse, click "File" -> "Export". A window titled "Export" will pop up. There, select "Java" -> "Runnable JAR file" and click "Next". On the next page, enter the path to save your runnable .jar into the text field labeled "Export destination". Under "Library handling", select "Copy required libraries into a sub-folder next to the generated JAR" (this is important!). Now, your window should look similar to Figure 6. Click "Finish". After a couple of seconds, the export process should finish with some warnings which are not critical. Just click "OK", and you're done.
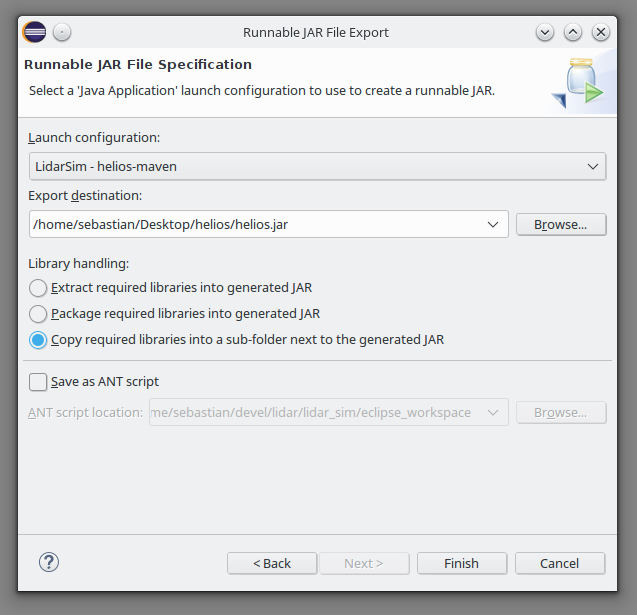
Figure 6: Runnable JAR export settings
To run your new self-contained HELIOS, open a terminal window and navigate to your selected export directory. There, run the following command:
java -jar helios.jar
See also the HELIOS quick start guide for a fast start and first insights or the comprehensive HELIOS user manual for more features and detailed information.