The datasets and table definitions were provided by Ed-Fi the Ed-Fi Data Standard and the Ed-Fi Alliance
To deploy the Azure resources required for this example, you will need:
-
Note:If you don't have an account you can create your free Azure account here -
Microsoft Azure Storage Explorer
-
Microsoft Azure Data Studio
-
Clone this GitHub repository using Git and the following commands:
git clone https://github.com/DataSnowman/Ed-Fi-Azure.git
Note that you will be deploying a number of Azure resources into your Azure Subscription when either clicking on the Deploy to Azure button below, or by alternatively deploying by using an ARM template and parameters file via the Azure CLI.
You can provision using the Deploy to Azure button below or by using the Azure CLI.


Choose your Subscription, and enter a Resource group, Location, Resource Prefix (Short Prefix of 10 characters or less for all resources created by this template so they are unique - gloabally unique in the case of some services like storage), SQL Server Username, SQL Server Password, and agree to the Terms and Conditions. Then click the Purchase button.

When the Deployment completes you will receive a notification in the Azure Portal. Click the Go to resource group button.

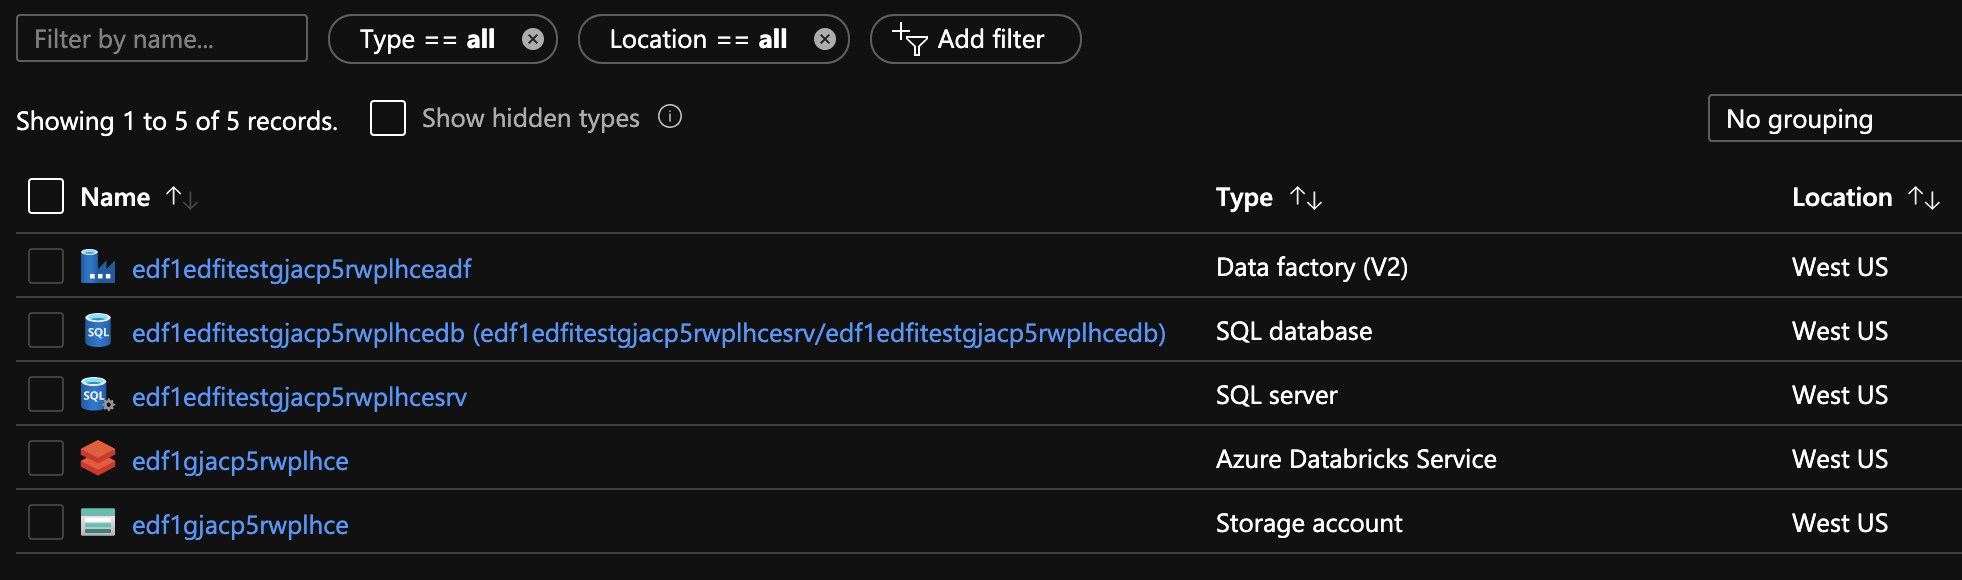
After you open the resource group in the Azure portal you should see these deployed resources
-
Download and install the Azure CLI Installer (MSI) for Windows or Azure CLI for Mac or Linux . Once the installation is complete open the command prompt and run
az login, then copy the access code returned. In a browser, open a private tab and enter the URLaka.ms/devicelogin. When prompted, paste in the access code from above. You will be prompted to authenticate using our Azure account. Go through the appropriate multifaction authenication. -
Navigate to the folder
Ed-Fi-Azure\setupIf using Windows Explorer you can launch the command prompt by going to the address bar and typingcmd(for the Windows command prompt) orbash(for the Linux command prompt assuming it is installed already) and typeaz --versionto check the installation. Look for theparameters-edfiazure.jsonfile you cloned during the Prerequisites above. It will look like this. Make changes to the resourcePrefix (max of 9 characters - used to make services like storage accounts globally unique so if you want multiple versions of this deployed assign different resourcePrefixs), sqlServerUsername, and sqlServerPassword and save prior to running the ARM Template via the CLI
{
  "$schema": "https://schema.management.azure.com/schemas/2015-01-01/deploymentParameters.json#",
  "contentVersion": "1.0.0.0",
  "parameters": {
     "resourcePrefix": {"value" : "edfi"},
     "sqlServerUsername": { "value" : "dbuser" },
     "sqlServerPassword": { "value" : "EdFiAzure2020!" }
  }
}
- When you logged in to the CLI in step 1 above you will see a json list of all the Azure account you have access to.
- Run
az account showto see you current active account. - Run
az account list -o tableif you want to see all of you Azure account in a table. - If you would like to switch to another Azure account run
az account set --subscription <your SubscriptionId>to set the active subcription. - Run
az group create -n edfiazure -l westusto create a resource group callededfiazure.
- Next run the following command to provision the Azure resources:
az deployment group create --resource-group edfiazure --template-file azureclideploy.json --parameters @parameters-edfiazure.json
Once the provisioning is finished, we can run az resource list -g edfiazure -o table to check what resources were launched. Our listed resources includes:
- Data Factory
- SQL database
- SQL Server
- Databricks workspace
- ADLS Storage account
Note: If you encounter issues with resources please check by running the following commands in the Azure CLI (Note more information on using the CLI is found in the Provisioning using the Azure CLI section below):
az login
az account show
az account list-locations
az provider show --namespace Microsoft.Databricks --query "resourceTypes[?resourceType=='workspaces'].locations | [0]" --out table
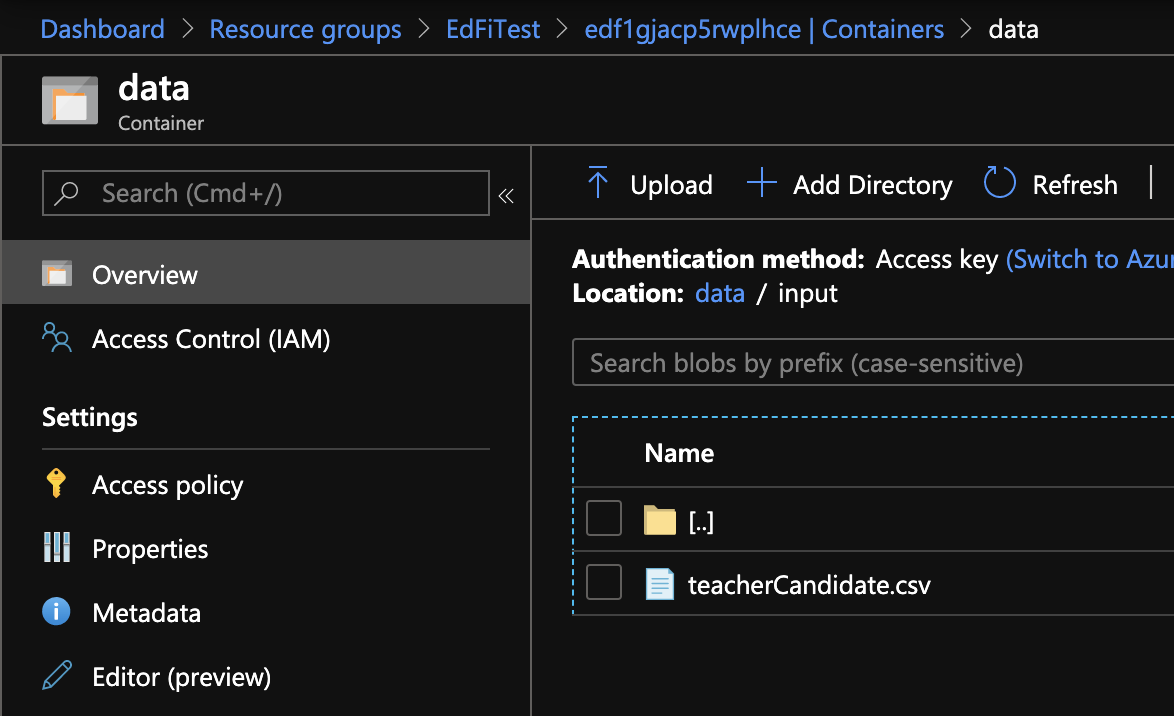
Copy teacherCandidate.csv to Azure Storage. Create a container named data and a folder named input. Click Upload and upload teacherCandidate.csv from the Ed-Fi-Azure/datasource folder where you cloned the GitHub Repository.
Create schemas and tables in Azure SQL Database.
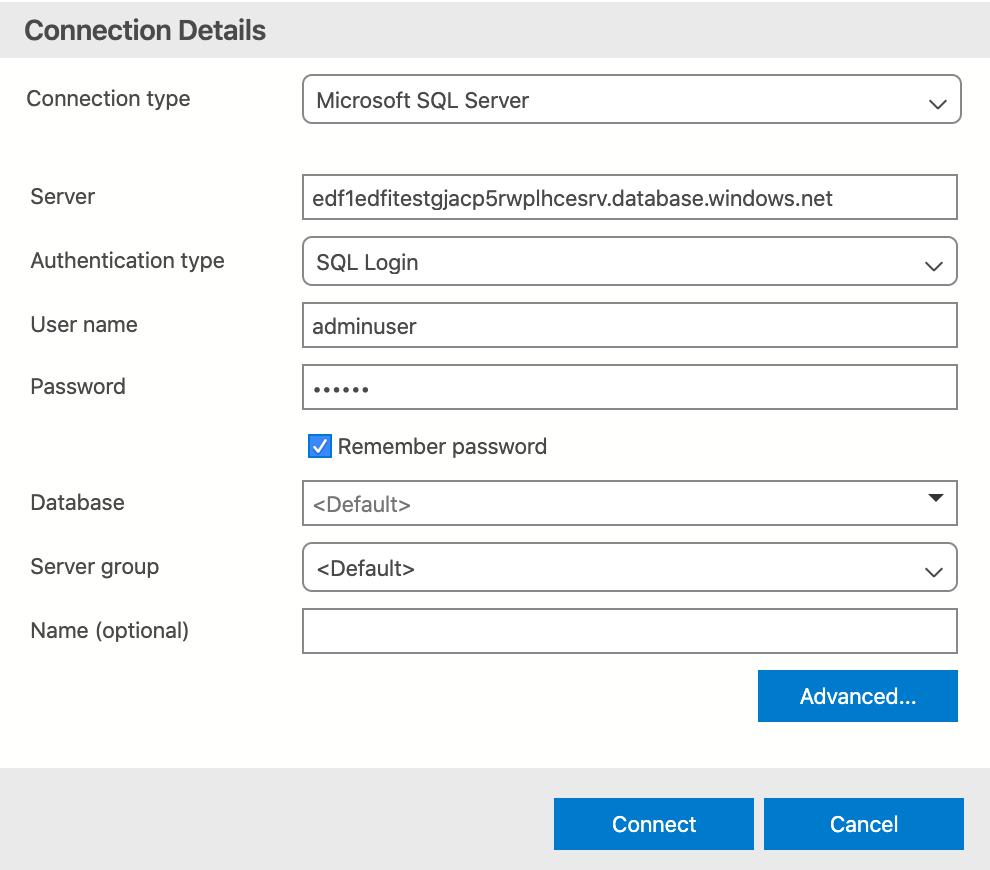
- Connect to the Azure SQL Database created during the deployment. You can find the Server name on the Overview area for the database. In my case the Server name is
edf1edfitestgjacp5rwplhcesrv.database.windows.net

Open up Azure Data Studio (available on Linux, Mac, and Windows) or SQL Server Management Studio (Windows Only) and create a connection.
- Run the following 3 DDL (Data Definition Language) queries located at
Ed-Fi-Azure/sqlfrom the Git Clone to create tables and insert data:
tpdmTeacherCandidate.sql(No Data - this is the target sink for the ADF dataflow)edfiDescriptor.sqledfiDescriptorTypes.sql
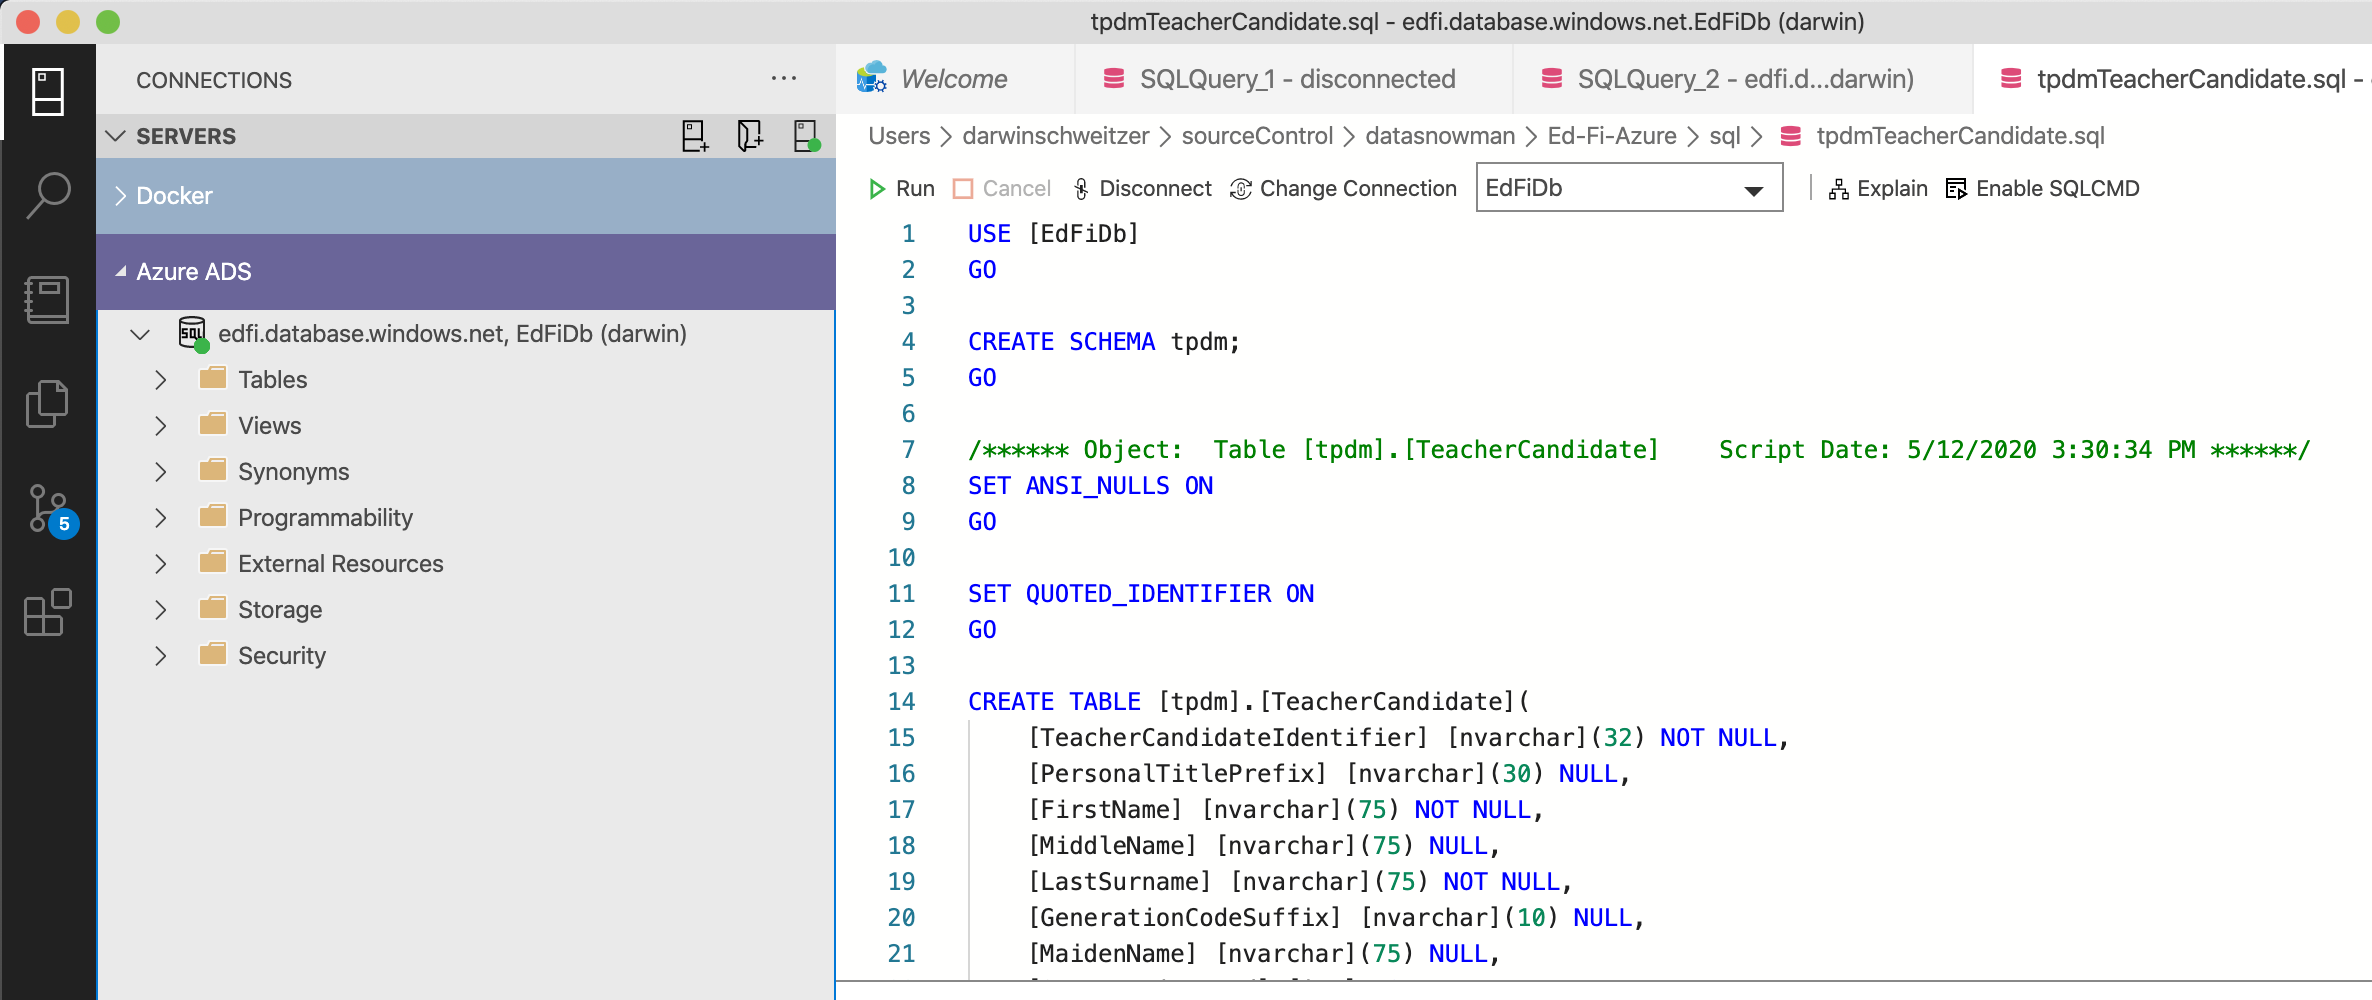
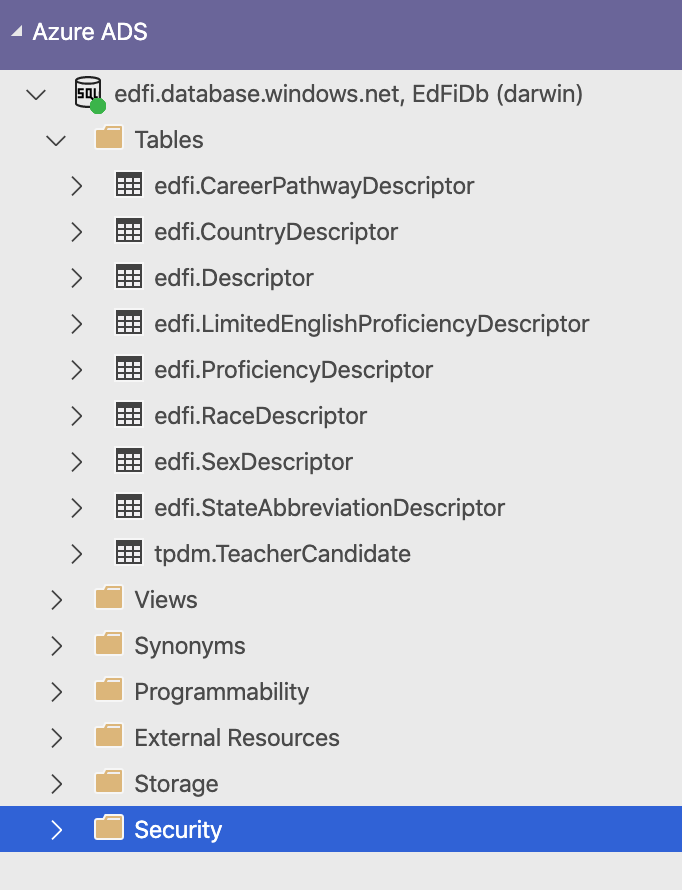
When you are finished you should have the following Tables
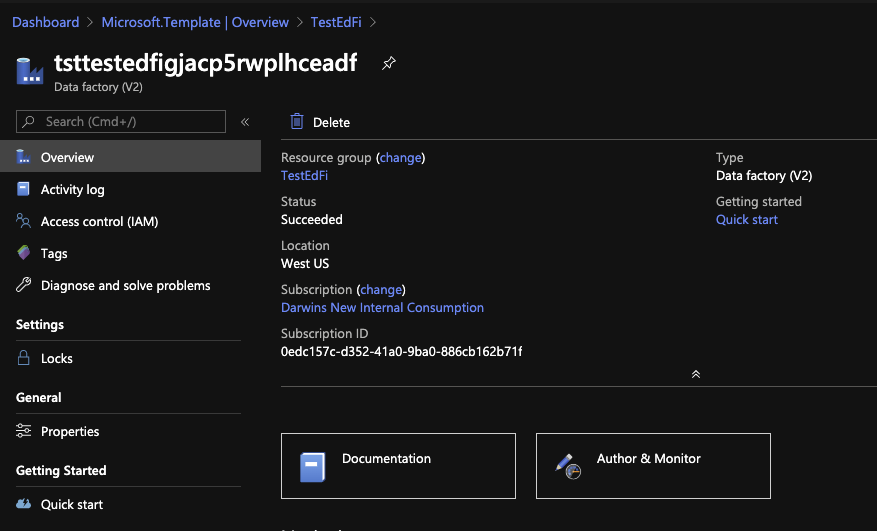
Use Azure Data Factory Data Flow and Pipeline to prepare and load data.
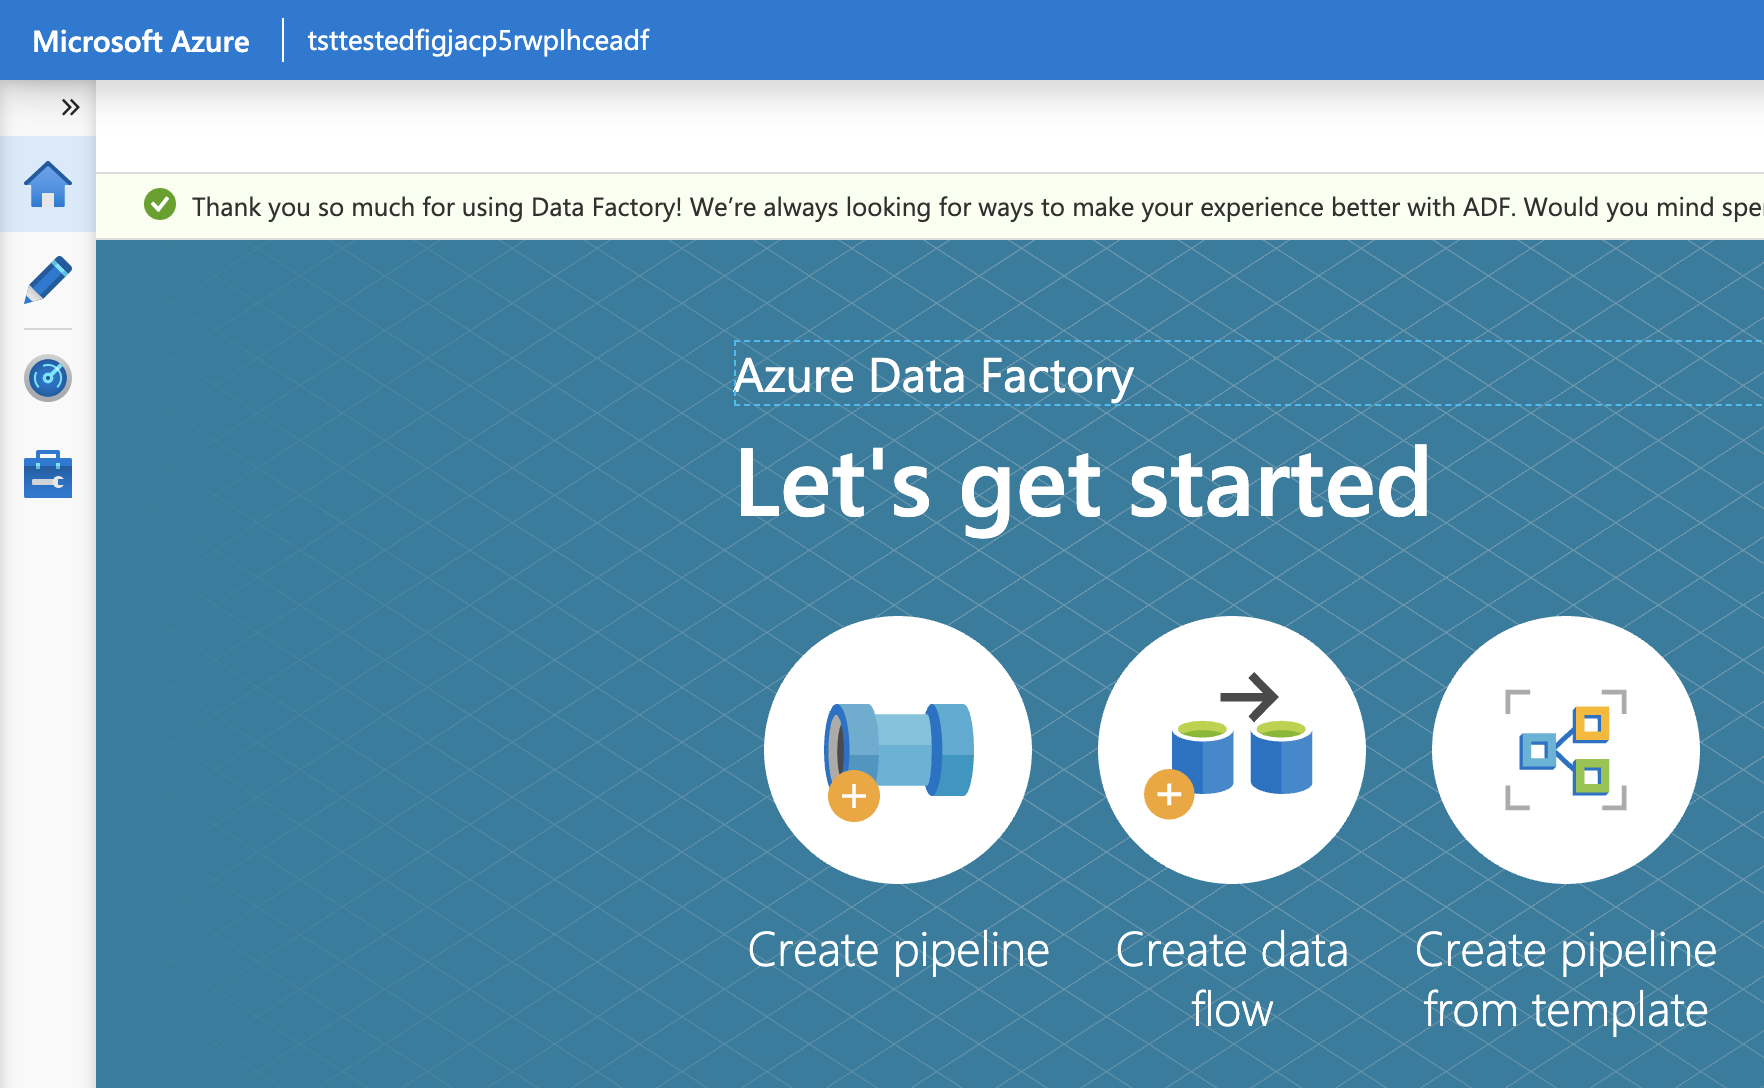
Click on Author & Monitor
Click on Create pipeline from template under Let's get started
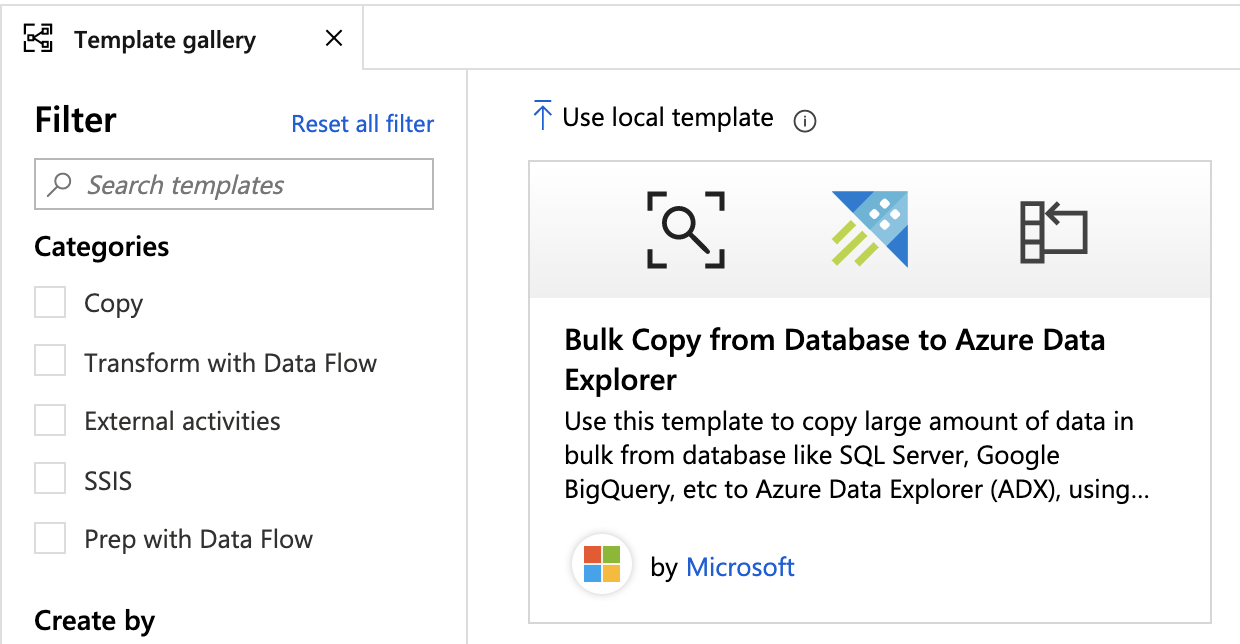
Click on Use local template
Navigate to the Load-tpdmTeacherCandidate.zip file and click Open
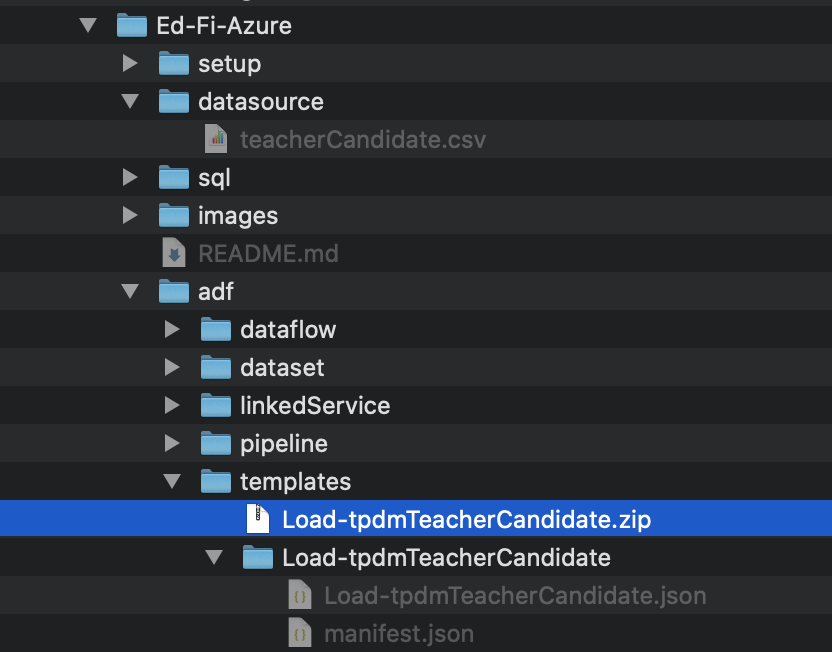
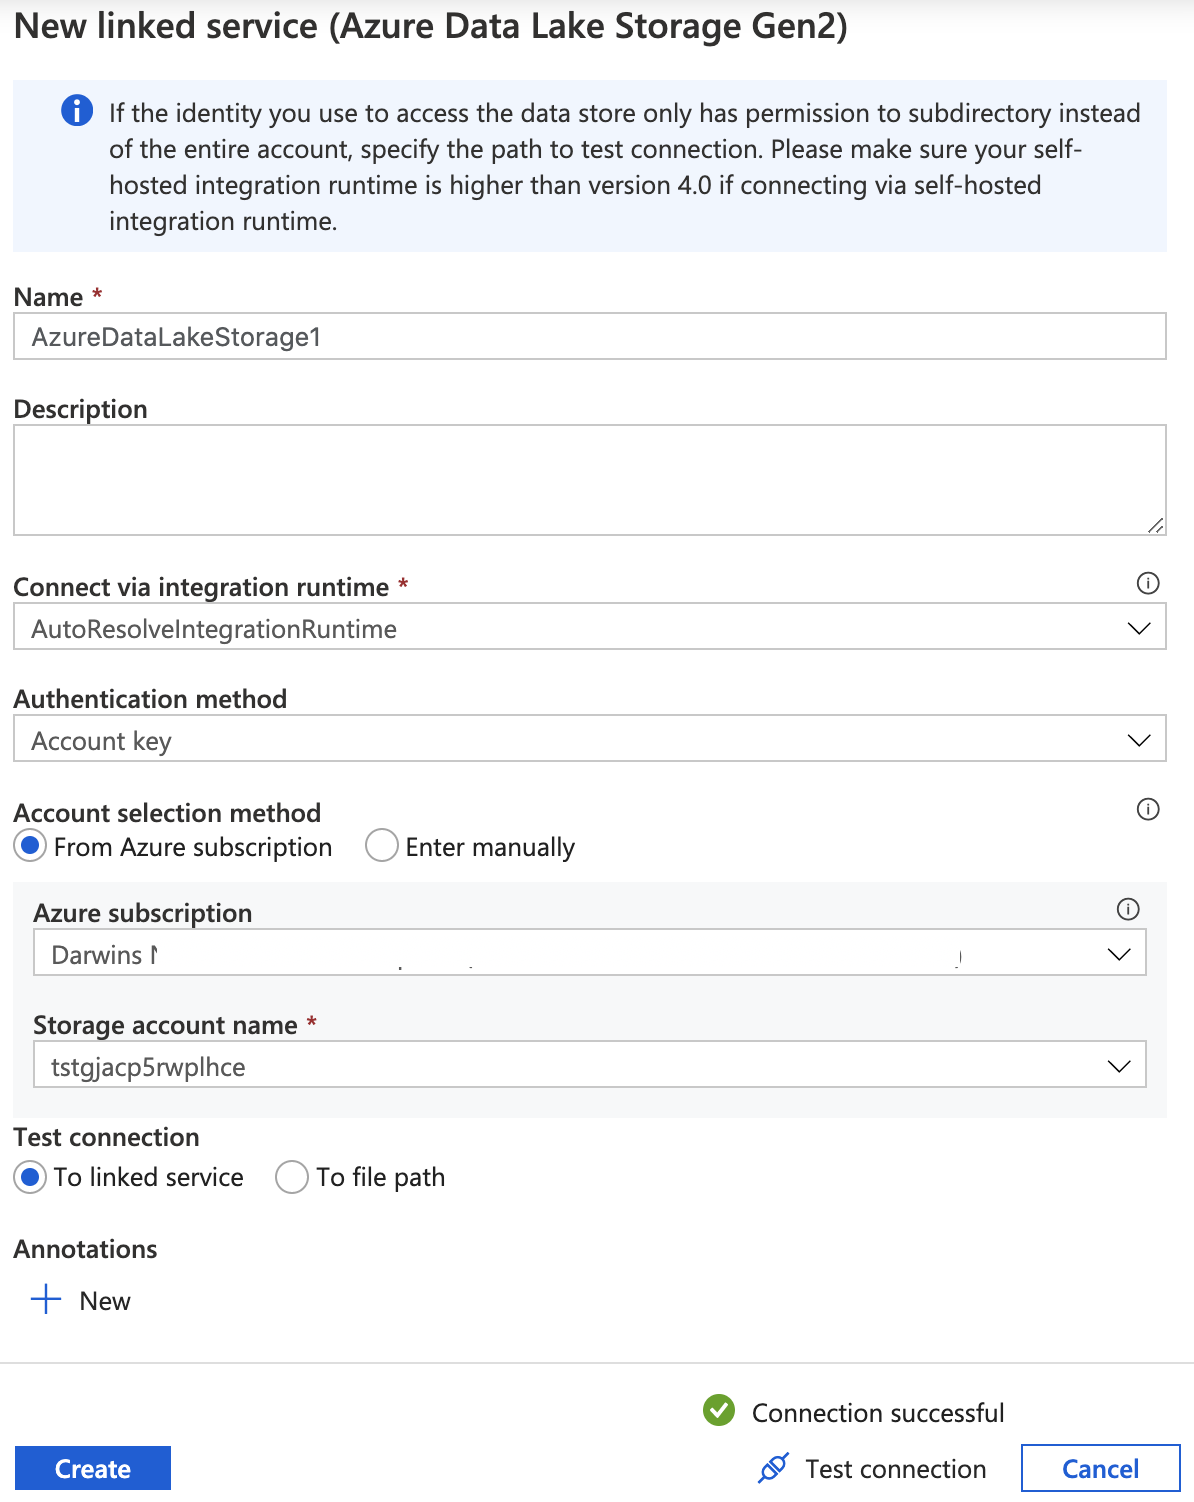
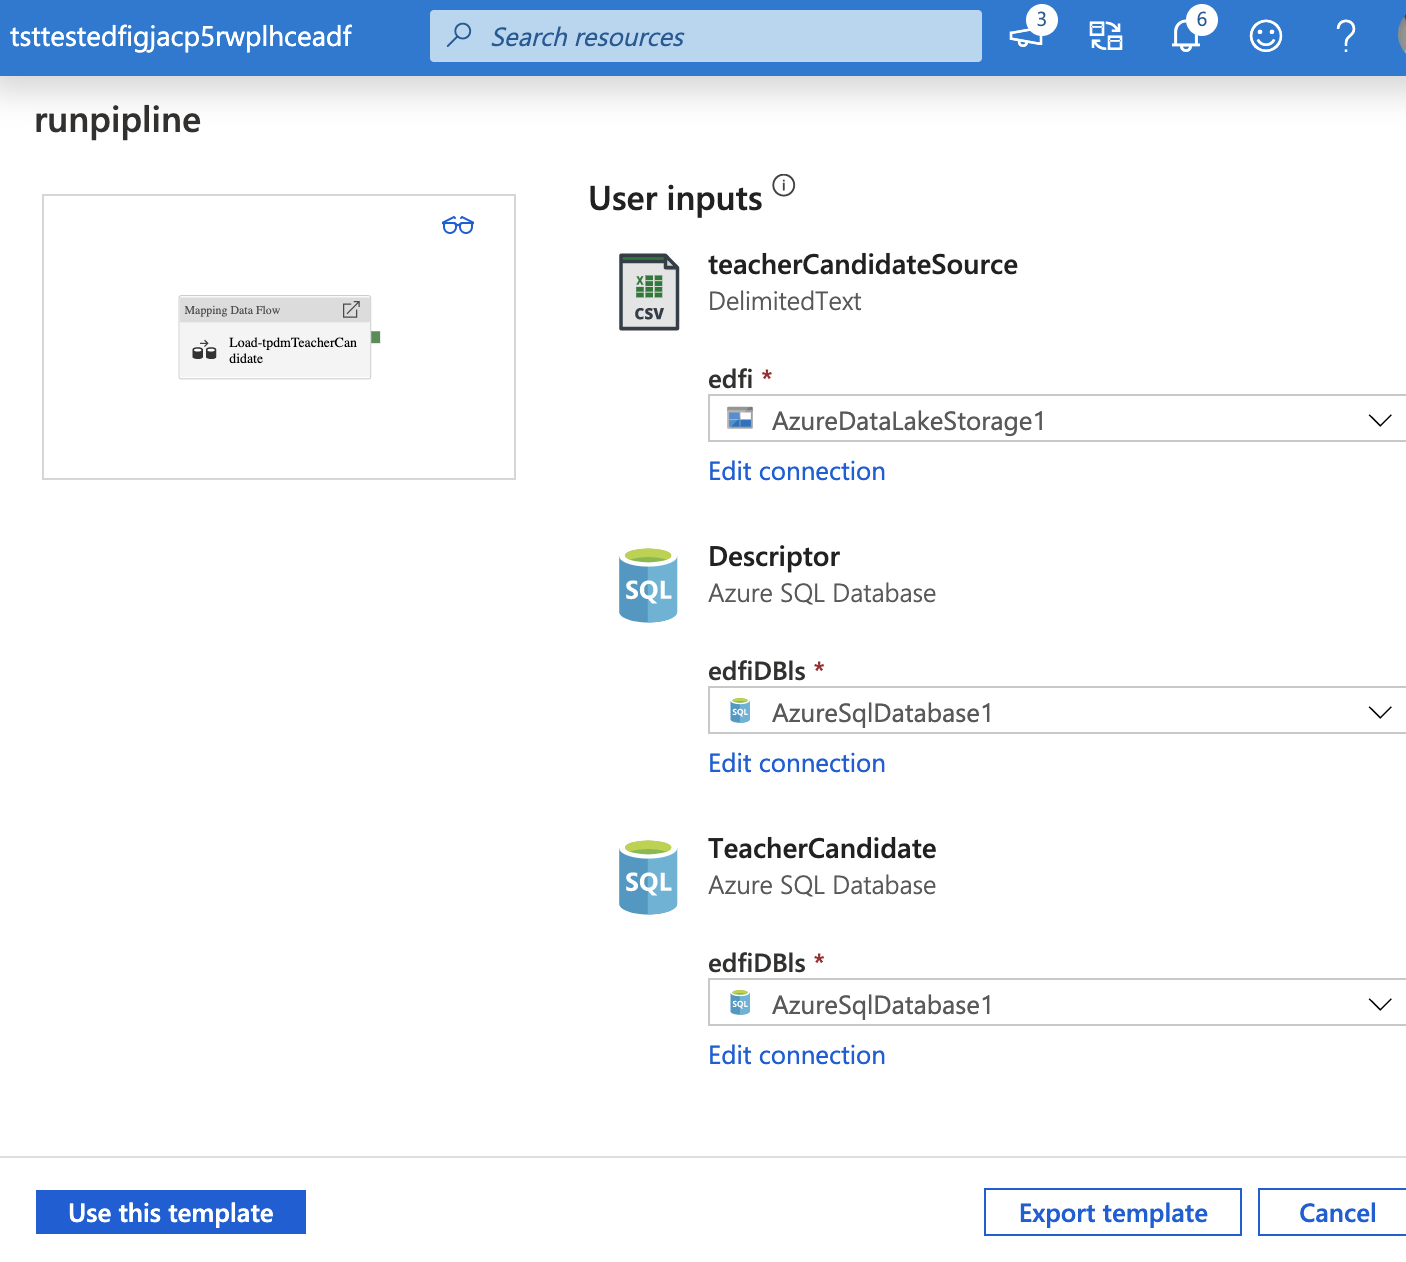
Create User inputs for your ADLS Storage and Aure SQL Database Linked Services
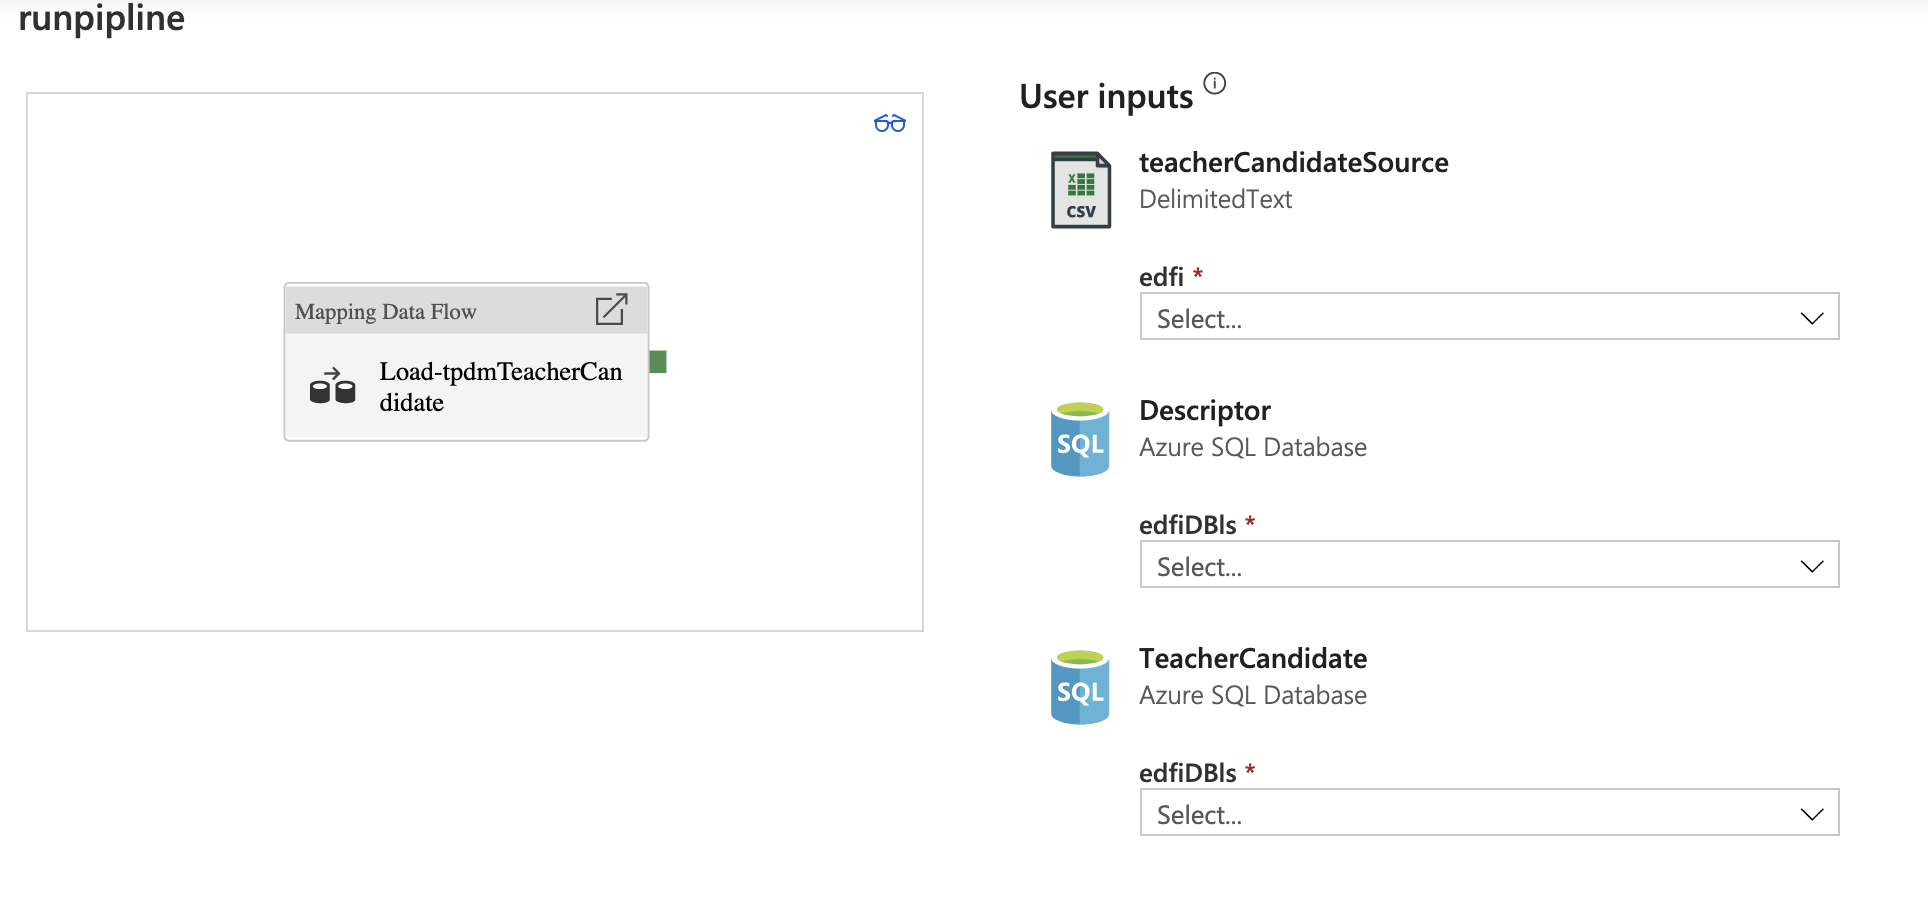
Storage. Click Create
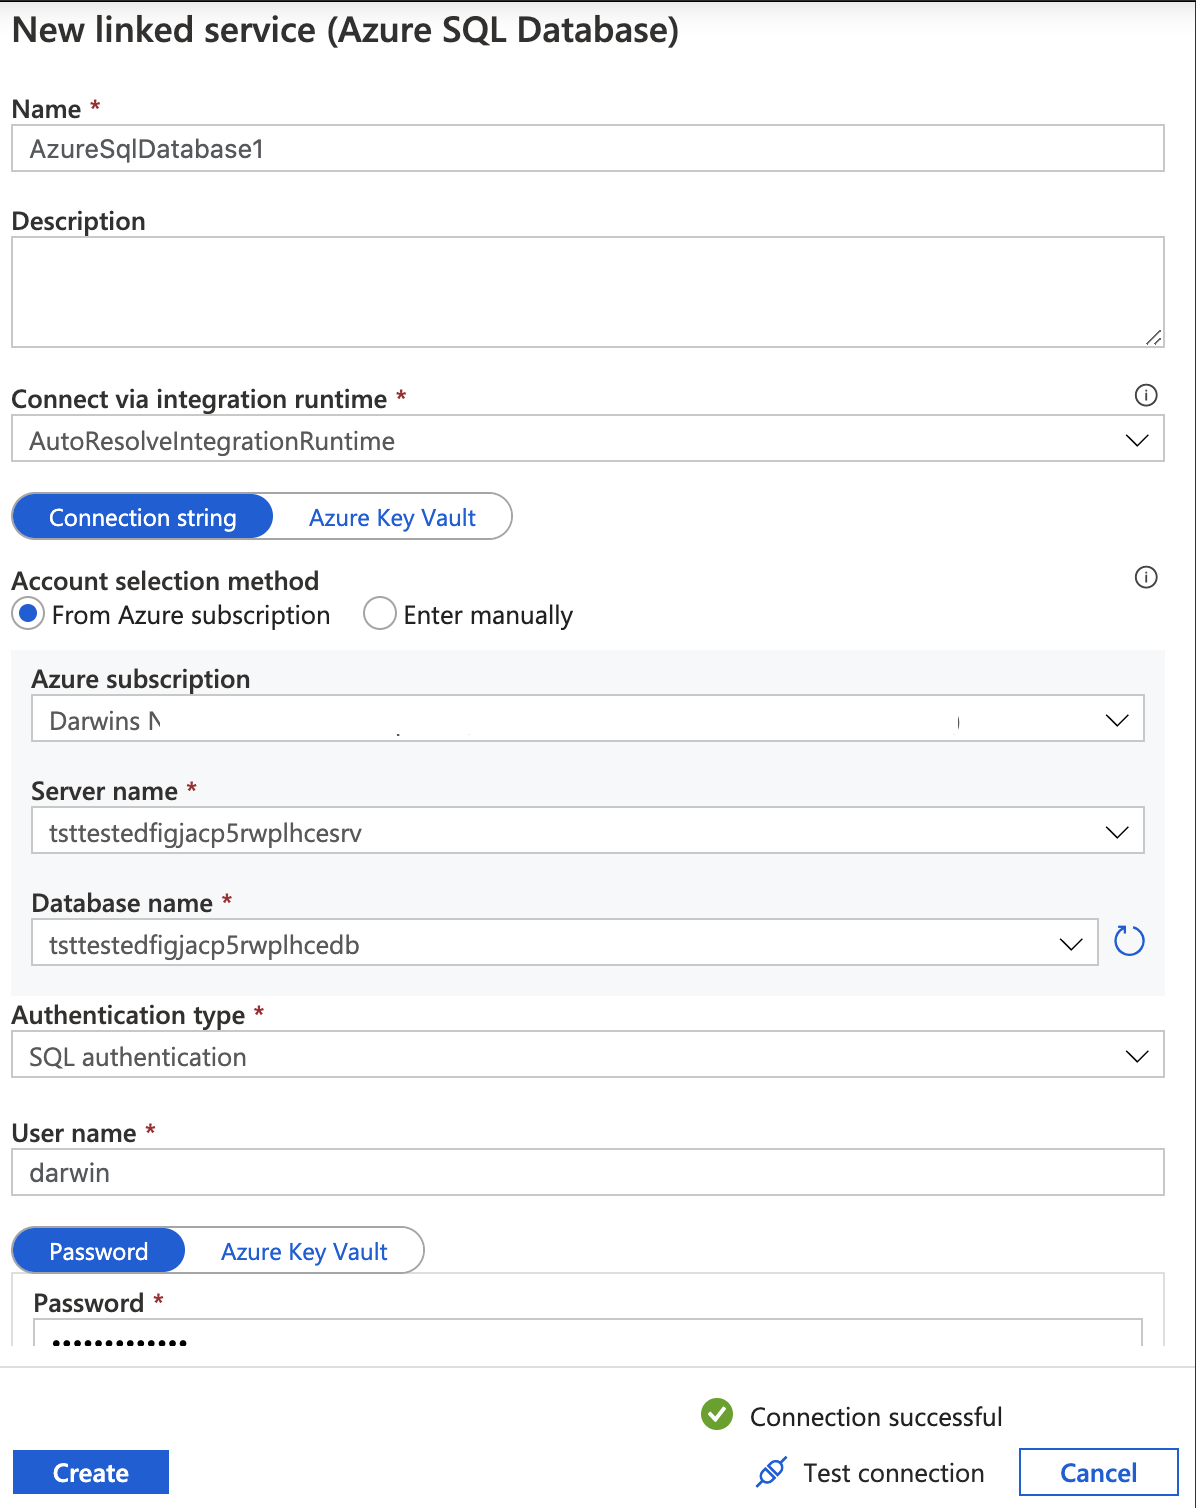
Database. Click Create
Click Use this template
Your ADF Data flow should look like this. You can now publish it, debug, and trigger the pipeline to run
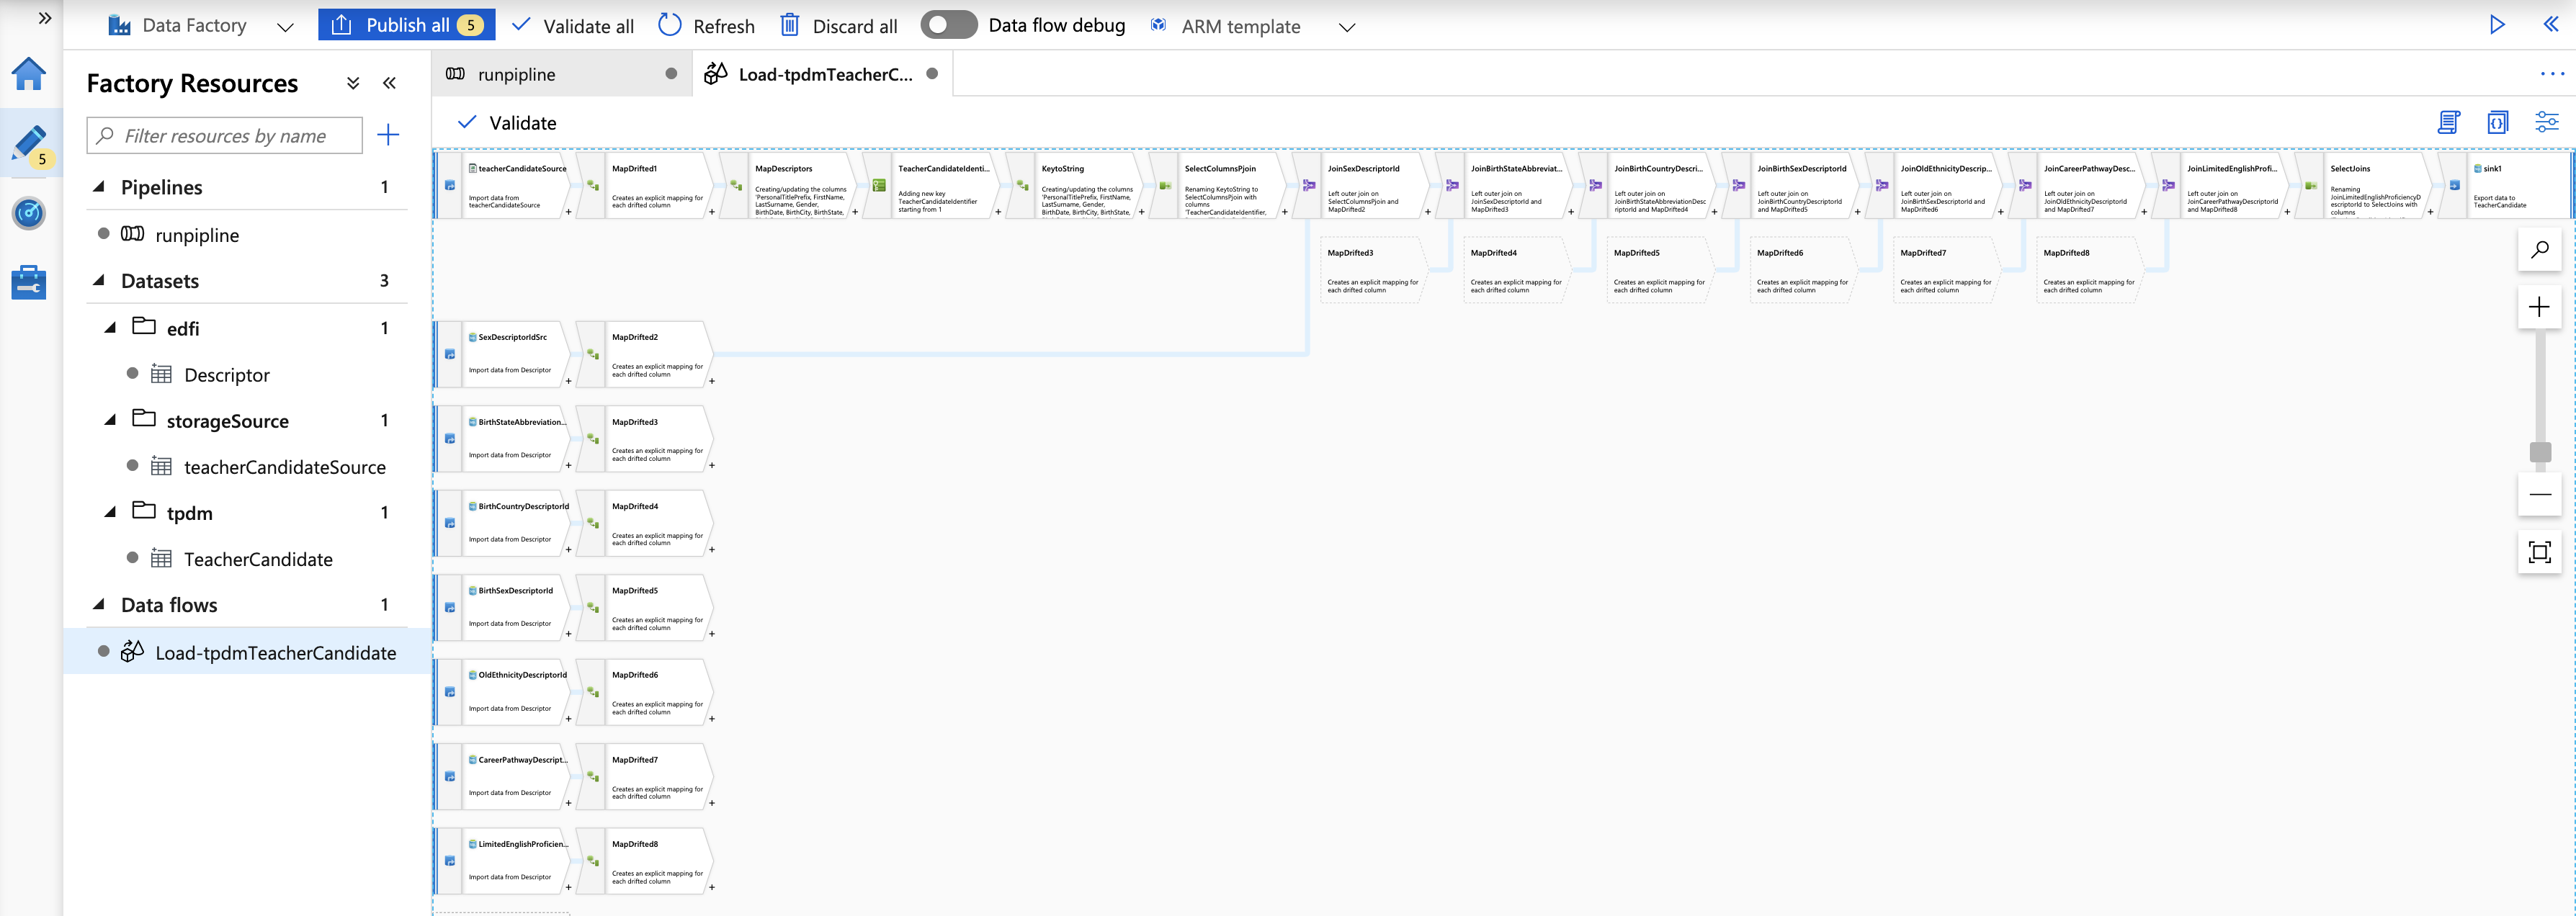
If you want to learn how to trigger an ADF pipeline click HERE
You can use Trigger nowversus scheduling it.
Hope you enjoyed this example.