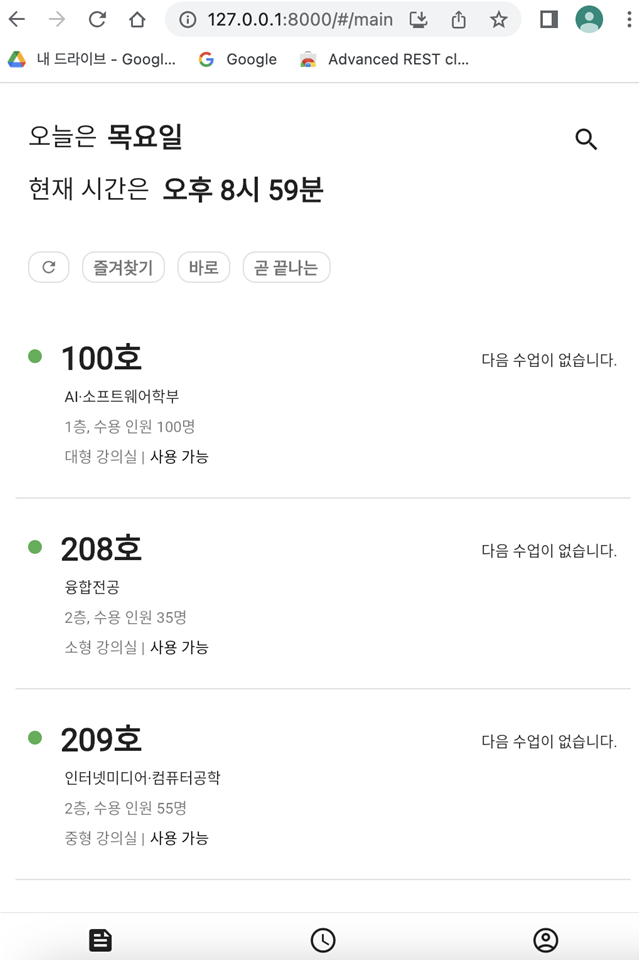
The AI building is located far from the main campus, making it difficult for students to find places to spend their free time. Therefore, the system is designed to make it easier for students, the primary users, to find empty classrooms at a glance, and to make booking a Metaverse incubator more convenient.
-
Find empty classrooms and view classroom information
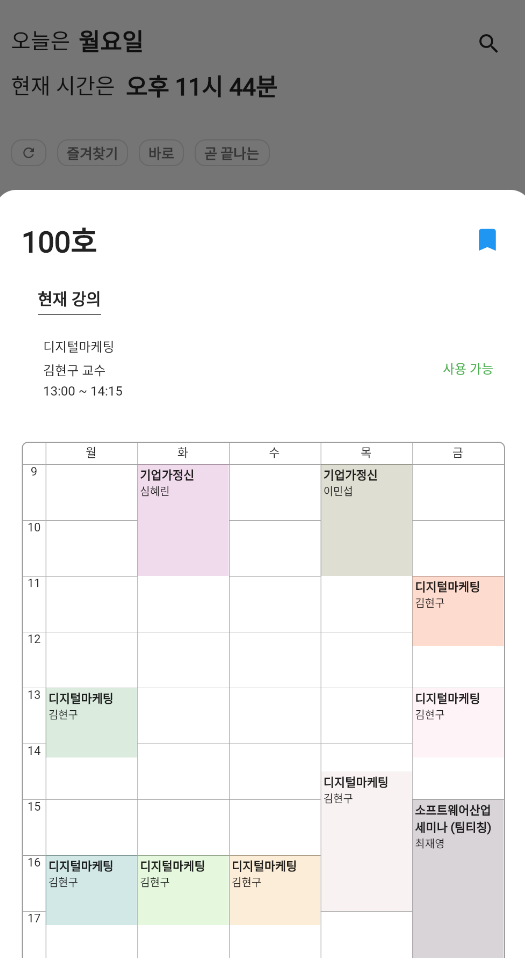
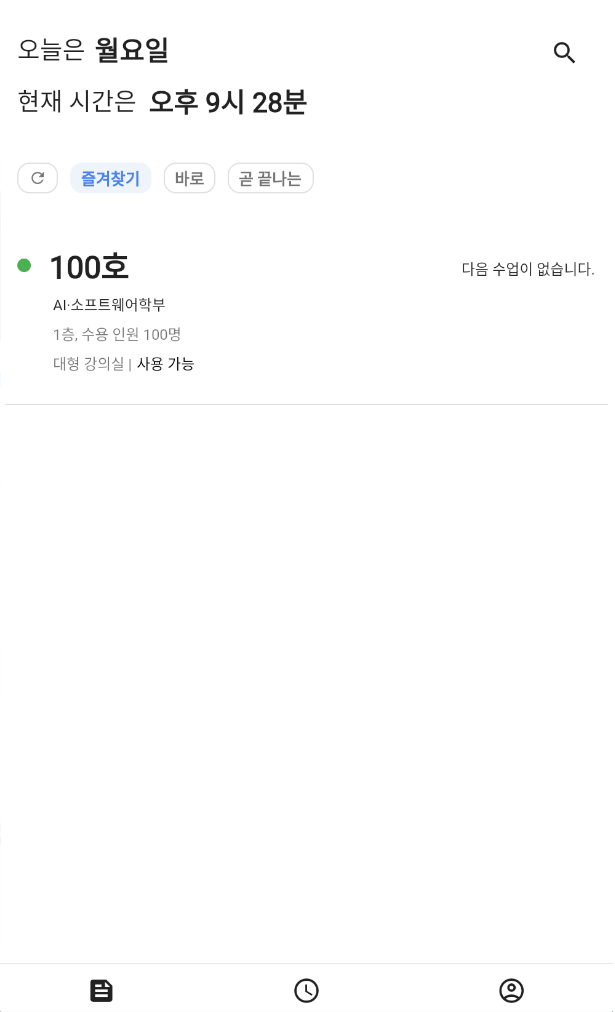
You can check the usage status of each classroom through the classroom list, and select a classroom to view its timetable, capacity, and other information.
-
Search for classrooms
You can search for the classroom you're looking for and it will show you a list of all classrooms that contain the number you entered.
-
Classroom favorites and filters
Clicking the Bookmark button in the room information will add the room to your favorites list. There are three filters, "Favorites," "Right Now," and "Ending Soon," and only classroom listings that match the selected filter will be fetched and displayed.
-
Incubator reservation and reservation history management
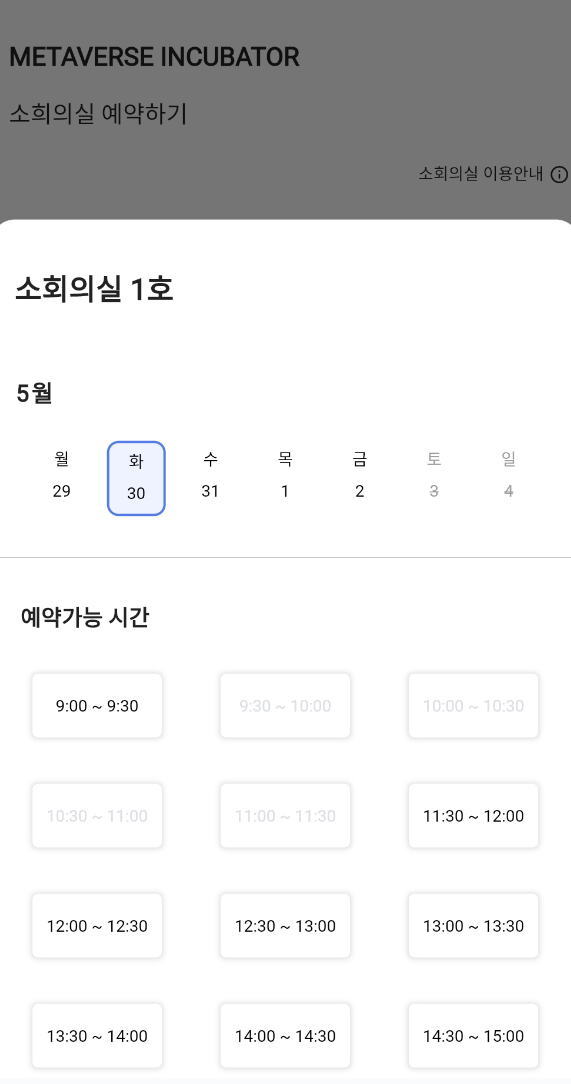
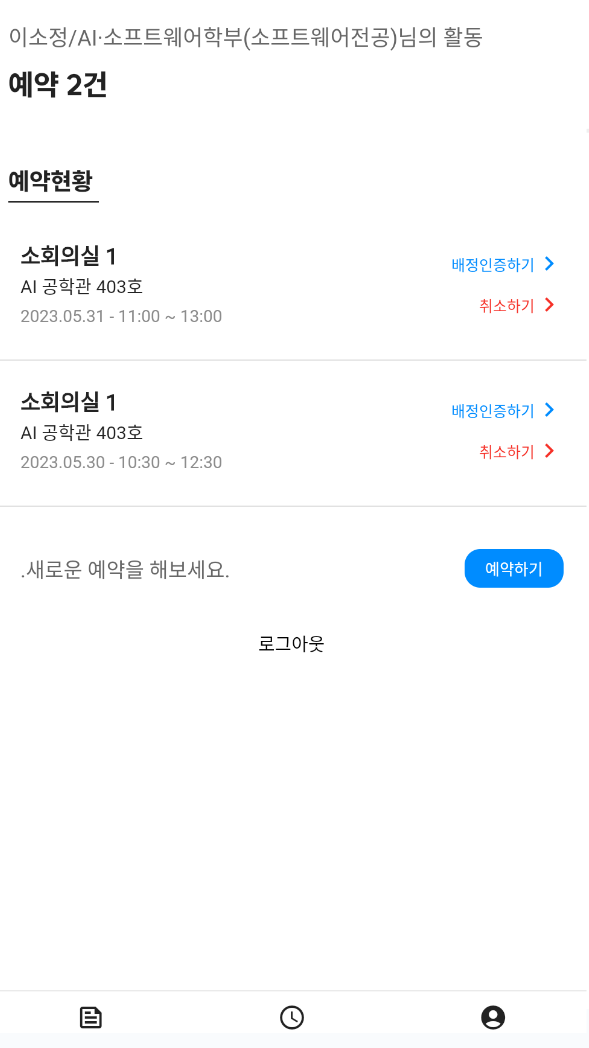
After selecting your preferred room, you can check the date and availability to make a reservation. To view your reservation history, go to your My Info page, where you can manage your reservation history, including canceling reservations and verifying assignments.
-
Frontend
- Flutter is an open source, cross-platform GUI application framework released by Google.
-
Backend
-
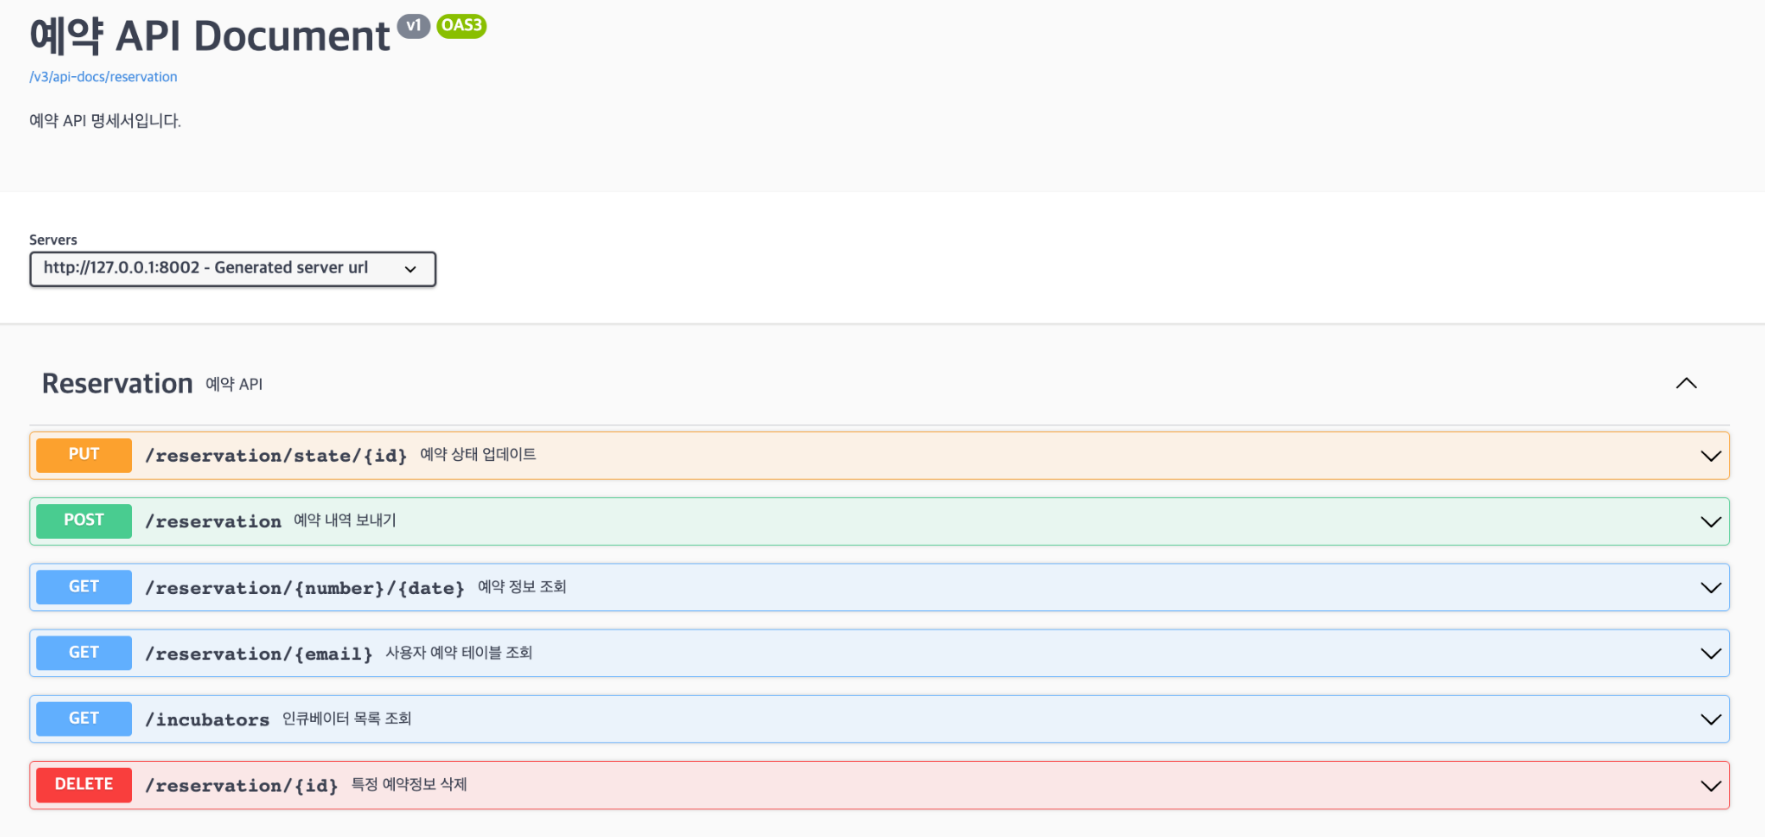
Swagger is a specialized tool that automatically organizes your application's RESTful API documentation. You can connect to "localhost:8000/swagger", select the service, and enter the appropriate parameters for the method of the API you want to test to see what the response actually looks like.
Above is the list of APIs for the booking service we want to test.
-
Navigate to the project you want to run, and run the following command on the command line to build.
$ fluuter build web
When the build is complete, a static webpage resource is created.After the resource is created, type the following on the command line.
python -m http.server —bind 127.0.0.1 8080
You don't need a separate web server, you can use python to use the server. Go to the pre-built build/web directory and execute it like below, and you can see it in your browser at the address 127.0.0.1:8080. -
Navigate to the project you want to run and type the following command in the command window.
./mvnw spring-boot:run
This is the actual classroom model used by the ai-gong project.
    // Field '_id', type 'ObjectId'
    // Default value is generated by MongoDB
    @Id
    private ObjectId _id; // MongoDB에서 자동으로 생성되는 필드

    // Field '호', type 'String'
    // This value is the classroom number

    // Field '전공', type 'String'
    // This value is the major of the classroom

    // Field '층', type 'int'
    // This value is the floor of the classroom

    // Field '수용인원', type 'int'
    // This value is the capacity of the classroom

    // Field '규모', type 'String'
    // This value is the size of the classroom
    private String 호;
    private String 전공;
    private int 층;
    private int 수용인원;
    private String 규모;
Implements a repository for JPA use.
// "ClassRoomRepository", JPA Interface, used to query the database, MongoRepository
public interface ClassRoomRepository extends MongoRepository<ClassRoom, Long> {

    // Query methods, find by 호
    @Query("{ '호' : ?0 }")
    ClassRoom findBy호(String 호);

    // Query methods, find by 호 and email
    List<ClassRoom> findBy호In(List<String> 호);
}
The code below is the get method code shown in the swagger test. GetMapping to get all the classroom information stored in the DB.
    /*
     * GetMapping("/classrooms") -> ResponseEntity<List<ClassRoom>>
     * This method is used to get all classrooms
     *
     * Args:
     * - None
     *
     * Return:
     * - ResponseEntity<List<ClassRoom>>: all classrooms
     */
    @GetMapping("/classrooms")
    @Operation(summary = "모든 강의실 목록 조회", description = "모든 강의실 목록을 조회합니다.")
    public ResponseEntity<List<ClassRoom>> getClassRoomList() {
        List<ClassRoom> classRoomList = classRoomRepository.findAll();
        for (ClassRoom classRoom : classRoomList) { // 강의목록 삭제해서 보냄
            classRoom.set강의목록(null);
        }
        return new ResponseEntity<List<ClassRoom>>(classRoomList, HttpStatus.OK);
    }
Add the token to the header before sending the request. The isLogin() function checks to see if you are logged in.
  /*
  * setAuth() is used to set the user information
  * @param: String refresh, the access token
  * @param: String refresh, the refresh token
  */
  Future<void> setAuth({required String access, required String refresh}) async {
    var storage = const FlutterSecureStorage();
    ApiService.instance.dio.options.headers["Authorization"] = "Bearer $access";
    await storage.write(key: 'access_token', value: access);
    await storage.write(key: 'refresh_token', value: refresh);
  }
  /*
  * isLogin() is used to check if the user is logged in
  * @param: none
  * @return: bool, true if the user is logged in, false if the user is not logged in
  */

  Future<bool> isLogin() async {
    var storage = const FlutterSecureStorage();
    return (await storage.read(key: "access_token") ?? '') != '' ? logining : false;
  }